Raspberry Pi Zero POE HQ Camera Case
prusaprinters
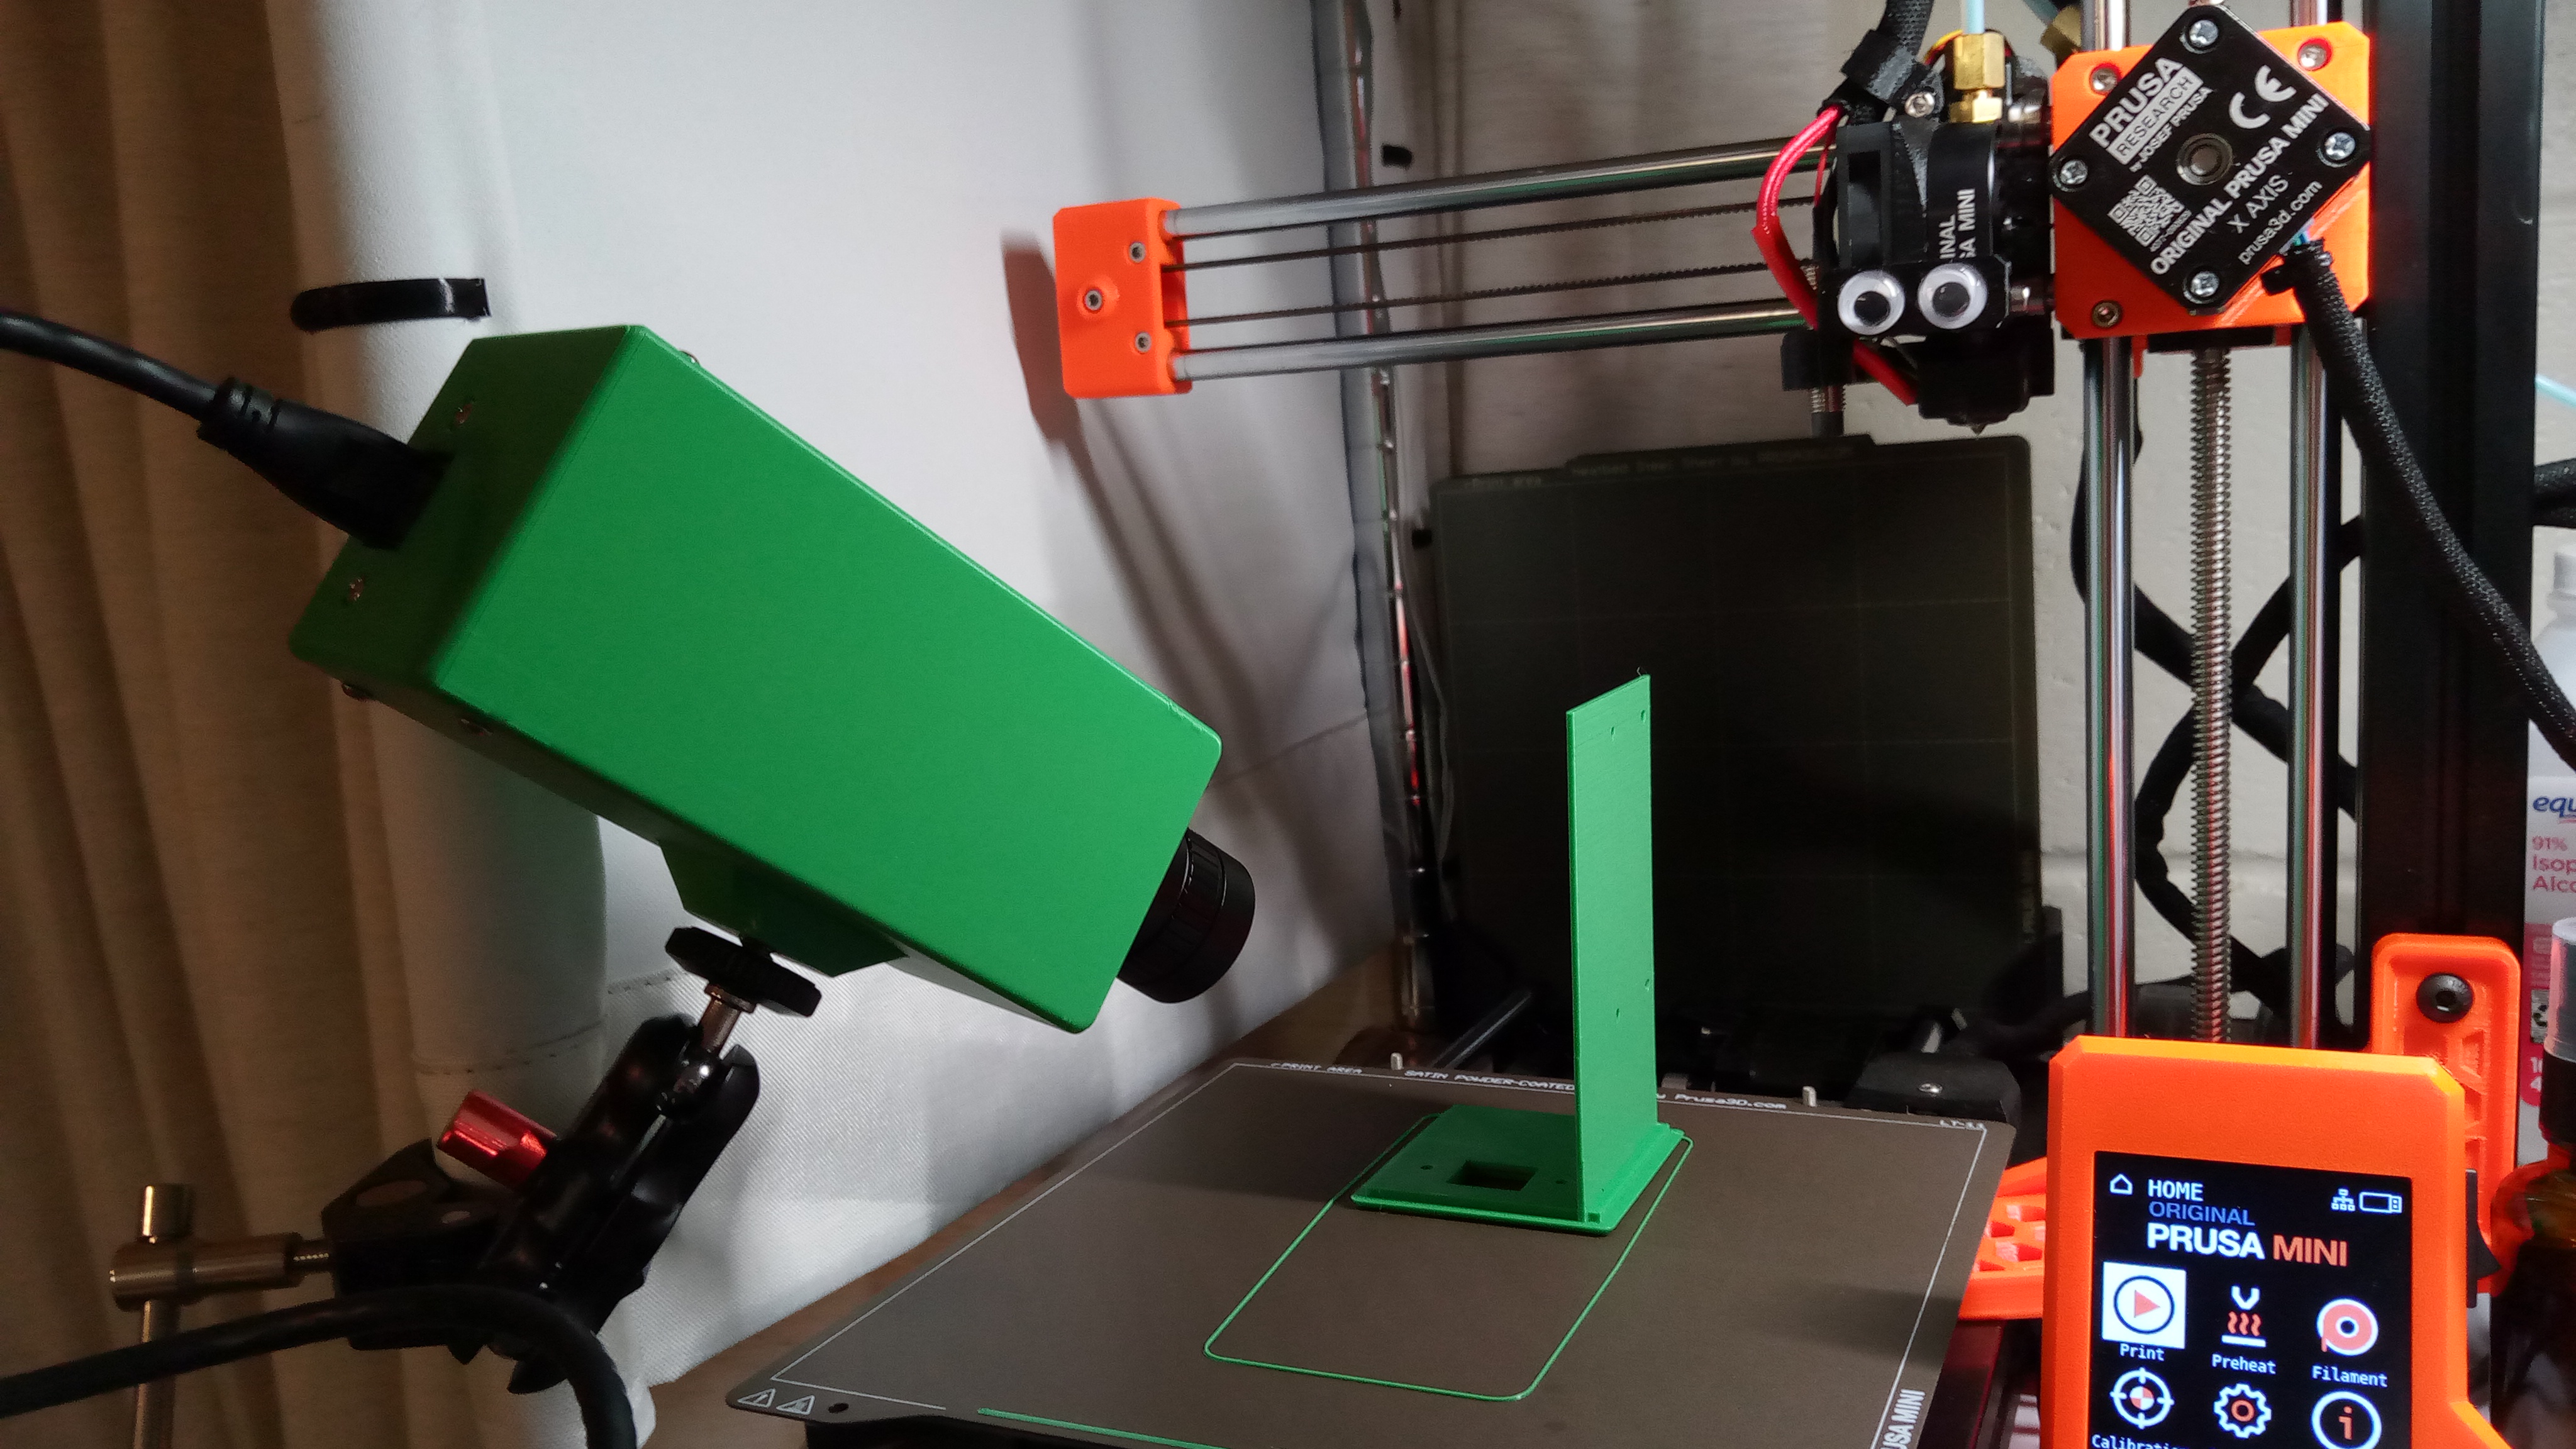
<p>For those who have a raspberry pi sittting around and looking for a remote access camera. For those who want a ridiculously large print observation camera. Or, more likely, for those who have a PoE switch (or want one) and need more justification for getting it in the first place, or a reason to get more single board computers and other tech. </p><p>Due to the very limited availability of any of the Raspberry Pi Zero SBCs, this was mostly done as a proof of concept and so can't speak to the long term viability.</p><h4>Versions</h4><ul><li>Lens cap: trim to length in the slicer to accomodate your chosen lens and includes a space for a protective clear sheet</li></ul><h5>Body</h5><ul><li>Body: is the body with a ¼-20 by 8mm (0.31") deep threaded camera mount hole that will work with most standard consumer camera mounting options. </li><li>Body - Smile: has “smile” debossed into the front face should the camera be mounted hanging from the threaded section</li><li>Body - Smile_Flipped: has “smile” debossed into the front face should the camera be mounted sitting on the threaded section the thread</li><li>Body - No_Hole: has no threaded hole on the mounting section and is just a flat face for your chosen mounting hardware.<ul><li>The two No_Hole - Smile options have “smile” debossed the same as the body with the threads</li></ul></li></ul><h5>Tray</h5><ul><li>Ported: has holes for the 90 degree ethernet extension cable listed below</li><li>Ported - Labelled: has ‘PoE’ debossed next to the hole in case you forget what goes there</li><li>No_Hole: has no holes but has an “X” debossed into the face in the approximate area where any connector holes should be placed</li></ul><h3>Required Parts List</h3><p>1 x <a href="https://www.raspberrypi.com/products/raspberry-pi-high-quality-camera/">Raspberry Pi HQ Camera Module</a> and a suitable lens<br>1 x <a href="https://www.adafruit.com/product/3157">Raspberry Pi Zero Camera Cable</a><br>1 x <a href="https://www.waveshare.com/product/raspberry-pi/hats/interface-power/poe-eth-usb-hub-hat.htm">Waveshare Raspberry Pi Zero PoE module</a><br>1 x <a href="https://www.raspberrypi.com/products/raspberry-pi-zero-2-w/">Raspberry Pi Zero2W</a>/<a href="https://www.raspberrypi.com/products/raspberry-pi-zero-w/">ZeroW</a>/<a href="https://www.raspberrypi.com/products/raspberry-pi-zero/">Zero</a>, (if you can find one) and an SD card<br>1 x <a href="https://www.amazon.com/dp/B07TYH668P?psc=1&ref=ppx_yo2ov_dt_b_product_details">90 degree ethernet extension cable</a> (left or right both work, I suggest right), or alternatively an ethernet cable without strain relief and a female end. Basically any form of ethernet cable that can make a 90º turn in 20mm (0.8") or less.</p><h5>Fasteners</h5><p>4 x M2.5x4 button head bolts<br>8 x M2.5x6 button head bolts (socket head can be used but will not look as good.<br>8 x M2.5 Nuts (4 are optional as holes are small enough that there is some resistance)</p><p>Optional<br>1 x approx 45x55mm section of clear materail for use in the Lens Cover<br>1 x Your choice of fastener to attach to an external mount if not using a conventional camera mount and the printed in threads.</p><h5> </h5><h3>Print Settings</h3><p>Supports: N/A<br>Infill: Any above 0%. the more, you add the stronger it will be.<br>Material: Any. Choose depending on your use case, PETG or ASA for outdoor, anything for indoor.</p><h3>Assembly</h3><ol><li>Set up your Pi using your OS of choice and enabling your remote access option of choice.</li><li>(optional) Install 4 M2.5 bolts into the slots in the front of the case near the hole for the camera. If needed use a small pointed object to pull out any filament that fell down during the creation of the holes.</li><li>Install the camera cable into the HQ camera module.</li><li>Install the HQ camera module into the case using 4 of the M2.5x6 button head bolts in the provided holes</li><li>Insert 2 of the M2.5 nuts into the slots in the slide-in plate</li><li>Install the Pi Zero into the slide-in plate using the 4 M2.5x4 bolts</li><li>Fasten the ethernet jack into the plate and secure any excess cable as well as possible then plug the ethernet jack into the PoE board</li><li>Place the remaining nuts into the cutouts on the slide-in plate</li><li>Start to slide the removable plate into the main housing</li><li>Connect the other end of the camera cable into the Pi and slide the tray into the case, being careful to keep from kinking the camera cable of dropping any of the nuts.</li><li>Install the 2 M2.5x6 bolts on the bottom taking care that the nuts do not fall out.</li><li>Install the remaining two M2.5x6 bolts</li><li>Place your camera, remote in and then focus the lens to your specific use case</li><li>(optional) Prepare your camera for outdoor use<ol><li>Install your choice of clear material into the front hood and seal it using your preferred method.</li><li>Place the hood over the front and push it on until it is close to the lens</li><li>Apply any weather resistant materials you desire to the case.</li></ol></li></ol><h4>Notes</h4><ul><li>If you need it weather resistant, liberal use of liquid electrical tape and electrical tape or any other sort of sealant can seal it off pretty well except for the ethernet port.<ul><li>weatherproof ethernet jacks exist however they all use different dimensions thus a plain backed one is included with a mark for where a negative volume can be placed in prusa slicer with your jack dimensions. So long as it doesn't protrude more than ~20mm (0.8") into the case from the interior wall, it should not contact the Zero</li></ul></li><li>If using the lens covering hood the lens protrusion from the lens mount cut it in slicer to the length of the lens plus 15mm.</li><li>As it has limited ventilation, it would not do well in a location where it is exposed to the sun, no matter what material, as you may cook your Pi, for those who don't know, this is bad since it's lacking an ‘e’ at the end</li><li>If PoE isn't your thing, the zero can be mounted alone or with a different hat so long as the height with standoffs does not go too far beyond 35mm (1.38"), all you would need is the correct length of standoffs and to create new holes in the blank top</li><li>The tray and hood starts off upside down and must be placed on the top face</li></ul><h5><code>Disclaimer</code></h5><p><code>The dimensions and tolerances used are calibrated based on the performance and setup of my printer, yours may or may not differ to the point where parts may not fit together or may fit too loosely. Not responsible for any time spent shimming, filing, scaling, or tweaking.</code></p>
With this file you will be able to print Raspberry Pi Zero POE HQ Camera Case with your 3D printer. Click on the button and save the file on your computer to work, edit or customize your design. You can also find more 3D designs for printers on Raspberry Pi Zero POE HQ Camera Case.