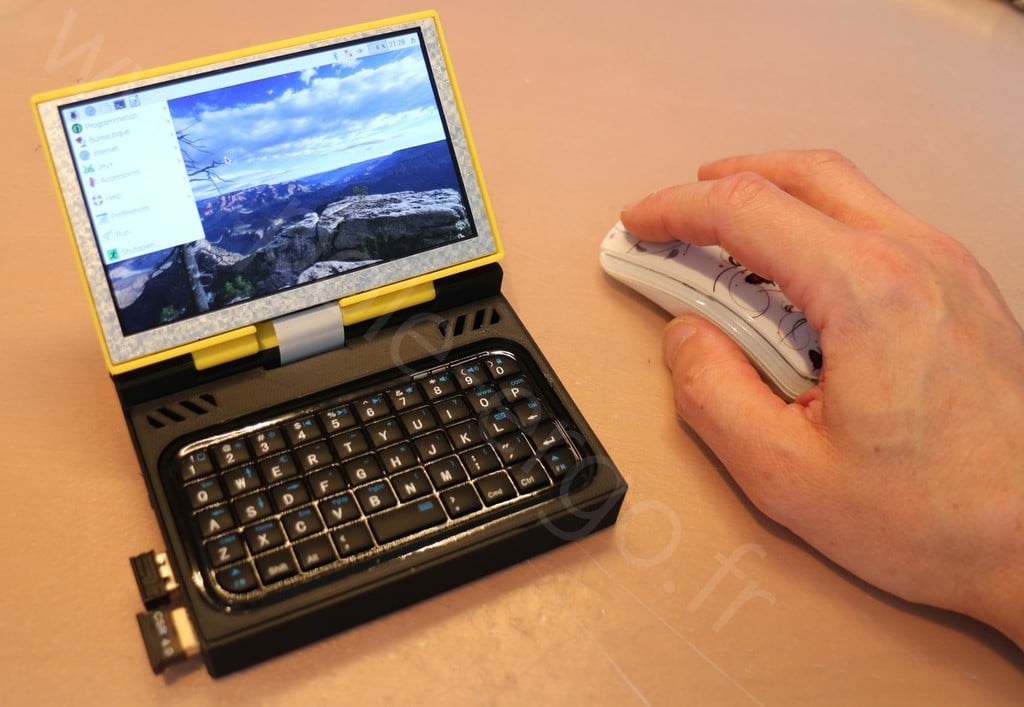
Raspberry UMPC

Raspberry UMPC

thingiverse

Update 08/09/17 : new raspberry Pi2 embox : https://www.thingiverse.com/thing:2514014 Le Raspberry Pi est un ordinateur miniature permettant la réalisation de nombreux projets, disponible dans le commerce dans sa forme la plus dépouillée, il se prête à l'intégration dans tout type de boitiers. Ainsi, l'objectif de ce projet, consiste à réaliser un nano ordinateur de la gamme UMPC (Ultra-Mobile PC) intégrant différents composants du commerce. Il s'agit là d'un exercice d'intégration de composants du commerce permettant un exercice poussé de conception de boitier technique. Attention : les modifications proposées peuvent être fatales à votre matériel. Ce projet est proposé "tel quel" sans aucune garantie de succès dans la réalisation et dans son fonctionnement. Raspberry Pi is a miniature computer allowing the realization of numerous projects, available in several shops in its barest shape, it lends itself to the integration in every type of cases. So, the objective of this project, consists in realizing a nano computer of the range UMPC (Ultra-mobile PC) integrating various components. This is an exercise of integration of components allowing an advanced exercise of conception of technical case. Warnings : The proposed modifications can be fatal in your equipment. This project is proposed "as is" without any guarantee of success in the realization and functioning. Rasperry Pi UMPC working : https://www.youtube.com/watch?v=2-fPb5VF1P4&feature=youtu.be Pour réaliser ce projet, il faudra les composants suivants : To realize this project, it will be necessary the following components: - Raspberry PI à partir du modèle B+, de préférence le modèle 3 (bluetooth et WIFI intégré), - Un micro clavier bluetooth du type ADK-100 Micro bluetooth Keyboard, - Un kit Adafruit Kippah sans contrôle tactile : https://www.adafruit.com/product/2454, - Le câble de connexion et son connecteur : https://www.adafruit.com/product/2098, - Un écran 5" : https://www.adafruit.com/product/1680, - Un booster chargeur de batterie : https://www.adafruit.com/product/2465, - Une batterie Li-ion 26650. Les produits Adafruit se commandent en France chez Mouser.com. Préparation du Raspberry : A faire avant toute modification du Raspberry : Préparer la carte SD du Raspberry en suivant les instructions proposées par Adafruit pour l'utilisation de la platine Kippah. Pairer le clavier bluetooth, paramétrer la connexion WIFI. Vérifier que tout fonctionne. (Attention, cette intervention annule la garantie et peut détruire le Raspberry en cas d'erreurs) Afin d'intégrer le Raspberry dans le boitier, il est nécessaire de le dépouiller de pratiquement tous les connecteurs dont il est pourvu. Pour ce faire, il est possible de suivre les conseils proposés par Adafruit : https://learn.adafruit.com/diet-raspberry-pi/steps. Preparation of Raspberry: To make before any modification of Raspberry : Prepare the SD card of Raspberry by following the instructions proposed by Adafruit for the use of the deck Kippah. Paired the bluetooth keyboard, parametrize the WIFI connection. Verify that everything works. ( Watch out, this intervention cancels the guarantee and can destroy Raspberry in case of errors) To integrate Raspberry into the case, it is necessary to deprive it of practically all the connectors with which it is provided. To do it, it is possible to follow the advice proposed by Adafruit: https: // learn.adafruit.com/diet-raspberry-pi/st eps. Il est ensuite nécessaire de raccourcir les pattes du port GPIO de façon à ce que, lors du montage de la platine Adafruit Kippah, l'ensemble ne dépasse pas 8,5 mm d'épaisseur. Il faut également rajouter deux port USB A en remplacement des modèles doubles présent d'origine. Il est préférable de rajouter un radiateur sur les processeurs de la carte pour un meilleur refroidissement. It is then necessary to shorten the legs of the port GPIO so that, during the assembly of the deck Adafruit Kippah, the set does not exceed 8,5 mm of thickness. It is also necessary to add two USB port A instead of the double models present of origin. It's better to add a radiator on the processors of the card for a better cooling. Clavier : (Attention, cette intervention annule la garantie) Démonter le clavier, dessouder la batterie (Attention danger de court circuit) de façon à dégager la platine électronique. Récupérer la platine, la membrane en caoutchouc et le cache. Voir photos. Câbler la platine pour l'alimentation en 3,7 volts pris de la platine Adafruit Kippah. L'installer dans la partie imprimée puis sceller en faisant fondre les picots en plastiques. Placer la membrane puis le cache en force. Keyboard: ( Watch out, this intervention cancels the guarantee) Tear down the keyboard, unsolder the battery (Warning danger of short circuit) so as to release the electronic deck. Get back the deck, the rubber membrane and the mask. See photos. Cable the deck for the supply in 3,7 volts taken by the deck Adafruit Kippah. Install it in the printed part then seal by melting teeth in plastics. Place the membrane then the mask in force. Ecran : Installer le connecteur et plier le ruban ainsi que le montre la photo. Coller l'écran dans le cadre imprimé avec de la colle contact en laissant dépasser le ruban de 3 cm. Screen: Install the connector and fold the ribbon as well as shows on photo. Stick the screen in the printed frame with some contact glue by letting exceed 3 cm the ribbon. Batterie : (Attention : respecter les précautions d'usage et manipulation des batteries Li-Ion qui peuvent prendre feu et exploser en cas de mauvaise manipulations) Installer le power booster Adafruit et un interrupteur sur le couvercle de la batterie. Câbler l'ensemble selon le mode d'emploi proposé par Adafruit pour son module. Battery: ( Warning : respect usual precautions and manipulation of batteries Li-Ion which can catch fire and explode in case of bad manipulations) Install the power booster Adafruit and a switch on the lid of the battery. Cable the set according to the instructions proposed by Adafruit for his module. Boitier : Installer la batterie sur le boitier, passer les fils d'alimentation par le passe câble. Souder les fils d'alimentation batterie sur les pad 5V et GND du Raspberry. Souder l'alimentation du clavier sur les pad d'alimentation proposés par la platine Adafruit : GND et 3,3v. Monter la platine Adafruit sur le Raspberry. Installer la carte sd, connecter l'écran et Installer l'ensemble dans le logement prévu. Installer le support de l'écran LCD : le pivot de la charnière est composé d'un filament plastique à imprimer. Installer le support de clavier en force. Tout doit fonctionner lors de la première mise sous tension. Pour ceux qui ne dispose pas d'une imprimante 3D, les pièces plastique composant ce kit peuvent être commandées sur Shapeways. Case: Install the battery box on the case, cross the wire of power supply by crosse cable. Weld the wires of battery on pad 5V and GND of Raspberry. Weld the power supply of the keyboard on the pad of supply proposed by the deck Adafruit : GND and 3,3v. Install the deck Adafruit on Raspberry. Install the SD card, connect the screen and Install the set in the planned housing. Install the LCD screen: the pivot of the hinge consists of a plastic filament to be printed. Install the support of keyboard in force. Everything has to work during the switched on. For those who have not a 3D printer, parts of this kit can be ordered on Shapeways : https://www.shapeways.com/shops/modular_designs

Download Model from thingiverse

With this file you will be able to print Raspberry UMPC with your 3D printer. Click on the button and save the file on your computer to work, edit or customize your design. You can also find more 3D designs for printers on Raspberry UMPC.