Raspi_boy ultimate Remix
thingiverse
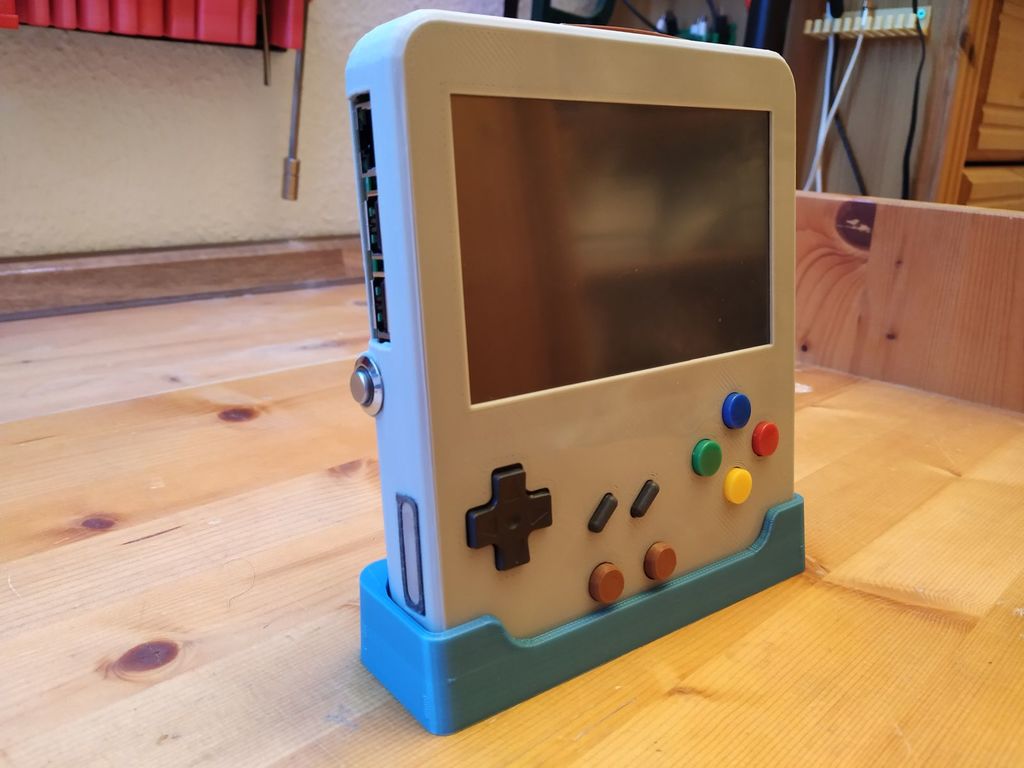
UPDATE 2018/12/06: Added a simple adjustable stand which clamps onto the back of the housing. For those who like to play with a wireless/different controller. https://www.thingiverse.com/thing:3263056 °°°°°°°°°°°°°°°°°°°°°°°°°°°°°°°°°°°°°°°°°°°°°°°°°°°°°°°°°°°°°°°°°°°°°°°°°°°°°°°°°°°°°° Darevix's intial design is great, but in my opinion it has more potential so I my same mods. I used the following parts additionally to his BOM list: Voltage Display: https://www.banggood.com/0_28-Inch-2_5V-30V-Mini-Digital-Voltmeter-p-974258.html?rmmds=myorder&ID=228&cur_warehouse=CN Power Button: https://www.banggood.com/Silver-12mm-LED-Metal-Push-Button-Latching-Switch-4Pin-Waterproof-Push-Button-Switch-p-1175634.html?rmmds=myorder&ID=231&cur_warehouse=CN LiIo Battery instead of Lipo: https://www.banggood.com/2PCS-NCR-18650B-3_7V-3400mAh-Protected-Rechargeable-Lithium-Battery-p-90990.html?rmmds=search&cur_warehouse=CN Mods: - Bottom_no_buttons_batt_V2 Added a door on the back to enable a quick battery swap Added a hole for the power button Made the side hole for the USB connector bigger Removed the compartment for the LiPo battery for a more flexible battery choice and also now offering more space. I used LiIo (for more info see down below). - Top_Buttons_V2.stl Optimized the front for better printig (removing the need to use covers) Added holes for the tiny speakers. Darevix's diagram is stating to add resistors on one of the speaker lines! DON'T! The resistor is reducing the voltage so much, that you can barely hear anything from the speakers. Without the resistor the result is much better in terms of loudness. Added a door on top, so you can easily reach a) the rasperry micro USB port for powering via charger and b) the HDMI port to attach the console to any HDMI capable TV, making this a portable retro gaming console and not only a handheld battery powered system. Added a voltage display. This was a pretty essential thing missing for me in the original design. Since you don't want to loose your game progress due to low battery voltage. - Door_Top_V2.stl Door for the top covering HDMI and micro USB connector - Batt_deckel_V2.stl Door for the back covering the LiIo battery. I used 2 NCR 18650 in parallel. I'm able to use about 4500mah of the theoretical 6800mah, which is not too bad. This is giving me almost 4 hours on one charge. The battery could last longer if you use a another step up voltage regulator. The one darevix recommended is rated for 3-5V input but the LiIo on some point falls below 3V under load and then the step up struggles. However, this will save your battery from discharging to low. I've seen step ups with 1-5V input voltage, maybe those will give you a little better runtime but you need to consider that the TFT and Raspberry Pi need some amps which the step up needs to deliver. Here are some step up converters I've found having a lower input voltage rating and some have a higher current rating. So of somebody is keen to experiment: https://www.banggood.com/1pcs-MT3608-2A-DC-DC-Adjustable-Step-Up-Power-Module-Booster-Power-Module-p-1213134.html?rmmds=search&cur_warehouse=CN https://www.banggood.com/1pcs-MT3608-2A-DC-DC-Adjustable-Step-Up-Power-Module-Booster-Power-Module-p-1213134.html?rmmds=search&cur_warehouse=CN https://www.banggood.com/DC-DC-1V-5V-To-5V-500mA-Boost-Converter-Step-Up-Power-Module-p-1069696.html?rmmds=search&cur_warehouse=CN (this one probably has not enough current, try at you own risk) However, you can easily make a replacement battery and simply replace it while charging the empty one, so infinite playing theoretically possible ;-) Also it should be possible to put 3 NCR 18650LiIo's in parallel inside the Raspi Boy, since there is enough space inside, leaving you with a little more heavy Raspi Boy and about 10.000mah!!! This will give you about 6 hours runtime. - Controller_plate_V2.stl The original Plate was too thin for me and not giving enough resistance to hold the controller PCB against the D-Pad/Buttons, so I made it a bit thicker and made counter sinks for the screws. - Button_V2.stl Just a simple button for the front L1/R1 buttons. Working much better for me then the oriignal buttons since this one has a flat back surface pressing against the tacticle switch, while the orignal buttons are kinda hollow. - TFT_holder_1_V2.st / TFT_holder_3_V2.st There was something missing for fixing the electronics plate onto the TFT, so I added a bit double sided tape between the electronics plate and the tft, which is not strong enought if you want to use the micro USB charger port, so I modified the clamps for the TFT to grab on the electronics plate, holding it in place quite good. - Electronics_plate_V2.stl Cut of one side for the TFT holder to grab onto. - Dock_V2.stl This might not be for you. I realized that which my larger hands the holding position is quite uncomfortable for a longer time, because the D-Pad / Buttons are pretty low and on the top you have the Raspberry Pi and TFT bringing some load onto your hands/finger. With this longer dock, my hands/fingers have a much more comfortable positions while playing and also it helps counteracting the top weight of the electronics. The best thing however is, you can to get some bluetooth controllers, hook up the Raspi Boy to a large TV, invite some friends, have some retro game fun while chilling on the couch ;-) Enjoy!
With this file you will be able to print Raspi_boy ultimate Remix with your 3D printer. Click on the button and save the file on your computer to work, edit or customize your design. You can also find more 3D designs for printers on Raspi_boy ultimate Remix.