Raspi NoIR Nightvision camera
thingiverse
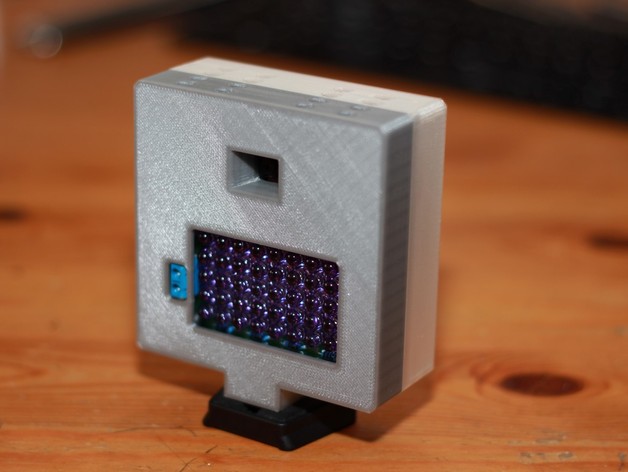
I had more or less everything lieing around, so I decided to design this enclosure for the IR LEDs, the raspi and the NoIR cam and built it. It is still not perfect, but everything sits fine and works like a charm. Information on the parts I used and the code are located unter instructions. 22.02.2015: The walls seem a bit too thin, a piece of mine broke off, now it won't keep closed very well. Improved version incoming! 25.02.2015: I uploaded rev2 files. Changes: front got thicker walls (3mm instead of 2mm) Where the walls get thinner to slide into one another they are now 1.5mm thick instead of the very easy to crack 1mm thick walls Nut-holder for tripod-mount is now closed by the front when the case is assembled, looks nicer. Back piece is now only 1.5mm thick instead of 2mm. Some minor changes It should now take a bit more time and material to print, but be much more durable and stable. 28.02.2015: Just printed rev2. It prints nicely, everything fits (The IR spotlight fits a bit better, actually), and it is way more stable (and once closed it stays closed, it's actually a bit tricky to reopen it). Not as fragile as rev1. 19.09.2015: Finally took the time to delete the rev1 images, and add some rev2 images, instead! Instructions Please print rev2 front and back, not the old rev1 files! rev2 is improved for better fit of the components and a lot higher overall stability. Parts: 12V PSU (2A or more) Raspberry A+ NoIR cam 12V -> 5V DC-DC IR spotlight I used this one: http://www.pollin.de/shop/dt/OTA5ODY0OTk-/Bausaetze_Module/Bausaetze/Infrarot_Scheinwerfer_Bausatz.html Logic-Level-MOSFET 220R and 10K 1/4W resistor (exact values not very important) Short explanation: I used the 12V PSU and connector of my printrbot simple metal, as they were replaced by something more powerful as I added a heated bed. The connector needs a 8mm hole, so every other type of connector with 8mm external diameter and any other PSU with 12V and 2A or more should work. The 12V -> 5V DC-DC converter was taken out of a phone charger for cars. The IR spotlight made me some trouble, as it is a design-fail. 60mA per LED, while they are designed for 20, max. 30mA. After 5min it nearly desolders itself. That's why I added the MOSFET, which is switched by a GPIO of the raspberry. In that way the spotlight gets only switched on for 1s while the image is being taken. Here is my current shell script: http://pastebin.com/1DtJtZ9s Warning: Once launched it creates an endless loop and takes a picture every 10s until you force-stop it with ctrl-C or power down the raspberry! Execute it with sudo in order to work. It will not be able to control the spotlight otherwise.
With this file you will be able to print Raspi NoIR Nightvision camera with your 3D printer. Click on the button and save the file on your computer to work, edit or customize your design. You can also find more 3D designs for printers on Raspi NoIR Nightvision camera.