Raspicam-Holder for Ultimaker 2
thingiverse
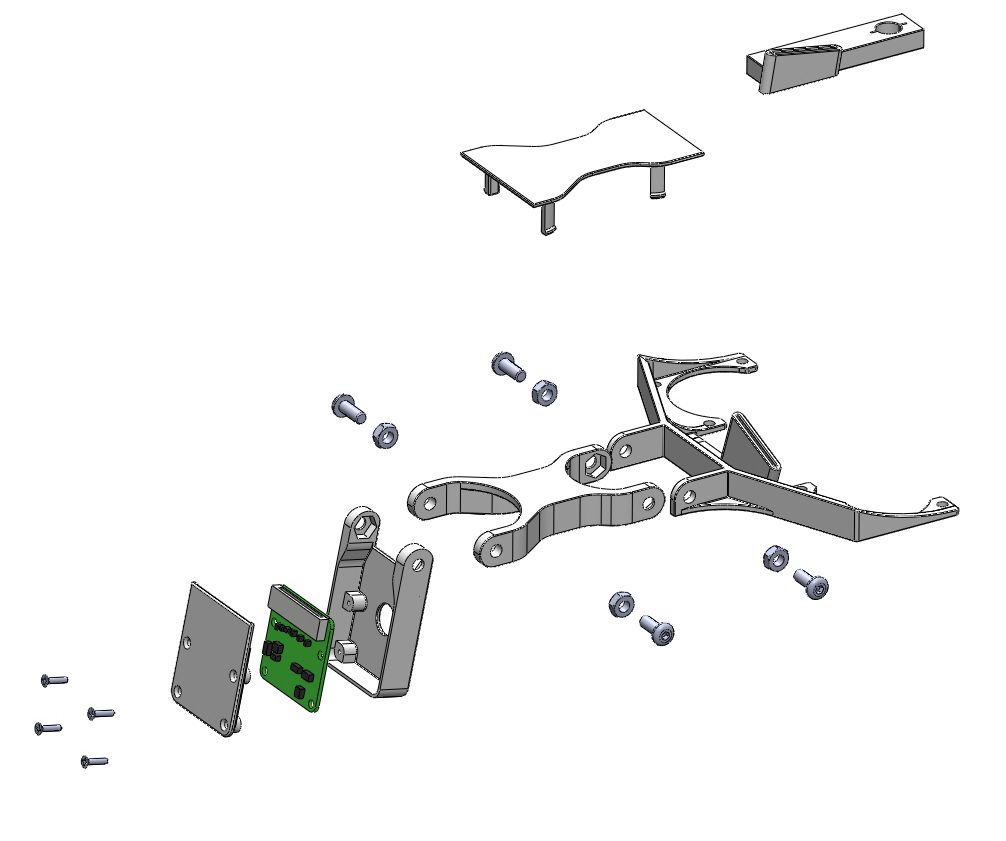
Here you are! Thank you for being interested in this thing! Well, this RasPi-Cam holder was created, because I run all my printers with OctoPrint and after having several issues with non-operating webcam I decided to take the one and only RaspiCam. Also, I truly like watching the printer run with the cam always focused on the nozzle and if you do so too, then you might have found the right thing... So there are basically two version and the parts are interchangeable and extendable (at least the extension fork). The difference in the setup is only the distance from the cam to the nozzle. Well, after a few trials I found out, that the version with one extension bracket works best for me and this is what I am going to describe below: 1.) Material: All you need is to print all parts and each one is required exactly one time. Second you are going to need the following: - 4x M3x5mm (thread length) screws. I used rounded caps with hex socket - 4x M3 nut - 4x 1,4mm screws (tapping screw or wood screw with countersunk head - 1x RaspiCam - 1x 1000mm flat cable for the cam 2.) First, pre-assembly of the Pi-Cam-housing: Maybe you need to widen the holes of the PiCam cap to 1,2mm or so, then you can assemble the PiCam Holder, the PiCamCap, and in between the Cam (please already connect the PiCam with the cable first). It´s kind of a sandwich and everything is held by the 4 screws together. 3.) Then, assembly (please refer to my pictures): First, you may assemble the Printhead-Adapter No.1. For this you won´t need any tools. To assemble the Printhead-Adapter No. 2 you need to remove 3 screws from each fan of the printer. Now you can already insert the cable with the Cam-Housing attached. Next step is to assemble the Extension fork (let it hang loose in the beginning) and the PiCam-Housing. (Take care about the proper cable-routing, otherwise you are going to do the job twice as I did...) Then you may attach the cap to hold down the cable on the extension fork. Finally, bring the extension in a horizontal position (please take care about the front timing belt!) and attach the screws. Finally you can adjust the position of the cam and fix the screws. Please take care about the proper handling of the cable and also, not to get too close to the timing belt up-front of the UM-housing. Have fun! Cheers!
With this file you will be able to print Raspicam-Holder for Ultimaker 2 with your 3D printer. Click on the button and save the file on your computer to work, edit or customize your design. You can also find more 3D designs for printers on Raspicam-Holder for Ultimaker 2.