Rasptop! Raspberry Pi Laptop with Official Pi Foundation 7" Touchscreen *Just 5 Parts!* *Source files included*
thingiverse
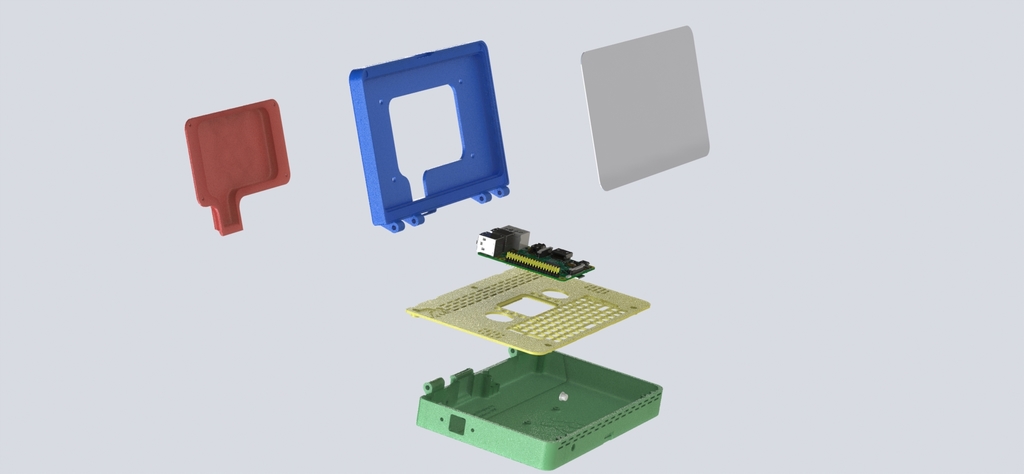
This is a project repository for creating a custom Raspberry Pi case, specifically designed for the Raspberry Pi with a touchscreen display and Adafruit Powerboost 1000C power management board. The case has undergone several updates to improve its design and functionality. **Design Evolution** The original design had some limitations, such as a low screen resolution (800x480) and poor heat dissipation. To address these issues, the designer modified the `config.txt` file to increase the screen resolution to 1024x614 and added air vents to improve cooling. **Tweaks and Improvements** The designer has made several tweaks and improvements over time: 1. Increased screen resolution: Modified the `config.txt` file to increase the screen resolution to 1024x614. 2. Improved heat dissipation: Added air vents to the base to improve cooling. 3. Wire management: Used silicone wire with 20AWG for power and 28AWG for signal. 4. Power supply: Switched to Adafruit Powerboost 1000C, which provides a more stable power supply. **Updates and Changes** The project has undergone several updates since its inception: 1. **Update 3/8/2018**: Increased the base height by 2mm to accommodate the new power management board. 2. **Update 3/8/2018.2**: Moved the SD card slot down a bit and updated the design. 3. **Update 3.14/2018**: Announced the arrival of the Raspberry Pi 3 B+ and started working on a new version with a higher-resolution screen (1024x600). 4. **Update 3/20/1018**: Made slight redesigns to improve the palmrest, added more vents, and removed logos from the palmrest. 5. **Update 4/13/18**: Switched to Adafruit Powerboost 1000c. 6. **Update 1/18/19**: Still using the case daily at work, with minor modifications. **Design Files** The repository includes source files for customizing and remixing the design: * `case_design.stl`: The main case design file * `palmrest.stl`: The palmrest design file * `bezel_rear_cover.stl`: The rear cover of the bezel design file **BOM (Bill of Materials)** The repository includes a BOM with links to purchase the necessary components: * Adafruit Powerboost 1000C: [link] * Heat sinks: [link] * Thermal glue: [link] * Silicone wire (20AWG, 28AWG): [link] Overall, this project demonstrates a commitment to iterating and improving the design over time, ensuring that it meets the user's needs and provides a great experience.
With this file you will be able to print Rasptop! Raspberry Pi Laptop with Official Pi Foundation 7" Touchscreen *Just 5 Parts!* *Source files included* with your 3D printer. Click on the button and save the file on your computer to work, edit or customize your design. You can also find more 3D designs for printers on Rasptop! Raspberry Pi Laptop with Official Pi Foundation 7" Touchscreen *Just 5 Parts!* *Source files included*.