Ratcheting capo (remix)
prusaprinters
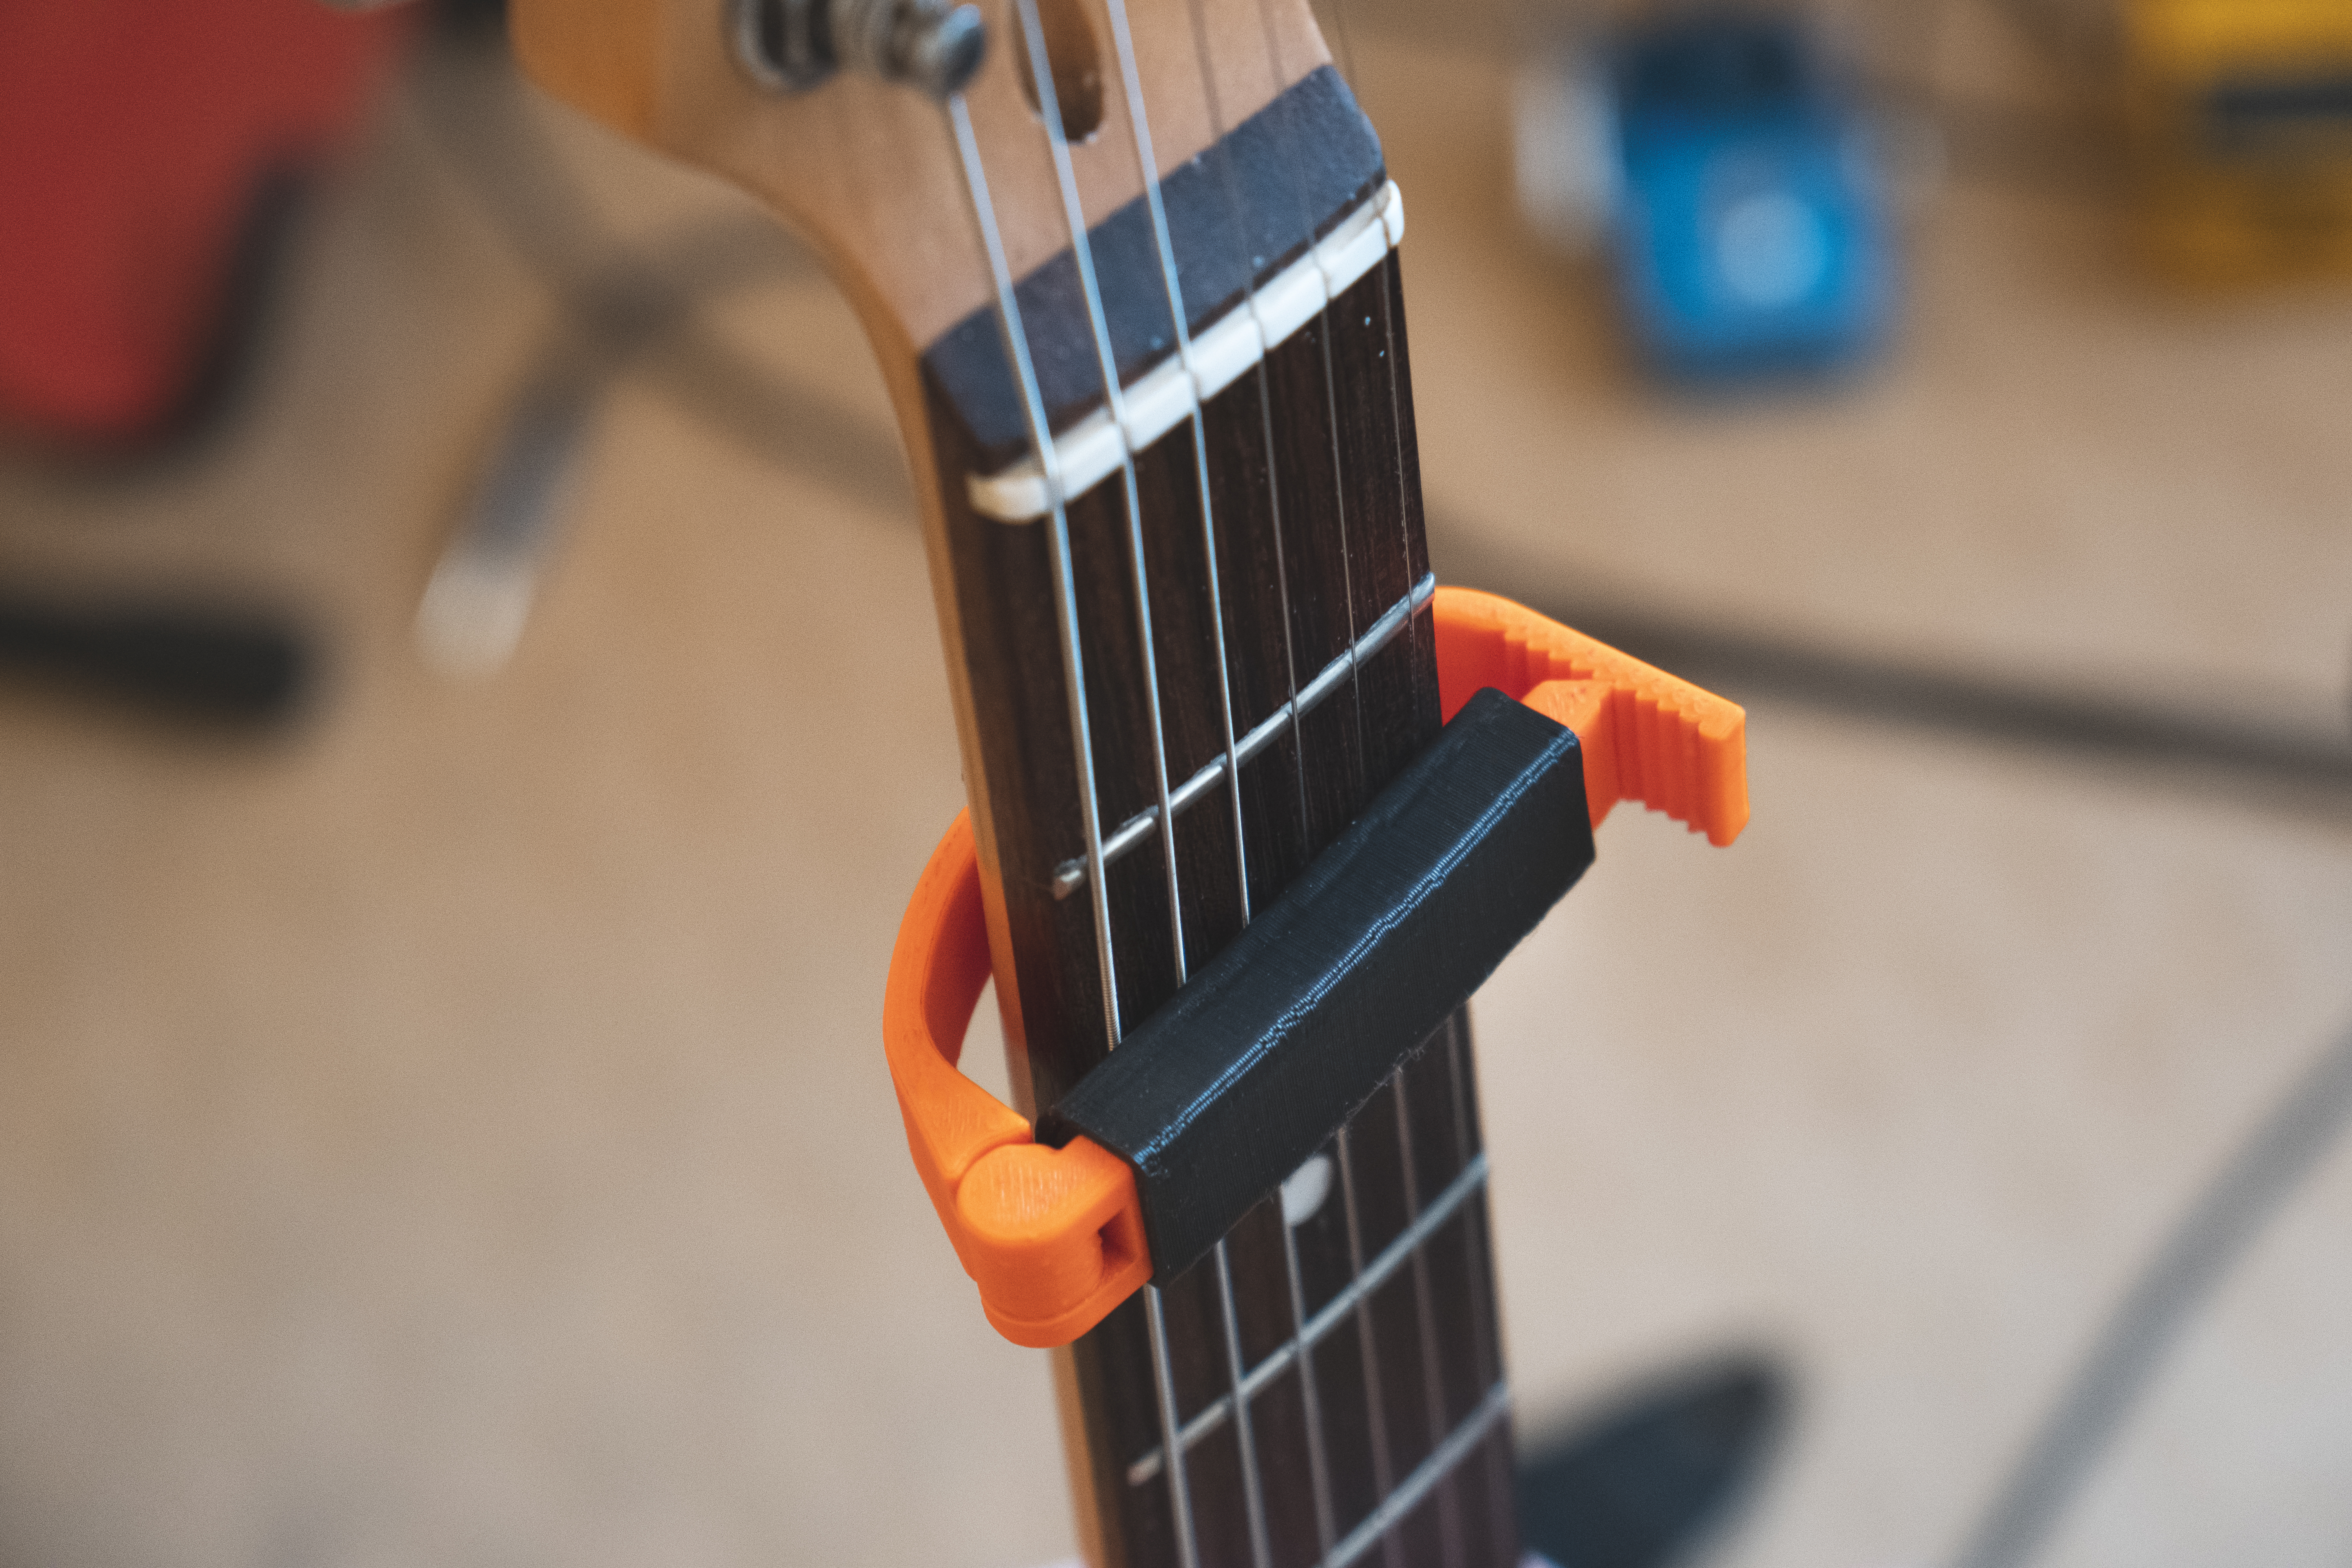
<p>This is a remix of the awesome <a href="https://www.thingiverse.com/thing:2567359">Ratcheting Capo by LoboCNC</a>.</p><p>Print it in place, no supports necessary. It works (surprisingly) really well. I've printed a few and I keep them in all my guitar bags because I often forget my main metal one at home.</p><p>I've tested it on both electric and acoustic guitar and it works great on both. If the strings are buzzing when played open, tighten the ratchet by one more tooth.</p><p>Consider adding some padding to the arc that touches your neck (electrical tape), it would be a shame to damage your guitar's finish :)</p><h5>Material</h5><p>You might have to gently break-loose the hinge the first time you try to bend it. I printed a couple both from PLA and from ASA and those work well. I'm worried that PETG would be too flexible for this (though it might work just fine).</p><h5>Optional rubber sleeve</h5><p>Print from a flexible filament, the softer, the better. I used FilaFlexible40 from Filatech.</p><figure class="image image-style-align-center image_resized" style="width:50%;"><img src="https://media.prusaprinters.org/media/prints/63610/rich_content/8596e962-6ae8-4c7f-a032-211ee05a22fd/4.jpg#%7B%22uuid%22%3A%2262d817ed-e3e6-4a5c-a044-4444f9d12a16%22%2C%22w%22%3A2657%2C%22h%22%3A1992%7D"></figure><p>If you don't have any flexible filament, you can use it without the sleeve. You will have to tighten the capo a bit more though, to prevent any string buzzing. Or you can just use some electrical tape to make this part a bit softer.</p><figure class="image image-style-align-center image_resized" style="width:50%;"><img src="https://media.prusaprinters.org/media/prints/63610/rich_content/198c0c54-a07e-43e5-a1b5-e8571a64427f/3.jpg#%7B%22uuid%22%3A%224c6559ca-6280-4173-9b3d-1c48566c670c%22%2C%22w%22%3A3428%2C%22h%22%3A2571%7D"></figure><p> </p><h3>Remix changes</h3><p>Even when printed from a stiff material, the original ratchet bent a bit and that caused the ratchet to not engage at all in the first half. I've extended the arm to the maximum amount possible, while still printing in place. I guess I could rotate the arm to extend it even more, but it works fine as is.</p><figure class="image"><img src="https://media.prusaprinters.org/media/prints/63610/rich_content/1ca7bb10-463c-4f81-8483-30e717538d89/capo5.png#%7B%22uuid%22%3A%229d693401-2f2b-499d-802b-3f30c8449d45%22%2C%22w%22%3A2318%2C%22h%22%3A1348%7D"></figure><p>I've also designed a rubber sleeve for the part that engages the strings. You can just use electrical tape or something similar to the arm of the capo softer, but since I have access to flexible filament, I thought it would be nice to print this part too. It works quite well, especially when printed from something really soft like FilaFlexible40 form Filatech. It prevents any unwanted buzzing.</p><figure class="image"><img src="https://media.prusaprinters.org/media/prints/63610/rich_content/2f41e4a8-609e-45ba-a234-b8e715c0f84e/capo6.png#%7B%22uuid%22%3A%227bdfc45c-ef57-426f-bf9c-9c67c9b08581%22%2C%22w%22%3A1758%2C%22h%22%3A904%7D"></figure>
With this file you will be able to print Ratcheting capo (remix) with your 3D printer. Click on the button and save the file on your computer to work, edit or customize your design. You can also find more 3D designs for printers on Ratcheting capo (remix).