RBX24 (SCX24 Rock Bouncer)
prusaprinters
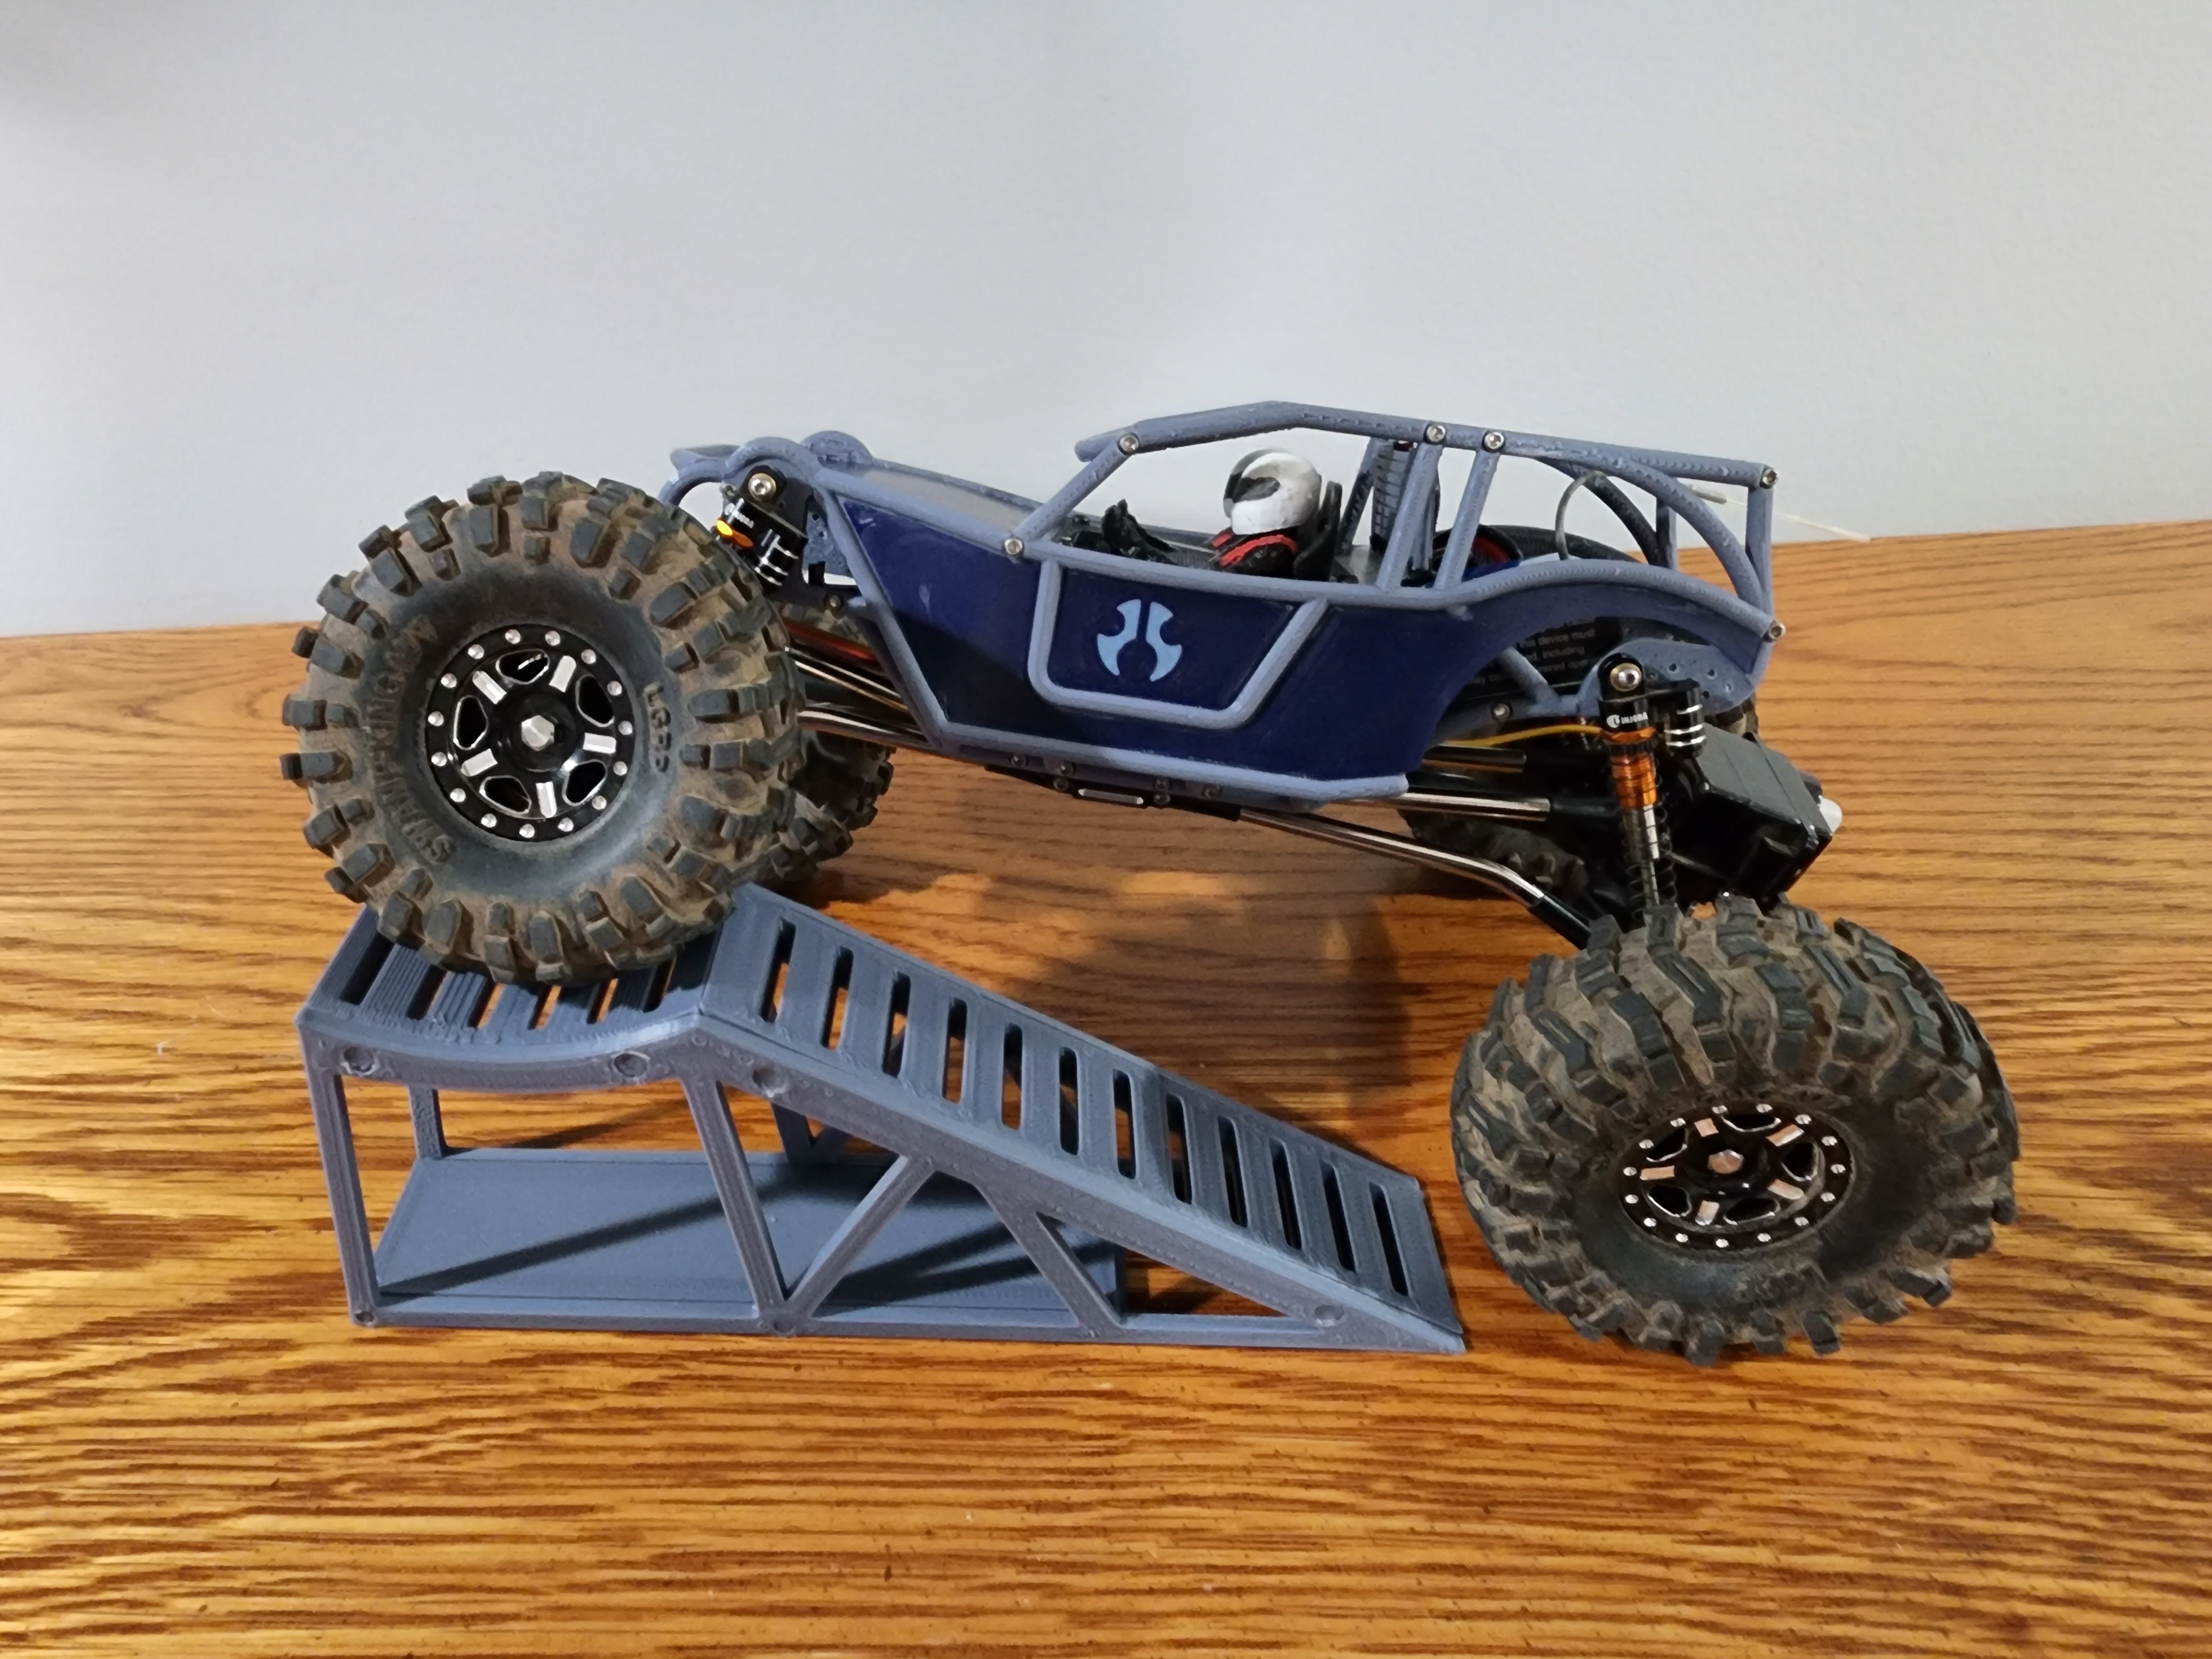
<p>Here's V2 of the RBX24, Rock Bouncer 24th scale Chassis for the SCX24. Based on 2 versions of the IRL Revolution 2.0 chassis. <br><a href="https://www.wideopendesign.com/revolution-2-0-rock-crawler-chassis">https://www.wideopendesign.com/revolution-2-0-rock-crawler-chassis</a><br><a href="https://www.wideopendesign.com/revolution-2-0-rock-crawler-4-seat-chassis">https://www.wideopendesign.com/revolution-2-0-rock-crawler-4-seat-chassis</a></p><p>While the overall design of the chassis I don't want to be remixed, I do want the community to get creative. I will allow remixing of the panels, electronic mounts, and decor pieces. They will all be uploaded again separately for you to remix if you choose. </p><p><a href="https://www.printables.com/model/279027-rbx24-remixable-parts">https://www.printables.com/model/279027-rbx24-remixable-parts</a></p><p> </p><p>Interested in selling this model? Please visit my Patreon for more details. <br>https://www.patreon.com/depep1</p><p> </p><h3>Choose a frame:</h3><p><img class="image_resized" style="width:36.76%;" src="https://media.printables.com/media/prints/279013/rich_content/4317913e-d208-4318-90c7-e55a3f767aeb/20220911_194656.jpg#%7B%22uuid%22%3A%2219e645d2-e56a-4b82-9e68-f41d6b5e7de1%22%2C%22w%22%3A4000%2C%22h%22%3A3000%7D"><img class="image_resized" style="width:36.71%;" src="https://media.printables.com/media/prints/279013/rich_content/73028cf5-5992-4a9e-a626-ab00f5bd8b4a/20220827_222739.jpg#%7B%22uuid%22%3A%22d805edb9-8a83-431e-8708-4e77155e035e%22%2C%22w%22%3A4000%2C%22h%22%3A3000%7D"><br>There are two diffrent frame designes. In Grey and blue is an example of the Square body and Single Panel Version. Orange and black is an example of the Round Body and Multi Panel version. Each body design has 4 different roof variants. Both models have the angled 2-bar or angled 3-bar roof. The flat bar roof does not have an angle in the front. There are also 2 hood versions, framed hood, and a flat hood. Orange has the frame hood while grey has the flat hood. </p><h3>What You Need To Print:</h3><ul><li>Frame:<ul><li>You need to choose one frame design. Whether it's square body or round body, Single panel or multi-panel. </li><li>You will also need a roof design corresponding to the body you chose. <br> </li><li>1x body left</li><li>1x body right</li><li>1x roof<br> </li></ul></li><li>Universal Body Parts:<ul><li>1x battery mount</li><li>1x ESC mount</li><li>1x hood (either frame hood or flat hood.)</li><li>1x front bar</li><li>1x rear bumper</li><li>Optional: 1.5mm offset. - This offset is primarily to offset the shocks from the body. I used one on top and bottom of each shock. 1.5mm worked best for me. <br> </li></ul></li><li>Decor:<ul><li>1x cooler</li><li>1x interior</li><li>2x helmet<br> </li></ul></li><li>Panels:<ul><li>1x hood panel (Either hood panel or one-panel hood) </li><li>depending on your panel choice you need either <br>2x Panels A-E<br>or<br>2x One Panel Side and 2x Panel C<br>(recommended to mirror panels for each side.)</li><li>1x rear panel</li></ul></li></ul><h3>Print Settings:</h3><p>I recommend printing at a 0.12mm or 0.2mm layer height with pla+ or petg.<br>Infill doesn't matter.<br>Support is a must.<br>I didn't use a brim nor a raft but if some parts start lifting then I recommend a brim. </p><h3>Post Processing:</h3><p>The interior designed parts benefit from some painting. </p><h3>Assembly: </h3><p>This assembly is for using stock parts only. Some upgraded parts should fit (longer brushed motors) However the mounts weren't designed for them. If you want to use upgraded parts and I encourage you to post a remix of the mounts you made on the separate link. </p><p>When assembling the frame, every hole is meant for a 5mm screw with two exceptions. The hood can take a 10mm screw and the cooler can take an 8mm screw. </p><ol><li>Glue all the panels to the body parts. I used CA glue. This can be tricky but take your time and it will come out good. </li><li>Connect the Left and Right together using the Front Bar and Rear Bumper.</li><li>Install the motor mount, transmission, esc mount, and front and rear axles with servos. <br><br>It should look something like this:<br><img class="image_resized" style="width:74.84%;" src="https://media.printables.com/media/prints/279013/rich_content/843f3646-c8e5-4fce-913a-4c972bb10793/20220911_145255.jpg#%7B%22uuid%22%3A%22ddb524f5-959d-4c01-8369-dd48f82dee95%22%2C%22w%22%3A4000%2C%22h%22%3A3000%7D"><br> </li><li>Install the esc and connect all the cables. Make sure to turn the esc on since the power switch will be hard to reach unless you use a screwdriver. <br><img class="image_resized" style="width:50%;" src="https://media.printables.com/media/prints/279013/rich_content/8c3b86c8-544b-4132-b09b-f46e5e89a97a/20220911_153727.jpg#%7B%22uuid%22%3A%220abeda7f-6d39-49db-83b8-d86542244ad4%22%2C%22w%22%3A3000%2C%22h%22%3A4000%7D"><br> </li><li>Now we need a battery lead extension and glue it on to the battery mount similar to this. I used a jst style connector.<br><img class="image_resized" style="width:50%;" src="https://media.printables.com/media/prints/279013/rich_content/6de4454c-3db0-44e8-ba6b-5dee0f2128b2/20220911_145441.jpg#%7B%22uuid%22%3A%227c85a1e4-66fd-4923-86e9-f1a503c6e15a%22%2C%22w%22%3A3000%2C%22h%22%3A4000%7D"><img class="image_resized" style="width:50%;" src="https://media.printables.com/media/prints/279013/rich_content/691ca918-9e1b-4e7f-adb2-3ab38aba3b3a/20220911_152849.jpg#%7B%22uuid%22%3A%22036a8f53-f296-45b9-97f5-ae7b2f38cd21%22%2C%22w%22%3A3000%2C%22h%22%3A4000%7D"><br><br>Install the Battery mount and plug in the cables.<br><img src="https://media.printables.com/media/prints/279013/rich_content/3313c96e-273b-4efc-aaad-dd43568b30d2/20220911_182223.jpg#%7B%22uuid%22%3A%221662aa2a-ee46-49c1-aab6-c7d5b0ef2f3f%22%2C%22w%22%3A3000%2C%22h%22%3A4000%7D"><br> </li><li>Now simply screw on the cooler to the driver models and press fit the helmets on the pegs. Install it into the chassis with 4 screws. </li><li>Install the roof and hood of your choosing. Remember the hood can take longer screws.<br> </li><li>If you went with a different style connector for your battery you will need to solder a lead to your stock battery. Remember not to cut both wires at the same time. <br><img class="image_resized" style="width:50%;" src="https://media.printables.com/media/prints/279013/rich_content/f627966b-a7b1-4ce6-8bd5-06f573ba1c38/20220911_182322.jpg#%7B%22uuid%22%3A%222da4ae7b-1ea0-4f12-a44a-59699ae138d1%22%2C%22w%22%3A3000%2C%22h%22%3A4000%7D"><br>When installing the battery, slide under the front bar and plug it in. Take the balance lead and tuck it behind the bar. </li></ol><p> </p><p>If you have any questions, recommendations, or tips please leave a comment. If you like this post please give me a thumbs up. <br><br>If you do make this model please post a make as I would love to see the builds. </p><p> </p>
With this file you will be able to print RBX24 (SCX24 Rock Bouncer) with your 3D printer. Click on the button and save the file on your computer to work, edit or customize your design. You can also find more 3D designs for printers on RBX24 (SCX24 Rock Bouncer).