RC-Benchy
prusaprinters
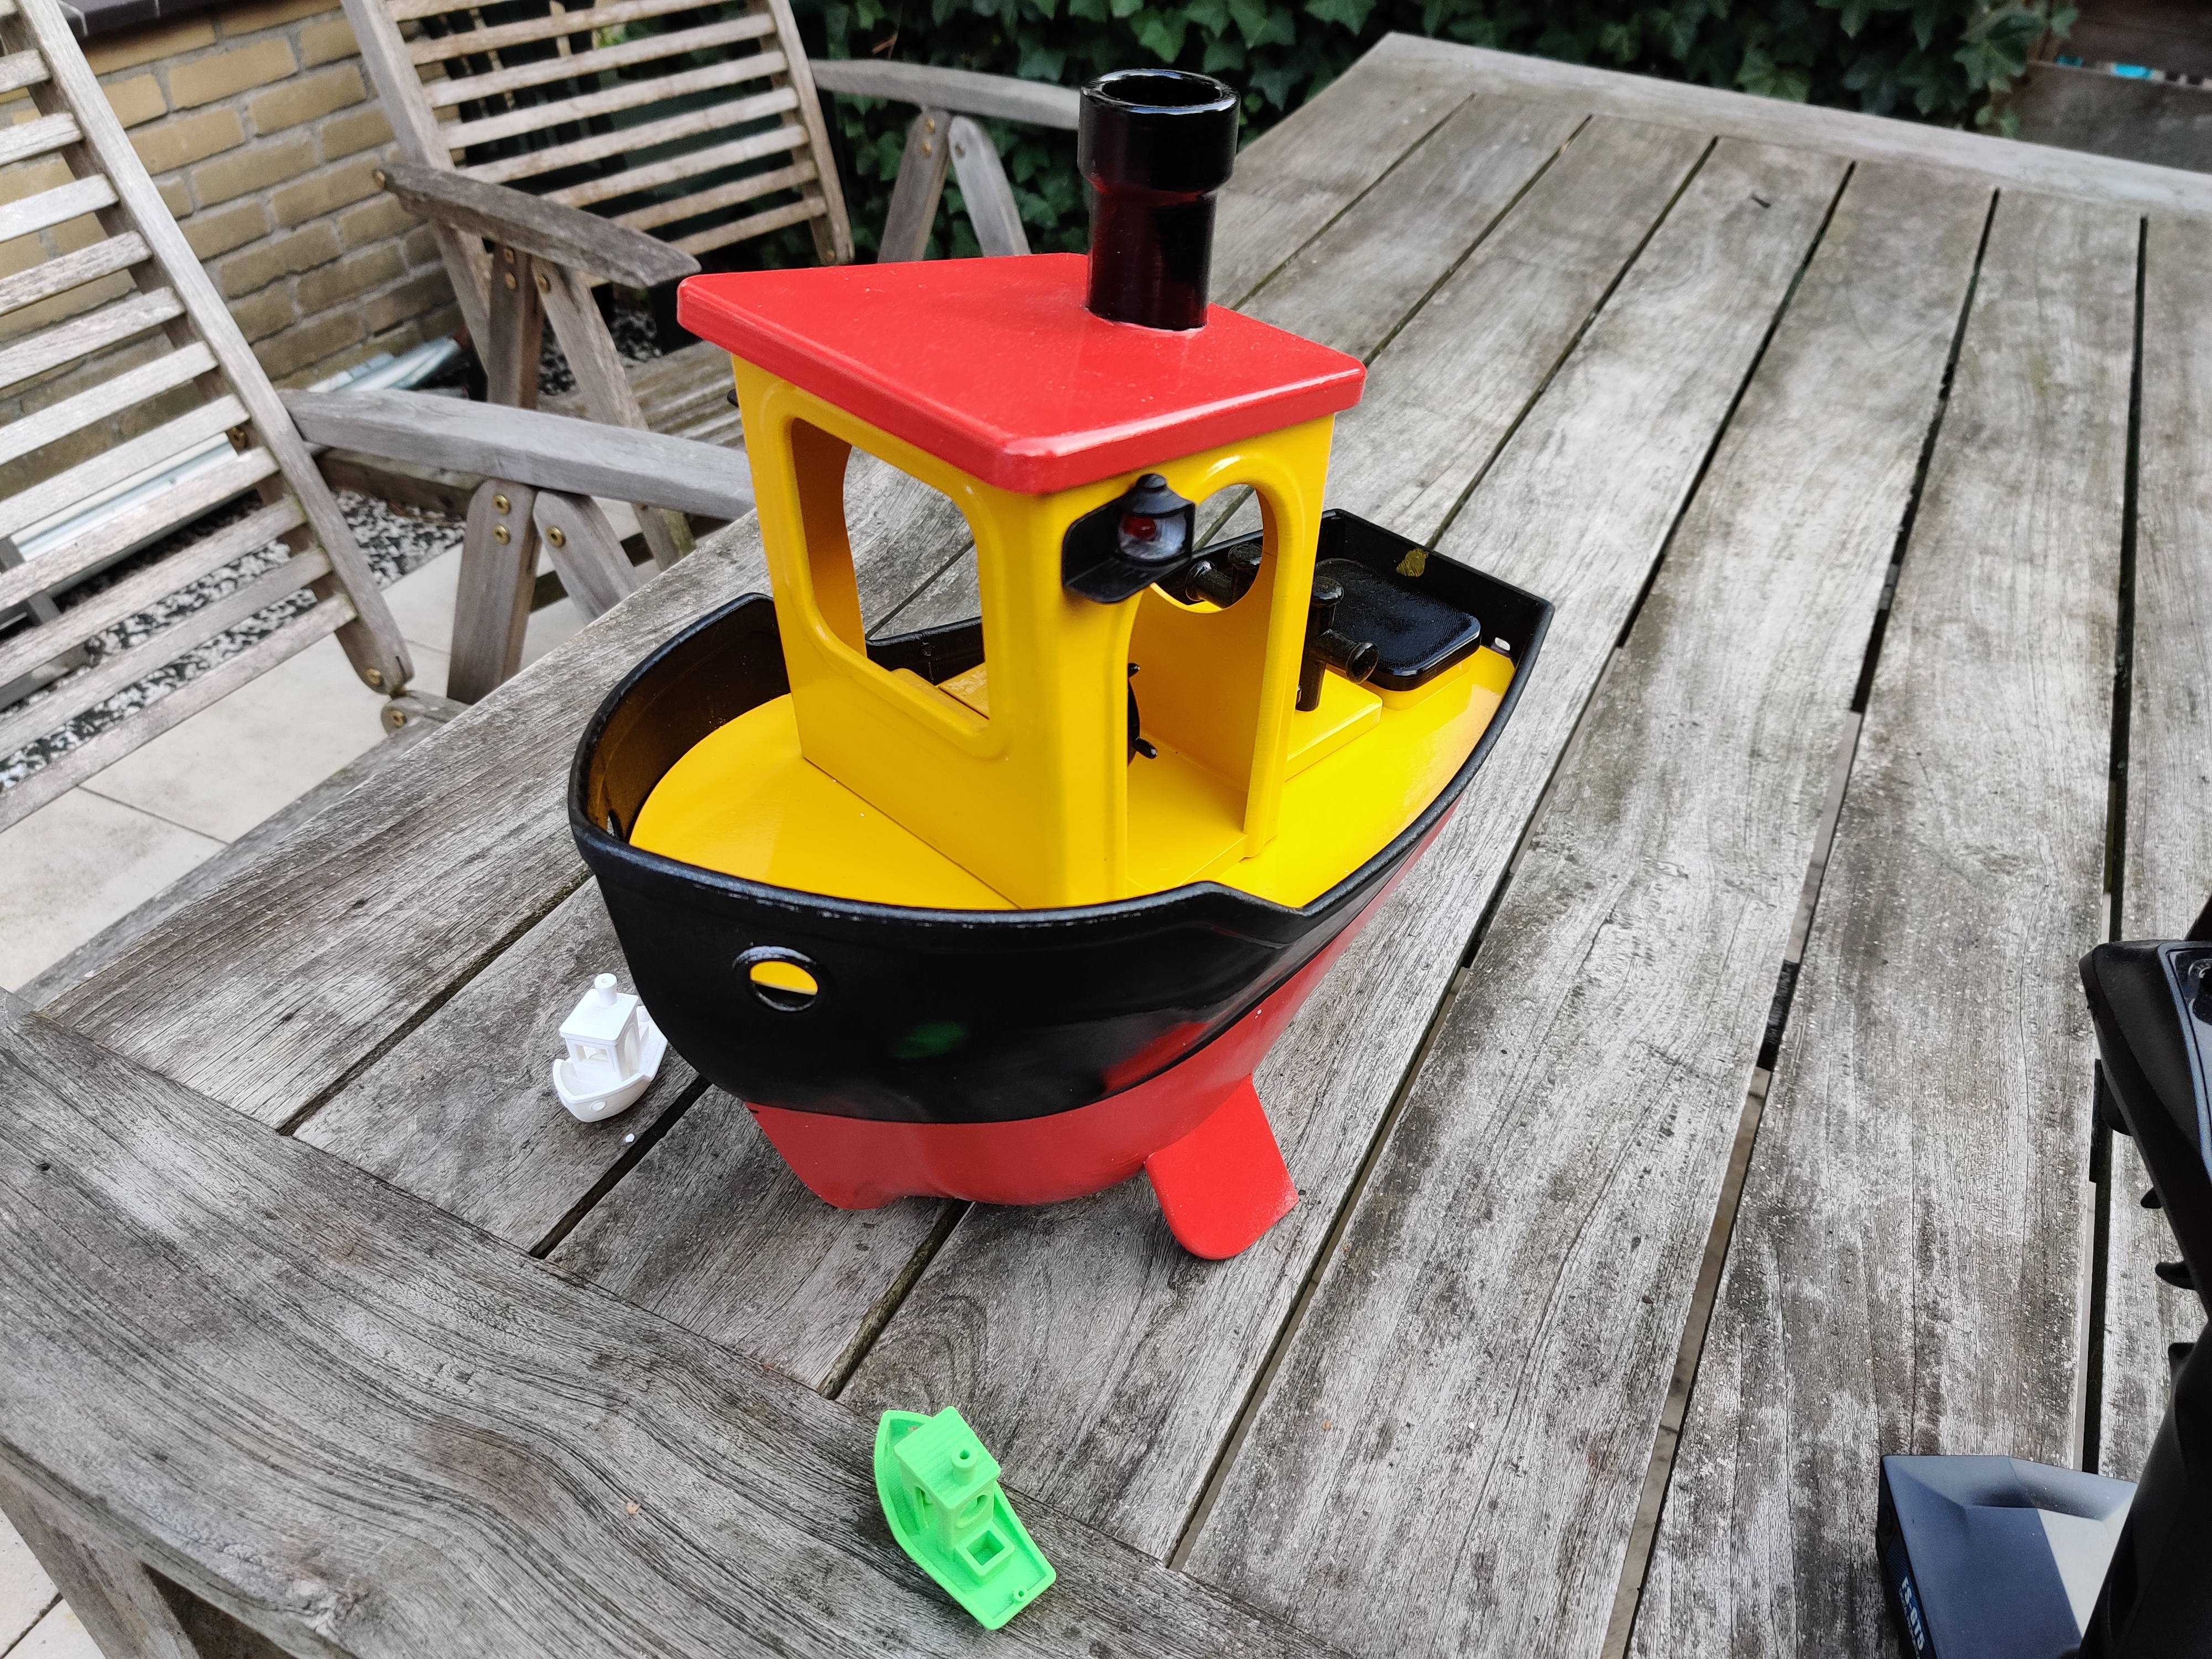
<p>This is my version of the RC Benchy by Thulen.</p><p>I modified almost every piece.</p><ul><li>Hull: Added stabilizer to fronthull and weed-diverters to the back. Changed the shaft part to accomodate the shaft with grease nozzle.</li><li>Deck: used the access hatch by <strong>simon5492 </strong>but modified the cover to go over/around the box instead of sitting on it.</li><li>Cabin: changed the sidelights to a smaller backplate and added hole for 5mm led</li><li>Cabin: used the servo mod by <strong>Lowtus77 </strong>but that required cutting the existing cabin and steering wheel. Made cabin with hole for servo and the housing did not fit my sg90 so I changed that too. Made steering wheel to be fitted over the servo and screwed down</li></ul><p>I needed to add support enforcers to the front hull. Maybe if you have a well tuned printer and profile this can be printed without supports.</p><p>I have made 2 versions of the front-hull. One that prints in one piece and another that allows the wings to be added later.</p><p>The sidelights need a hole to be drilled at the location you want to add them. I made an attiny85 print that can translate the channel3 signal. It has 3 modes. Off, one on, two on. Currently I'm only using one on to turn both LEDs on. I went for the simple option of getting 5V ready LEDs so I did not need to add a resistor. There are also ready to use cables available but they mostly use channel 4 and cycle through modes when double tapping. (edit: it seems there are options for this I just discovered)</p><p>Glue together both hulls. Be sure to align the sides and bottom middle. I have not made an easier way to do this. I think adding holes for dowels would be helpful in aligning it.</p><p>Needed for the build:</p><p>RC-transmitter. I used: FS GT5</p><p>RC-receiver: I used: FS2A 4 channel</p><p>Option: light control. search for “LED Lamp Light Control Switch Panel System Turn On/Off 3CH for RC Car Vehicle” You can also just wire it up to be always on. I used attiny for this. (https://www.pcbway.com/project/shareproject/RC_signal_decoder_switch_2d58e924.html)</p><p>Lipo: 2S 2200 that fits the compartment. around 10cm long. strap velcro around it.</p><p>Brass pipe and rod: 10 cm long 3 mm brass rod, and a 48 mm long 4mm OD/3mmID tube. It will probably need some sanding down of the rod to move freely. (and grease)</p><p>Propeller shaft: 4mm diameter 10 cm long, with a sleeve that is 5 cm long and 9.5 I used one with a grease nozzle to be able to lubricate without taking it apart.</p><p>Shaft coupler: 4mm to 3.175mm </p><p>Motor: 2212 1000kv brushless outrunner motor. I found out that the coloring of the wiring is different between one or the other motor. My second motor turned the other way although I connected it the same way with red,black,yellow wires. You can sand down one of the legs of the connections piece and use that behind the plastic of the hull to have more strength.</p><p>Brushless ESC with reverse: Most ESCs are for drones and will not reverse. Be sure to get one with reverse. Also the cheap ESC will burnout and have the motor shake instead of turn. Despite that the circuit turns off in case of overcurrent.</p><p>Servo's: One for the steering and one for the steering wheel. I used mg90 for steering and the sg90 with plastic for the steering wheel.</p><p>Servo cable splitter: You can solder the wires or use a splitter cable that costs around a dollar.</p><p>Magnets: 12 neodymium magnets 8mm diameter x 3 mm thick</p><p>Lead for weight: I got a bag of 1kg from a local diving shop. coated lead beads.</p><p>m3 screws: Countersunk screws 3x M3x6mm underneath for rudder support 2x M3x8mm for motor and one m3x8 plus nut for the steering rod connection on top (I used bhcs for that)</p><p>m6 screws: 2 M6 screws. I clamped down the towcleat and put an M6 tap through it, very gently. This way it's removable and strong. You can also just glue everything together without the screws but I wanted it strong enough to be able to really tow another boat.</p><p> </p><p>For building instructions Thulen did a great job. You can look there. Basically glue the hull together taking care to align it perfectly. There is a possibility to use the little holes to put some filament in. Leave the deck unglued until last. It will greatly reduce the possibility to adjust things inside. I glued the top and topboard together but did not glue that to the cabin. It was a snug fit so that is just fine.</p><p>I bent the brass rod at a 90 degree angle to go into the rudder. It wants to be a bit round. I filed down the rod until it could be inserted into the pipe without binding.</p><p>I used a dremel to trim off the top of the rod for the rudder so it stayed under the deck. You could possibly use a saw or cut it to length using pliers.</p><figure class="media"><oembed url="https://www.youtube.com/watch?v=i8HYo6D8Iio"></oembed></figure><p> </p>
With this file you will be able to print RC-Benchy with your 3D printer. Click on the button and save the file on your computer to work, edit or customize your design. You can also find more 3D designs for printers on RC-Benchy.