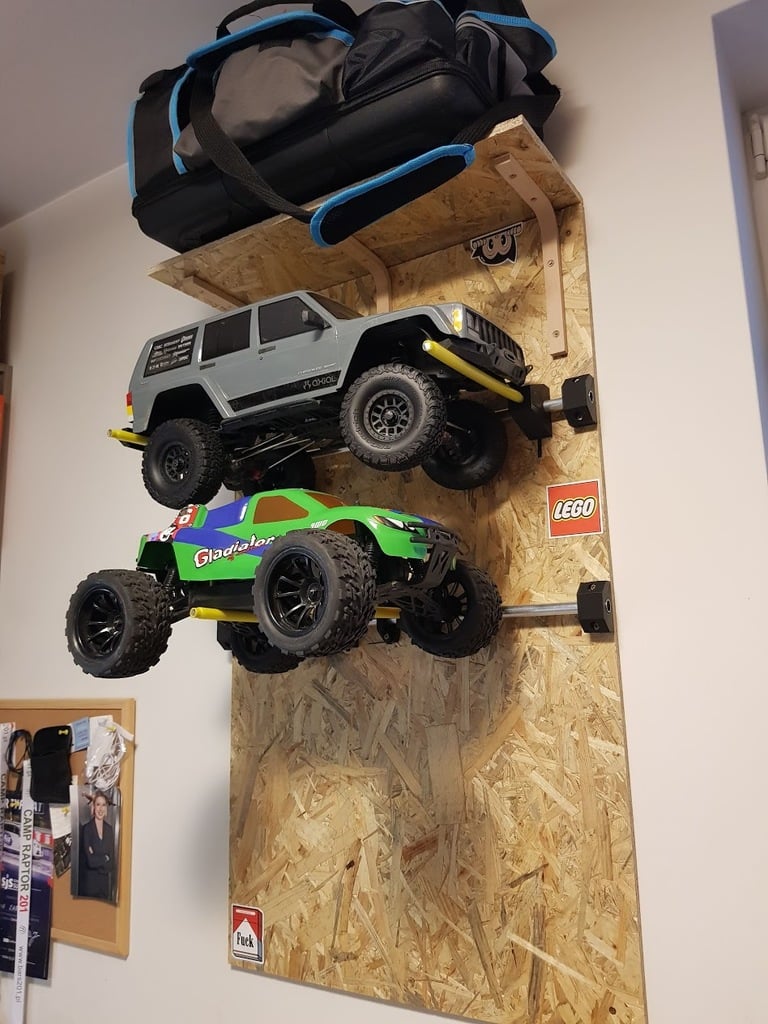
Rc cars shelf
thingiverse
Mine was done this way: 1. Cut OSB-3 board in proportion: 70 to 30 cm 2. Use any generic shelf support to mount a to szelf (30 cm piece) on top 2. Put m10x30 nut into "wieszak" cutout and than plug hole with printed plug (part of "wieszak". You can use glue to secure parts if you need. (i did). 3. Cut Aluminium bar to size: 60 cm 4. Put plastic parts in bellow order on the rod: 1. wspornik (on the side) 2. wieszak (this one is movable) 3. wspornik (put it on the middle - it's optional but recommended for long hooks) 4. wieszak (this one is movable) 5. wspornik (on the opposite side of 1st one) 5. Screw whole set of "wspornik" onto the board 6. Repeat for all of the shelf's 7. Cut threaded rod into desired pieces, 1 for each of the "wieszak" 8. Insert and cut heat shrinks on the thread rod pieces so 40mm of thread is not protected. 9. Shrink it with gaslight or hot air on the ends of shrink tube so it would be secured, this is your hook 10. Screw hook into m10 nut inside of "wieszak", note that if you screw it into the end it would lock itself onto the alu bar, so it would not be moving. Notes: If holes for aluminum bar are to tight heat them with hot air or similar and push bar through. Bill of materials for 4 shelfs: 1. OSB-3 Board 60x100 cm 10 mm thick x 1 pcs 2. Wood Screws 4x35 mm x 36 pcs 2. Aluminum bars/pipe 15x60cm x 4 pcs(1 for each shelf) 3. M10 threaded bar x 2-4 pcs (depends on how deep hooks are going to be) 4. M10 x 30 mm nuts x 8 pcs. 5. Your fav glue for plastic parts 6. Heat shrinking tubes 12mm for protecting thread on hooks 2-4 pcs 7. wspornik.stl x 12 pcs 8. wieszak_rc.stl x 8 pcs 9. Any king of standard shelf mounts if you like shelf on the top (as on pic)
With this file you will be able to print Rc cars shelf with your 3D printer. Click on the button and save the file on your computer to work, edit or customize your design. You can also find more 3D designs for printers on Rc cars shelf.
