RC Control surface throw gauge
thingiverse
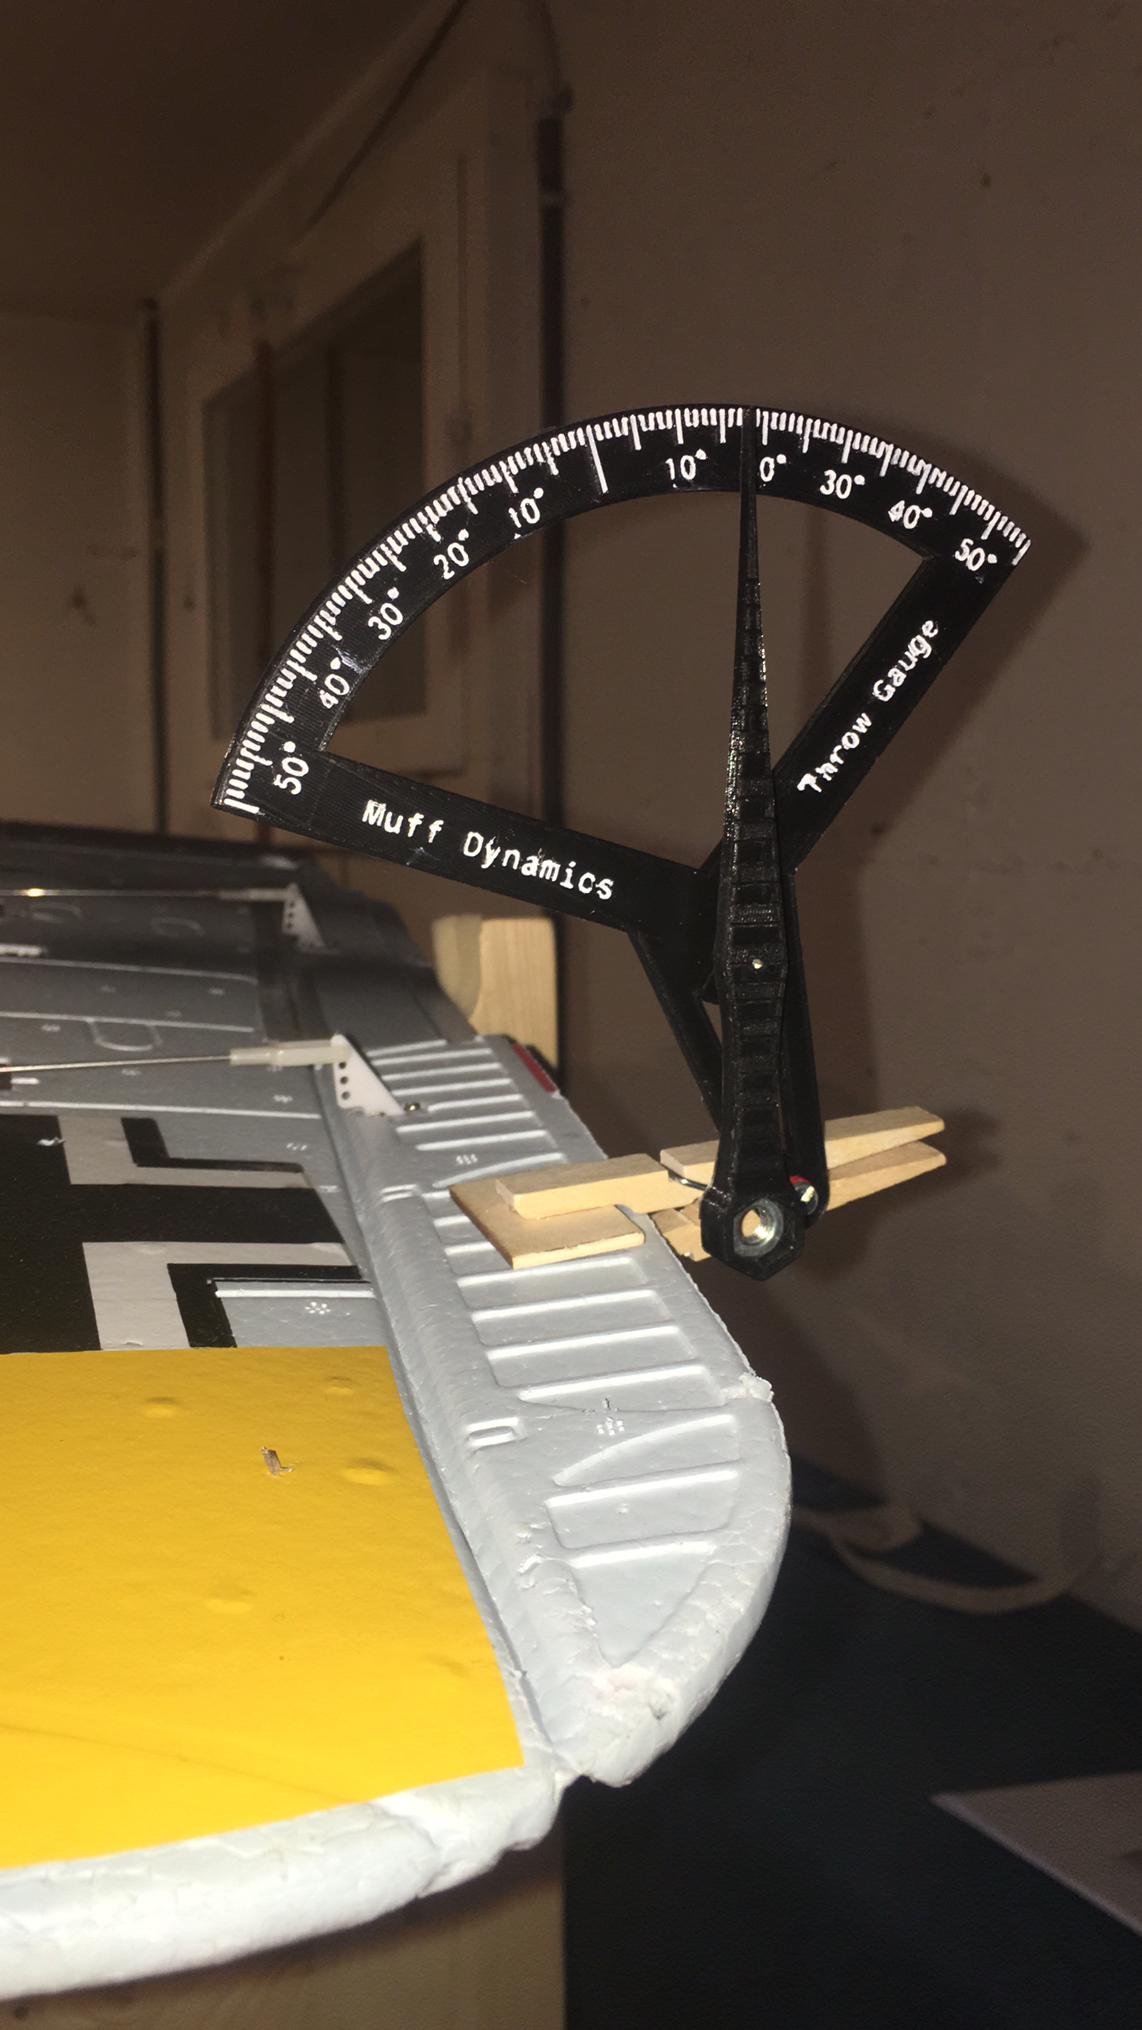
Firstly, inspired by weslewis' model - he did an excellent job and even made a video showcasing its construction: https://www.thingiverse.com/thing:3711163. This is my own version, capable of throwing up to 55 degrees. To build this, you will need the following parts: - An M3 bolt - An M3 nut - Two M3 spacers - An M6 nut (used as a weight for the needle) - A clothespin (I had to enlarge its hole with a 3mm drill and a bit for the two plates) - Two small wood plates to glue onto the clothespin - A 1.2mm axle (I obtained it from an old control cable from a standard plane, but you can drill it larger if desired) - Two droplets of glue (for the axle and plates) Building: Once printed, get the three parts clean and inspect the holes. It should be challenging to insert the axle into the gauge needle and the pin. The frame hole must allow the needle to rotate freely. Insert the M6 nut into the needle. Do this with the axle as well, applying a drop of glue to it before insertion. Next, insert the axle into the upper hole of the frame. It should still be able to rotate freely. Then, insert the little pin onto the axle, making sure the spike side is touching the frame (this helps reduce friction). Sand the clothespin and attach the wood plates using glue. Finally, screw everything together with two M3 washers around the frame. Feel free to reach out if you encounter any issues during construction.
With this file you will be able to print RC Control surface throw gauge with your 3D printer. Click on the button and save the file on your computer to work, edit or customize your design. You can also find more 3D designs for printers on RC Control surface throw gauge.