RC Speedboat with ducted fan
thingiverse
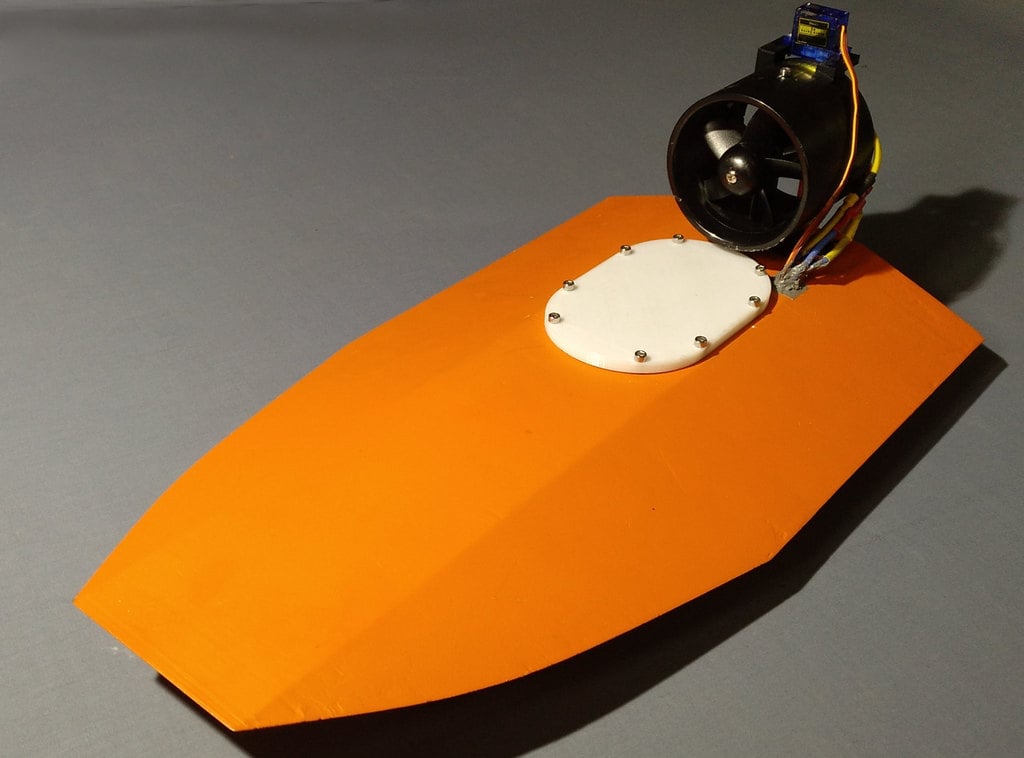
Speedboat with ducted fan ========================= The model: ---------- The boat was inspired by a YouTube-video where someone* has built a similar model. I didn’t find a printable model, so I have drawn one myself. *https://www.youtube.com/user/RcLifeOnSimon Additional needed parts: ------------------------ - 64mm ducted fan (Mail order from China: <https://www.banggood.com/QX-Motor-64MM-5-Blades-EDF-Unit-With-QF2611-4500KV-Brushless-Motor-p-1064602.html> ) - 9 g Servo (SG90) - 2.4 GHz remote control (min. 2 channels) with receiver. - Brushless motor-controller (mine has 40A) with BEC (Powersupply for the R/C receiver). - Several M3 screws. - 2 M2 Bolts and Nuts for the Servo mount. - Gasket for the cover. This is made of two usual tube- gaskets glued together with cyan- glue. It should have a diameter of 3.2-3.6mm. The total length is 290mm. - 3S Li-Po Battery - Optional a battery buzzer which gives an acoustic signal when the battery becomes low. - Some primer and paint. - Epoxy Glue to glue the two parts of the body. How to print: ------------- Generally, all parts should be printed with very few infill. 10% is a good number. Otherwise the boat becomes to heavy. ### Boat hull: Due to its size the hull must be printed in two parts on most home – printers. #### Front part: The front part should be printed with support “touching buildplate only”. Make sure that the overhang-angle is adjusted that no support in the center part is generated. #### Rear part: Use support- blocker to make sure that no support is printed in the threaded holes for the screws. ### Wing: The wing should be printed standing with the servo-side down. How to assemble: ---------------- ### Boat hull: The two parts of the boat-hull must be glued together. 2-component epoxy-glue works best with PLA. The glue can be also used to fill and smoothen the small gap between the two segments. To seal the printed parts and to fill small leakages the hull should be sprayed with filler first, sanded and sprayed with color-spray. While spraying some bolts should be placed in the threads to avoid that the threads become unusable. The printed hull has no cable conduit to the fan. That hole must be drilled after printing in the size of the wires used. After installing the wires, the hole should be sealed either with epoxy-glue or silicone. ### Fan-Holder: The ducted fan should be fixed by a screw in the holder. For the screw a hole must be drilled through the holder and the fan-tube. Make sure to find a position were the fan does not touch the screw. ### Gasket for the technical compartment The gasket is glued together from rubber – gaskets for tubes to fit the size. It should have a diameter of 3.2-3.6mms. The total length is 290 mm. If you find a round gasket with a diameter of 92.5mms it would be perfect. Cyanoacrylate glue is perfect to glue rubber. ### Wing-holder: The lower wing – holder is mounted at the rear side of the boat. It can be fastened with M3-screws but it is a good idea to add some glue additional. The part is not symmetric: The hole must face away from the end of the boat. Video: ------ https://youtu.be/Zten7D27IQI
With this file you will be able to print RC Speedboat with ducted fan with your 3D printer. Click on the button and save the file on your computer to work, edit or customize your design. You can also find more 3D designs for printers on RC Speedboat with ducted fan.