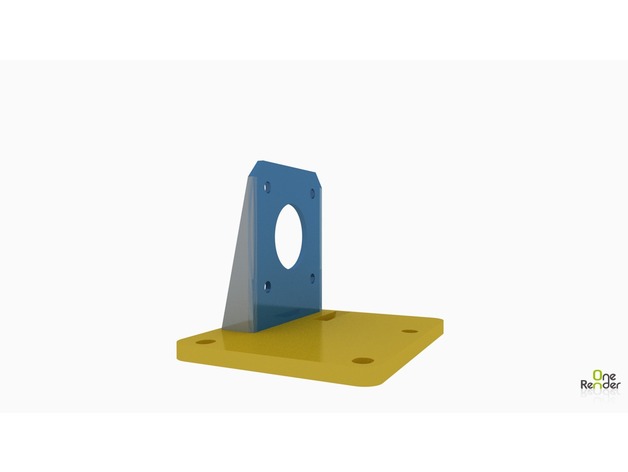
Reach 3D Titan Extruder Mount and Prox Sensor
thingiverse
Custom Mounts for the Reach 3D Printer to mount the E3D Titan Direct Drive Extruder and Solid 2 hole mounted Proximity Sensor for Finer adjustment than the stock mount. The Brackets may need a little more tweaking, and if they do not line up quite right, please let me know in the Reach3D G+ Community so I can correct them. Print Settings Printer: Reach 3D Printer Rafts: No Supports: Yes Resolution: 0.1 Infill: 20% Notes: Resolutions, speeds, and other things are irrelevant, print what you are comfortable with. 0.1 mm Resolution gave a finer appearance to the files for me. Post-Printing Hardware Needed: Additional hardware needed are as follows: 2 x M5x50 2 x M5x30 2 x 1/2" 3/8"OD .219 ID Spacers ( Got mine from AluminumSpacers.com Happy with them ) X Limit Switch can use redoing. I did not on mine though, I just clipped the ends of the plastic for mounting hole and made it a slot to work. Assembly is a bit tricky. Before you mount the Titan and motor to the mount, I found it better to assemble the top left piece to the bracket as it sits behind the motor block. with the M5x50 screw it's Top Proximity Sensor, 1/2" Spacer, V Wheel, 1/4" Spacer, metal block, Titan bracket, X Limit Switch (butt of switch sits on end of bracket), nut. I have a gap in the mount for the motor to allow for the nut. Assemble the Titan per E3D's instructions. Top Right hole is M5x30, V Wheel, 1/4" Spacer, metal plate, Titan bracket, nut. Bottom holes are the same as their respective top holes. Make sure you have your Belt mounted to your X plate prior to mounting bottom Wheels. Assemble and tighten as normal. May I recommend a part cooling fan also with this setup as it will compliment the E3D Hotend. I have 2 things added to my Reach Collection that you can get to serve this purpose. And re-use the 40mm fans Nate included with your Reach. E3D Piggy Back Fan mount. and the 40mm to 30mm adapter plate. I used M3x8 and M3x16 for the brackets and adapter. In your firmware. Be sure to change your settings for the Extruder Steps per MM as per E3D's specifications. It's a precisely machined Extruder, I found no need to tweak it on my setup. Now for the Proximity Sensor Offset settings, I used: "#define X_PROBE_OFFSET_FROM_EXTRUDER -10 // X offset: -left +right [of the nozzle]" "#define Y_PROBE_OFFSET_FROM_EXTRUDER 45 // Y offset: -front +behind [the nozzle]" "#define Z_PROBE_OFFSET_FROM_EXTRUDER 0 // Z offset: -below +above [the nozzle]" Y offset is actually 85 but, the printer can't use that setting as it can't move the Hotend far enough. Trust me, 45mm is ok. I also do a 9 point bed level on mine. Not necessary, but to each their own. Just use the 2 nuts and washers that came with the Prox Sensor to tighten and adjust your height. Once you have it dialed in and tight, you should not have to worry about it again. But it won't hurt to check it from time to time. :-) How I Designed This These prints were designed using OnShape's Free license. They are public and you may make adjustments as you see fit. Or improve on them. They are crude and designed to get the E3D Hotend functional with the Reach 3D printer.
With this file you will be able to print Reach 3D Titan Extruder Mount and Prox Sensor with your 3D printer. Click on the button and save the file on your computer to work, edit or customize your design. You can also find more 3D designs for printers on Reach 3D Titan Extruder Mount and Prox Sensor.
