Reconfigurable Multi-jaw Vise
prusaprinters
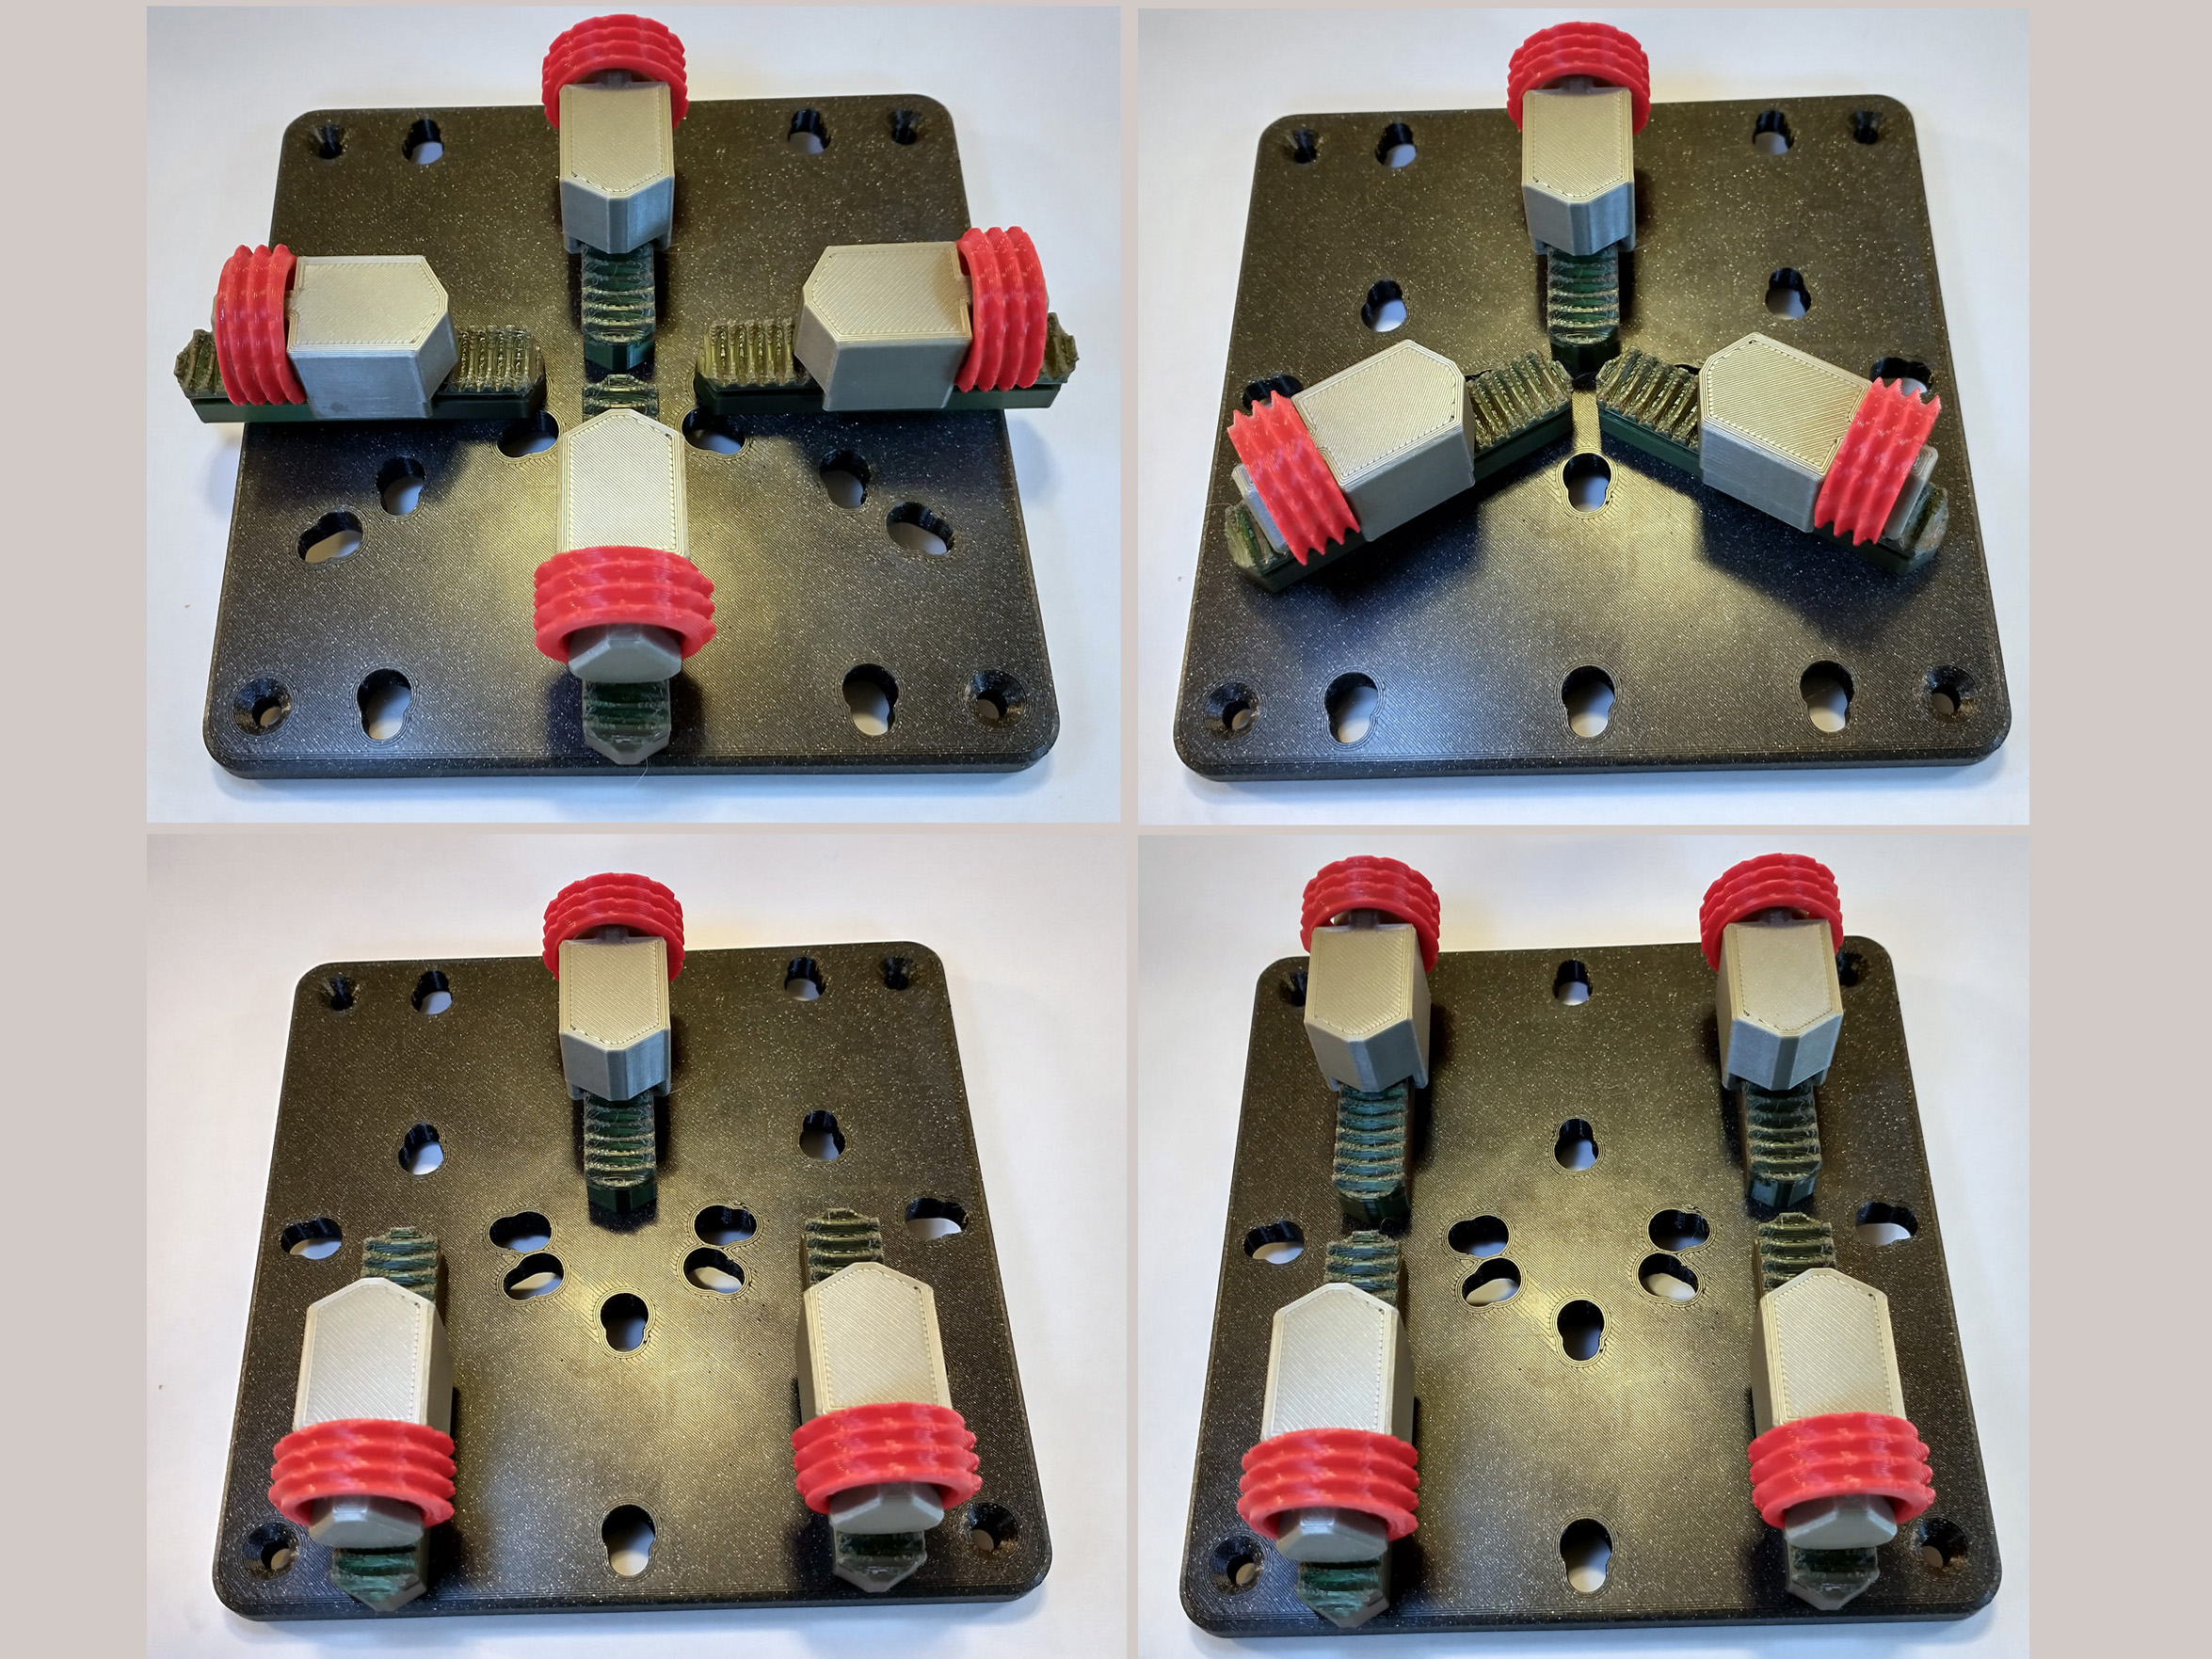
<p>This multi-jaw vise consists of a base plate and 3 or 4 rack & worm jaw units. Pins in the bottom of each rack slip into keyhole slots in the base for quick reconfiguration. Each jaw slides onto grooves in the rack, trapping a worm/knob between the jaw and the rack teeth. Rotating the worm/knob pushes the jaw along the rack.</p><p>The pins in the bottom of the rack are arranged asymmetrically, and the jaw/worm can be assembled pointing in either direction. Flipping the rack one way will allow the jaw tips to touch for holding very small parts. Flipping the racks around will allow you to hold larger parts. (As shown in the 2nd and 3rd photos.)</p><p><strong>Printing</strong><br>All parts are printed in PLA and without supports. I would recommend PLA over other filaments as it is harder and stiffer, and less likely to deform under loads. After printing work all of the mating parts together until they slide smoothly. I used 0.2mm layers for my prints, but a finer layer height may reduce the amount of "breaking-in".</p><p><strong>Assembly</strong><br>First, the pins need to be inserted into the bottoms of the racks. Notice that the pins have a flat side – the flats should be facing away from each other when inserted into the rack. The pins should be a pretty tight fit and will been to be tapped into place with a small mallet. If your pins are too loose, try scaling them up (in Y and Z to increase the diameter), or just use a drop of superglue to hold them in place. The should be tapped in all the way to the bottom of their holes.</p><p>Next, slide the pointy end of the jaw onto the rack partway and then slip the worm onto the post at the end of the jaw. With the worm pressed against the body of the jaw and tucked in under the lip at the end, push the jaw all the way onto the rack as you screw the worm clockwise. This will thread the worm onto the rack teeth, leaving it captured between the jaw and the rack.</p><p>At this point, each rack piece can be inserted into a pair of keyhole slots in the base plate and pushed backwards into the slots. As you clamp onto and object, the pins will be pushed back and locked into the slots.</p>
With this file you will be able to print Reconfigurable Multi-jaw Vise with your 3D printer. Click on the button and save the file on your computer to work, edit or customize your design. You can also find more 3D designs for printers on Reconfigurable Multi-jaw Vise.