Recymbol - Customizable recycling symbols and library
prusaprinters
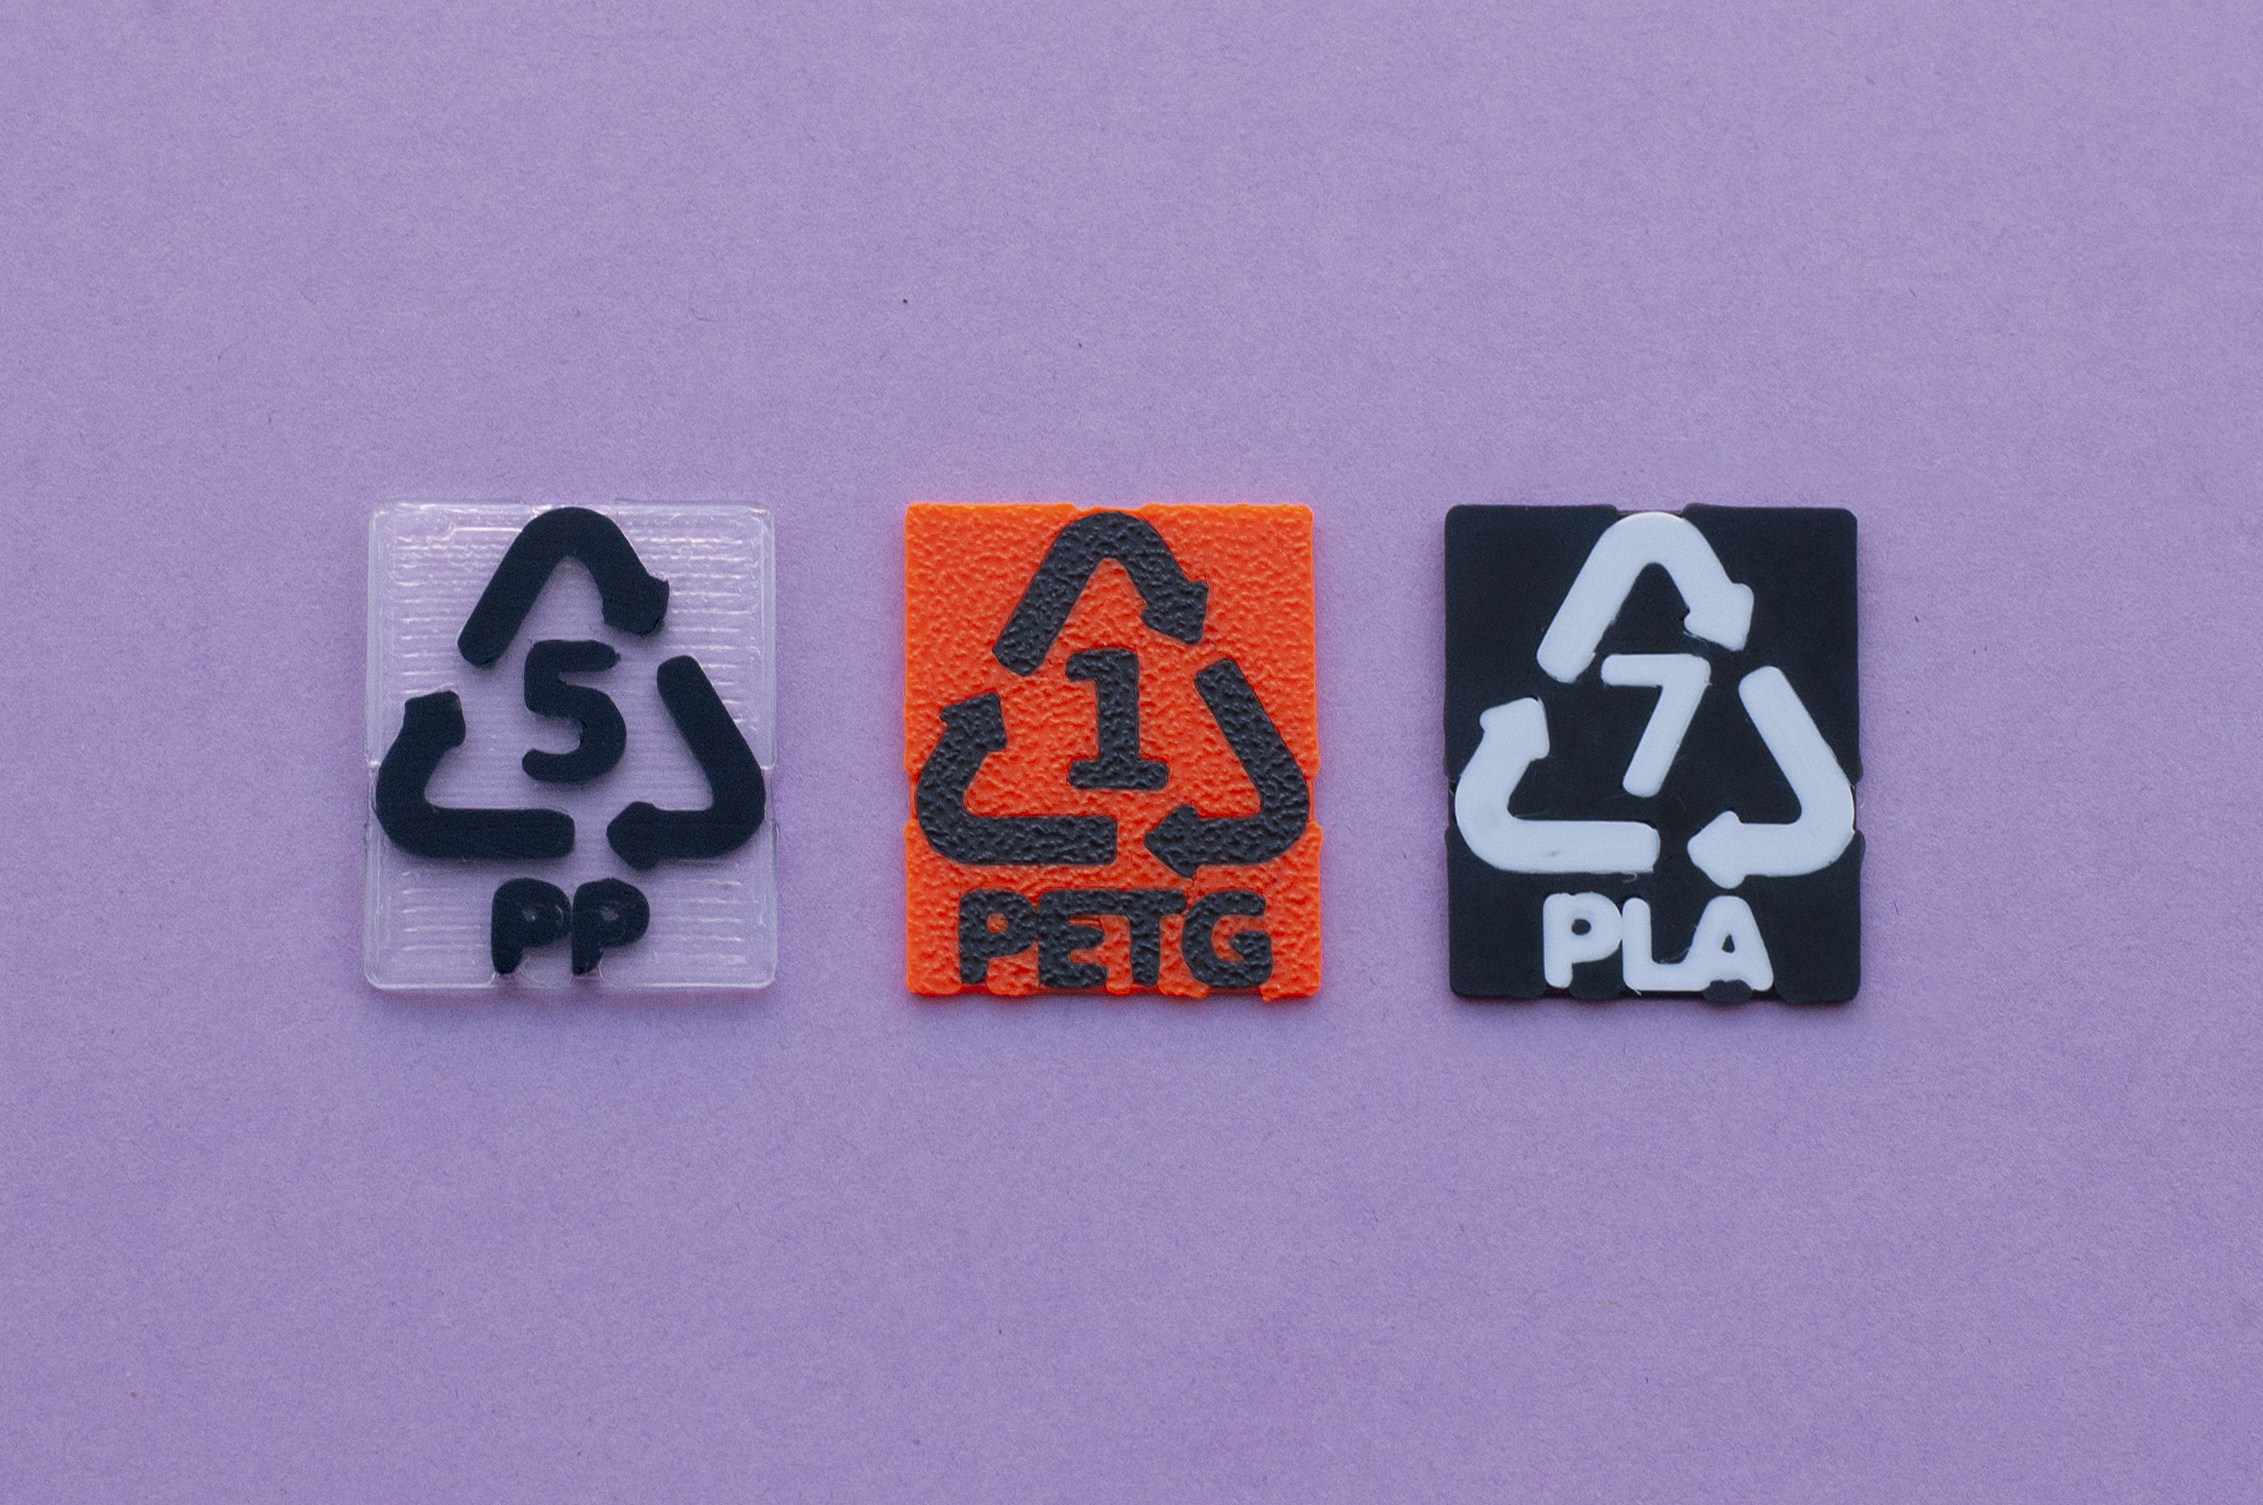
<p><i><strong>UPDATED 2022-08-06 (v1.1)</strong></i><strong>.</strong> TL;DR: Added small improvements, fully backwards compatible. See full changelog at the end of the description.</p><p> </p><p>This set of tools includes a set of STLs in the same size as those in PrusaSlicer, an OpenSCAD customizer and an OpenSCAD library (which are basically the same). You can create symbols for anything, not just plastics… and even customize the codes and more!</p><p>First, a set of STL is provided, in DejaVu Sans bold font and two styles: a "plain style" in the default size (that of PrusaSlicer, see the example picture), and with a 0.2mm offset or positive clearance (you'll see why just below). The OpenSCAD customizer has a whole bunch of self-explanatory parameters, allowing you to easily customize the output. You can add offsets, change fonts, use a "stack" of symbols (which print well with stepping overhangs, allowing for color change), and more. Finally, the library is basically the same file as the customizer, minus the parameter sets and the code execution, so you can "include" it in a straightforward manner; I recommed to set it in a "Recymbol" folder in your OpenSCAD library folder (so you only need to add <include Recymbol/library.scad>). There's plenty of inline documentation in the file, so the more daring users can have it readily accessible.</p><p>The whole set of options allows many uses. Add the symbol to your swatches, and know which material is at a glance (and allow recycling when you no longer need the swatch). Even more, you could, say, use code 22 and PAP (for paper) and a stencil font to easily make a stencil to mark things with paint. Or even some creative effects... like the "3D PRINT" logo, or <a href="https://www.prusaprinters.org/prints/136243-customizable-recycling-symbol-rings-signet-embossi">my recycling rings</a>. The "stack" option can be used in combination with z-based color change, as there is some height (the "base height") where the symbol does not overhang.</p><p>My favorite trick, though, is using the negative volume modifier in PrusaSlicer to use the "print on print" technique by Davin Montes, from the Make Anything YouTube channel, to integrate a different color symbol without a MMU unit (<a href="https://www.youtube.com/watch?v=KV2AjyowXX4">see it here</a>)! Basically, you align the object and symbol, slice and print the symbol (make it two layers tall at most!!), remove skirt and purge line, and print the object on the symbol still on the bed. (Of course, you may also use the "virtual extruders" technique, if you like it more.) I found that a clearance of 0.2mm works well for this process; either a positive offset for the negative modifier, or a -0.2mm offset for the symbol itself. (I'm using a 0.6 Nozzle-X, so YMMV.) Also, I found that the negative volume modifier tends to distort the symbol to fit the modified object, so you may need to load another copy (not as a modifier) to resize appropiately the negative modifier. But two layers are usually enough to display the right color, and having it flush to the base (and no color changes, no MMU) is a great advantage.</p><p>There is also a .3mf example file. You can delete the symbol or object, slice it, undo, delete the other and slice. And presto! You may replace the STLs with other generated models to have it ready to go.</p><p> </p><h5>CHANGELOG</h5><p>2022-08-06 (v1.1)</p><ul><li>Added new automatic recognition for material PETG_US. This will set the material to “PETG” and the recycling code to 7, instead of 1. Thanks to <strong>Johntron</strong> for pointing the issue.</li><li>Parameters added:<ul><li><strong>code_spacing</strong>: Spacing for the text code inside the arrows / triangle.</li><li><strong>text_offset</strong>, <strong>arrow_offset</strong>, <strong>code_offset</strong>: Additional offsets for each separate element, for better printability. These are added to the overall offset (parameter <strong>offset</strong>).</li></ul></li><li>Included a (possibly much needed) reference in PDF format.</li><li>Included the “Using OpenSCAD customizer” guide for those new to OpenSCAD. Seriously, you can use it without having any idea of how it works! Try it!!</li></ul><p>This version is backwards-compatible, meaning that it can be used with models that used Recymbol 1.0. The new parameters are defaulted to the formerly hard-coded values (0.9 for <strong>code_spacing</strong>, 0 for all the new offsets).</p><p>Any new model using v1.1 with version 1.0 installed will work mainly right, only throwing some errors of inexisting parameters, and obviously the new features won't be available. </p>
With this file you will be able to print Recymbol - Customizable recycling symbols and library with your 3D printer. Click on the button and save the file on your computer to work, edit or customize your design. You can also find more 3D designs for printers on Recymbol - Customizable recycling symbols and library.