ReDuplicator i3 MK3x - MK52 Removable Heatbed Expansion
thingiverse
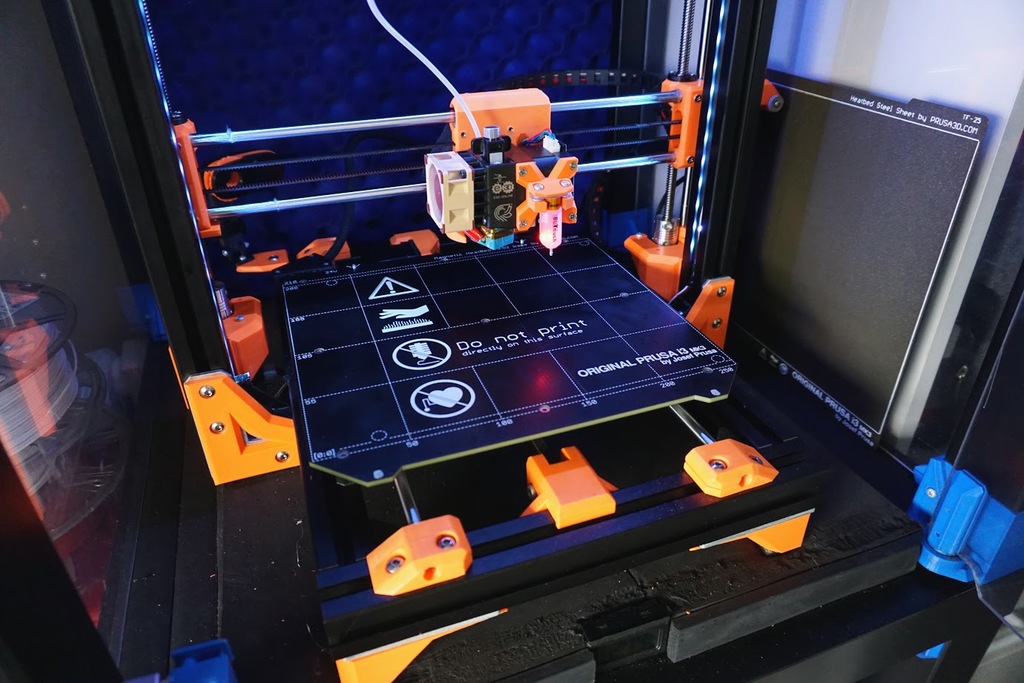
This is a documentation of the installation process for an MK52 expansion on a 3D printer, specifically the ReDuplicator-MK2sx model. The document provides detailed instructions and images to guide the user through the assembly and installation of various components. Here's a breakdown of the content: 1. **X Gantry Assembly**: The X gantry is assembled using M3 nylocks and screws to clamp the idler and motor to the z bearings. 2. **Idler Tensioner System**: An improved tensioner system is introduced, which includes two heatserts in the rear of the tensioner part. Two 20mm M3 screws are required to clamp the X idler and tensioner together. 3. **Z Rods Assembly**: The Z rods are assembled with a distance of 396mm between them. The Z rod top holding pieces should be flush with the edge and top of the tower extrusions, and should fit snugly. 4. **Y Bearing Assembly**: The bearings are inserted into the Y bearing holders using M3 nylocks and secured to the Y carriage with 22mm-25mm M3 bolts and washers. 5. **Y Belt Tensioner**: A new belt tensioner is introduced, which requires two m3 nylocks to be press fit into it. The belt is mounted by looping it around a 12mm M3 screw and tightening it with a 35mm M3 screw. 6. **Heatbed Installation**: The MK52 heatbed can be installed using countersunk 12mm screws and nylock nuts for precise leveling. 7. **Soldering the Heatbed**: The heatbed must be soldered to be low profile enough that it doesn't collide with the hotend cooling system. 8. **Heatbed Cover Installation**: The heatbed cover is installed using fasteners provided with the heatbed. The document concludes with a changelog, which indicates that this is version 1.1 of the documentation, and includes major updates to improve X gantry rigidity, introduce a new X tensioner, and improve Z rod top and motor mounts. Overall, this document provides detailed instructions and images to guide users through the assembly and installation of various components on an MK52 expansion for a ReDuplicator-MK2sx 3D printer.
With this file you will be able to print ReDuplicator i3 MK3x - MK52 Removable Heatbed Expansion with your 3D printer. Click on the button and save the file on your computer to work, edit or customize your design. You can also find more 3D designs for printers on ReDuplicator i3 MK3x - MK52 Removable Heatbed Expansion.