Reef Delete Easy Arm Holder
thingiverse
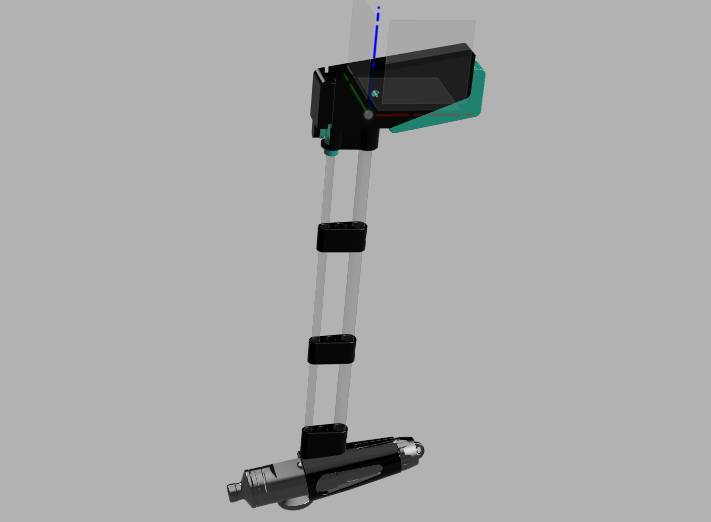
Reef Delete Easy Arm Additional parts required: 1x Acrylic Rod 6mm (available on eBay, craft stores + some LFS as coral pointers) choose length yourself - buy spares incase of assembly/cutting errors 1x Acrylic Rod 10mm (available on eBay, craft stores + some LFS as coral pointers) choose total length yourself - buy spares incase of assembly/cutting errors 1x Nut+Bolt M4 x 30MM - ideally nylon - but stainless or titanium will work. Small rubber band or O ring Super glue - for gluing 10mm rod only. Tools: 4mm, 6mm and 10mm drill bits + drill Sand paper Sharp Jnr. Hacksaw for trimming rod - or Dremel with cutting disc (easiest) Print Instructions: Print all parts - ideally in ABS - we suggest using a raft for the trigger and reef delete body holder to ease of print. Ream out all printed holes as required for the Nut/Bolt/Acrylic Rods in all parts where fitment is not tight. We recommend a wiggling the 6mm drill bit around when reaming to make the 6mm holes slightly oversize to reduce friction. Note some parts can be a tight/loose fit due to tolerances in 3d printing and the printer’s own calibration in XYZ coordinates + acrylic extruded rod can vary in thickness. It make may the difference between too loose or too tight. Adjust as required with scaling or slight sanding + reaming of holes with a drill. Assembly - Refer to the photos on this page 1. Check you have all parts including 2x of the rod supports 2. Insert 6mm rod into rod cam and glue in place, align as per photo and insert into the trigger body first. This should be able to move freely up and down inside. Sand part sides down if required. Push all the way up so you can then insert the trigger handle and insert the bolt through the assembly and do up hang tight. This does not need to be very tight - its just to act as a lever point. 3. The whole assembly should look like this and the handle move up and down freely, pushing the rod up and down. 4. Attach elastic band or a suitable O ring to act as a return spring. You don’t want this too strong, otherwise it will still make your hand ache! Check action as per trigger action video on the Reef Delete Official Owners Group - in the files section - it should all move freely and easily and push the rod out when the trigger is pulled. 5. Using a jar Hacksaw or Dremel - You will need to trim the 10mm acrylic rod down in length, using sand paper to tidy the edges of the cut so that you have several mm of 6mm rod going into the Reef Delete holder. This length of 6mm rod poking into the holder is critical so it can reach the Reef Delete button so keep checking fitment. Adjust as required. 6. Final assembly and checks. Unscrew Reef Delete battery tube, insert Reef Delete body into the holder, refit the battery tube and tighten up. Check that the 6mm rod can push the button down and activate the Reef Delete easily. If you need to adjust this - Cut down 10mm rod to get more length on the 6mm rod if required as per part 5 Assemble as per photo 6. Glue the Rod into the supports ensuring they are evenly spaced and into the trigger and holder, evenly spaced with glue ONLY on the 10mm side. The 6mm side should move freely and is to be only glued into the trigger cam. If using Stainless nut/bolt ensure on the handle and it gets wet, make sure you rinse with freshwater and hand dry after use to avoid rusting.
With this file you will be able to print Reef Delete Easy Arm Holder with your 3D printer. Click on the button and save the file on your computer to work, edit or customize your design. You can also find more 3D designs for printers on Reef Delete Easy Arm Holder.