Refill Spool
prusaprinters
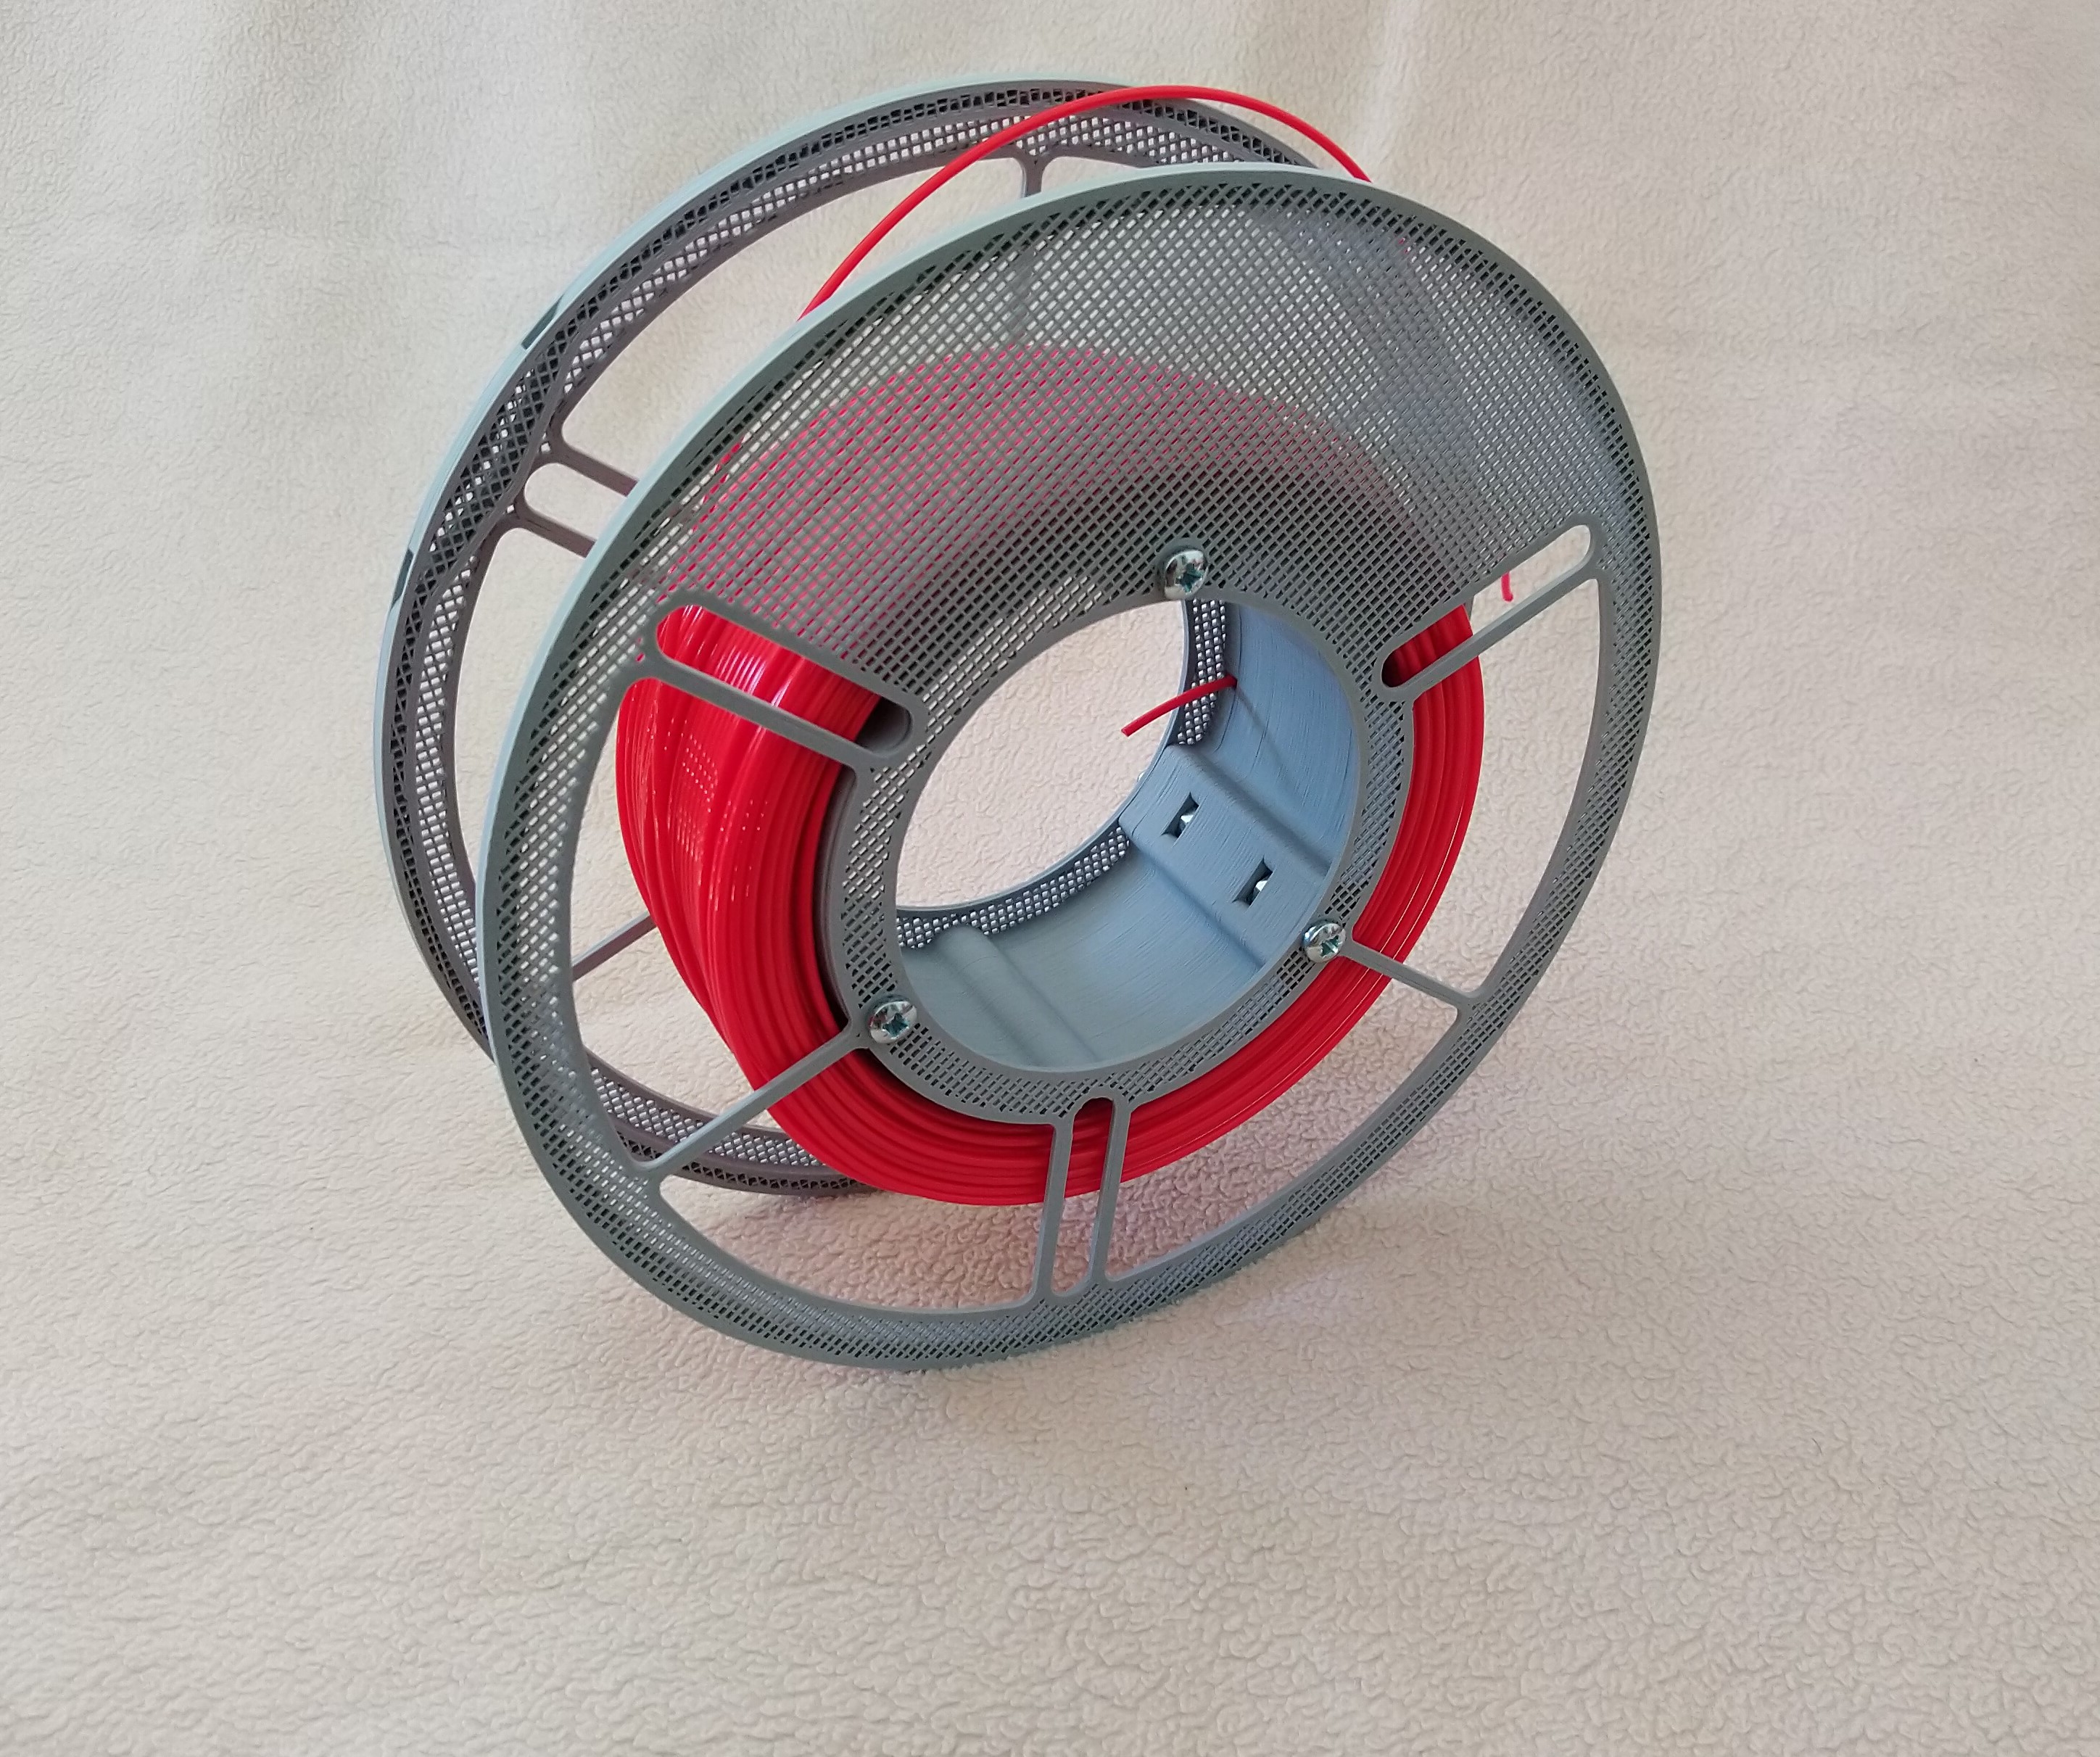
<h3>Motivation</h3><p>First off: Props to the MasterSpool by RichRap on Thingiverse (<a href="https://www.thingiverse.com/thing:2769823">https://www.thingiverse.com/thing:2769823</a>), which spawned this effort to create this thing.</p><p>It bothered me, that plastic spools turned to garbage once the filament was empty.<br>Having experienced some master spool designs, I thought why not to make your own.</p><p>Makers in my opinion sometimes overcomplicate things. Printing a big thread or fancy locking mechanism is cool and all, but could be solved easier.</p><p>This is designed for refills with a core diameter of no less than 100mm, outer diameter of no more than 198mm and a width of around 50mm (there is no real limit there - filament might sit a little loose if wound to thin).</p><h3>Setup</h3><p>This approach combines easy to print model and 6 M3 or M4 screws, which has everbody lying around. Done.</p><h3>Good to know</h3><p>You may want to print the side with the sticker with 1 or 2 bottom layers just for the sticker. In terms of time and material it does not really make a difference.</p><p>I printed it all without top and bottom layers to save time and material and ended up with less than 100g material and less than 4h print time (see settings below).</p><p>People who need a certain spool center diameter for fitting it onto something can easily create their own adapter plate to fit onto the screws. The diameter of the circle through all screws is 90mm.</p><p>I also added an extra 5mm spacers for people with wider refills (some distributors ship them with 1kg instead of 850g). This one is intended for M4, but works just fine with M3.</p><p>Have fun and hit me up, if things do not work out well.</p><h3>Detailed Print Settings using Prusa-Slicer:</h3><h4>Printer (set to expert mode):</h4><ul><li>Speeds all set to 190mm/s with bridges and first layer set to 50mm/s</li><li>Layer heigt 0.25mm, also on the first layer</li><li>Infill was rectilinear, 25%</li><li>3 perimeters - Tick "Detect bridging parameters"</li><li>0.4mm Nozzle and all layers set to 0.5mm width</li><li>Number of top layers set to 0, bottom layers set to 0 or 2</li><li>Max volumetric flow: 0mm³/s</li><li>No brim or skirt</li></ul><h4>Filament</h4><ul><li>Set "Max volumetric flow" to 18mm³/s (if your extruder makes awkward noises decrease this setting)</li></ul><p>This should give you an aproximate printing time of ~45min per side and ~2h for the core.</p><h4>UPDATES:</h4><p>23.04.2020:</p><ul><li>Removed "M3"/"M4" label from all parts since it is rather obvious</li><li>Fix some width issues to make some parts exactly 4 perimeters wide</li></ul><p>24.04.2020:</p><ul><li>Fix M3 champfer to correct angle of 45°</li></ul><p>15.05.2020:</p><ul><li>Change core width to 46mm in accordance to RichRap coil design. If the core is to slim for a coil, please use a spacer on one side. You can make thinner spacers by scaling them in z-direction.</li></ul><p>23.11.2021:</p><ul><li>Added adapter plate down to 50mm for a hook or bar to go through freely.</li></ul>
With this file you will be able to print Refill Spool with your 3D printer. Click on the button and save the file on your computer to work, edit or customize your design. You can also find more 3D designs for printers on Refill Spool.