(remix 2021) Prusa Mini Cable Chains (x-axis, headbed)
thingiverse
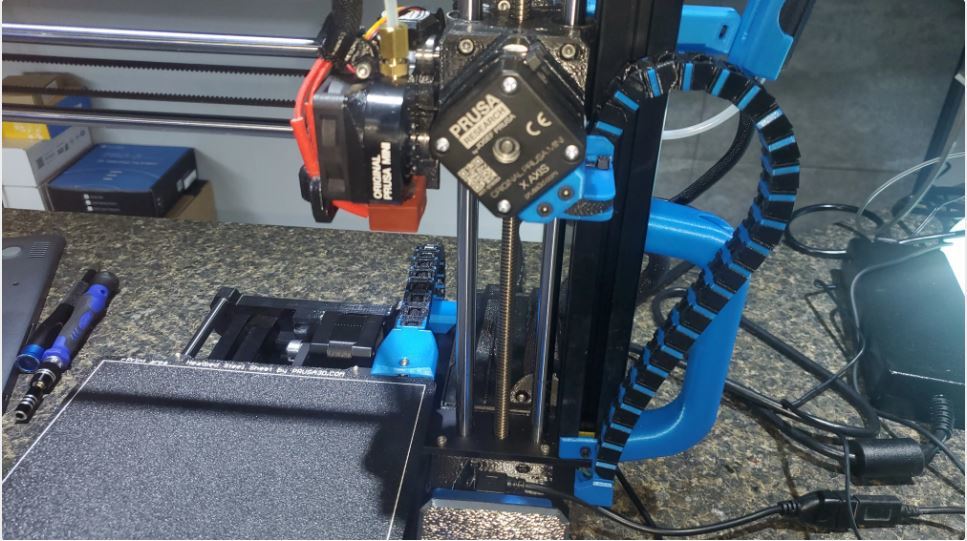
I'm very greatfull to @Autotilt for the original model. Thus, while printing and assembling thin parts broke (heatbed mount, x-axis low mount, x-axis upper mount). I improved those, the present remix is FULL. It includes some orig.parts and new if needed (marked with names xxx_V2.stl). Improvements 1) 04_-_x-axis_Lower_Mount V2.stl (stronger attachment to both: chain and vertical profile) 2) 01_-_x-axis_Motor_Mount_p2 V2.stl (shorted 2mm, it was touching vertical rail) 3) 06_-_heatbed_Cover V2.stl 06_-_heatbed_Cover V2.stl (stronger attachment to the chain) 4) 07_-_heatbed_Mount V2.stl (stronger attachment to the chain) 5) updated printing instructions 6) added 1 more chain-parts into each axis, it is bending nicer on the extreme extension 7) I include .3mf files for Prusa Mini (it includes sequential printing) 8) changed orig filenames from z-axis to corrent x-axis :)))) Cable Chain Setup for Prusa Mini x-axis and the heatbed. This has some other prints remixed in it. Prusa i3 MK3 Cable Chain Add-on (ALL AXIS) https://www.thingiverse.com/thing:2862375 X Stepper sleeve wire clamp https://www.prusaprinters.org/prints/3436-x-stepper-sleeve-wire-clamp The default heatbed cover from Prusa Print Instructions Additional Parts: 3 - Small Zipties 3 - m3*10 Bolts 3 - m3 nuts Print one each of parts 1-8 24 each - part 9 for the x axis 25 each - part 10 for the x axis 16 each - part 9 for the Heatbed 17 each - part 10 for the Heatbed (Advice: print few more part-10 elements - they break easily while assembled) PLA or PETG work great. 0.20 Layer height. 15% infill. No support needed All parts are pre-oriented for printing. sequential prints (see attached .3mf files) IMPORTANT: print chain elements (part-10) into 10 pcs batches, and than sequentially. If print all 40 pcs they warping and detaching from the table - you loose very long print. X-AXIS: Remove electronics covers on the MINI and reroute x-axis wires under the frame. Slight cutting away of the electronics case will probably be necessary for cleanest look. Place 2 nuts into part 1. Ziptie part 1 to the x-axis motor. Bolt part 3 to part 1 with the cable between them. Place part 2 against part 1, route cable and ziptie part 2 and cable to part 1. Place nut in t-nut, slide into bottom of x-axis frame, loosely bolt part 4 and route cable through. Add x-axis Chain and clip parts starting from the motor side. Tighten bolt on part 4. HEATBED: Replace bed cover with part 6. Unplug heatbed wires and reroute through y-axis wire hole. Add 15 chain and clip pieces starting from the headbed side. Place part 8 Adapter on heatbed cables and snap into part 7 Mount with the adapter open end Up. Some finagling may be necessary to get the cable length correct. Attach part 7 mount to frame with the y-axis motor cables between the mount and the frame. Reconnect heatbed and replace electronics cover.
With this file you will be able to print (remix 2021) Prusa Mini Cable Chains (x-axis, headbed) with your 3D printer. Click on the button and save the file on your computer to work, edit or customize your design. You can also find more 3D designs for printers on (remix 2021) Prusa Mini Cable Chains (x-axis, headbed).