Remote Light Switch
thingiverse
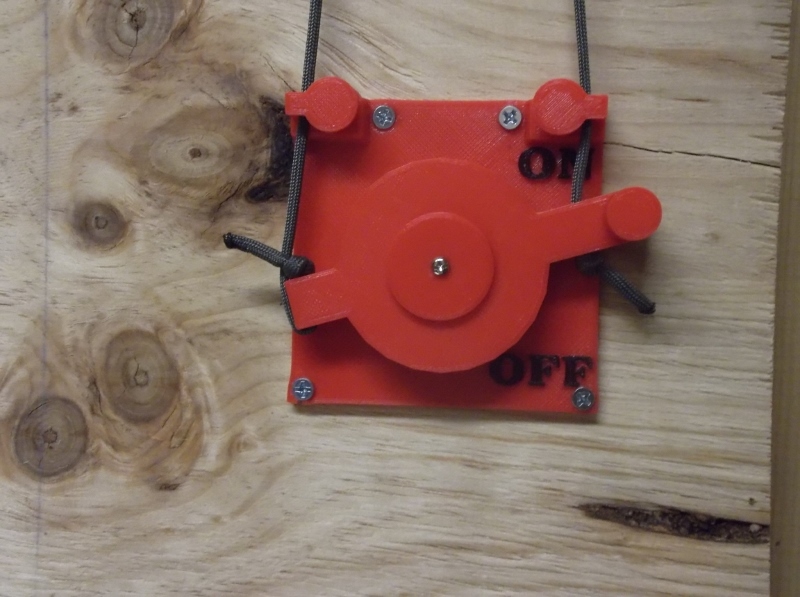
When I built my dedicated printing room, I failed to notice that the switch for the overhead lights was located at the top of the rear wall, which is not very convenient. This design has 4 main parts: The Switch Plate mechanism, The Corner "Pulley", The Cable "Pulleys", and The Remote Switch mechanism. The Switch Plate mechanism attaches to the switch using existing mounting holes. I was able to use the existing screws, but you may need slightly longer screws depending on your electrical hardware. The Corner "Pulley" is used to make a horizontal 90 degree turn for the control cables. Although I call it a pulley, there are no rotating parts. I'm using standard 550 cord, which slides easily across the plastic "sheaves". The Cable "Pulleys" are used both for cable routing along the wall and to make the vertical 90 degree turn down to the Remote Switch. The Remote Switch pulls on the cables to operate the actual electrical switch. ASSEMBLY Determine the amount of cord/cable you will need to make the entire run. Leave plenty of extra in case it's needed. Find the center of the length of cord and mark it. Mount the RLS_Mount to the electrical box. Thread your cord through the RLS_Lever until the middle of the cord is centered on the lever. Mount the lever to the mount using the RLS_Cap and a screw. Mount the "Pulleys" as needed to make the run over to the remote switch. Keep the cords running in line with the direction of pull. This will make the whole thing easier to operate and reduce stress on the parts. When making the cord run down to the remote switch, cross the cables. This will make the remote switch turn the electrical switch ON when moved up, and OFF when moved down. Mount the RLS_Switch_Base in line with the vertical cables. Run your cords through the RLS_Switch_Lever holes and mount onto the base. Adjust your cords so they are tight enough to operate the electrical switch when the lever is operated. I secured the cords using a single knot. Depending on how stretchy your cords are, you may have to remove the lever, tighten the cord, retie the knot, and then remount the lever. Once you have your cords adjusted to your liking, remount the lever to the base and secure it using the RLS_Switch_Cap and a screw. Don't cut the cords too short until you know everything is working correctly and all of the stretch is gone. The design isn't perfect, but it works great for me. Now I don't have to walk all the way to the back of a dark room to turn the light on and off.
With this file you will be able to print Remote Light Switch with your 3D printer. Click on the button and save the file on your computer to work, edit or customize your design. You can also find more 3D designs for printers on Remote Light Switch.