Repeat-O-Meter for Surface Plate Calibration
thingiverse
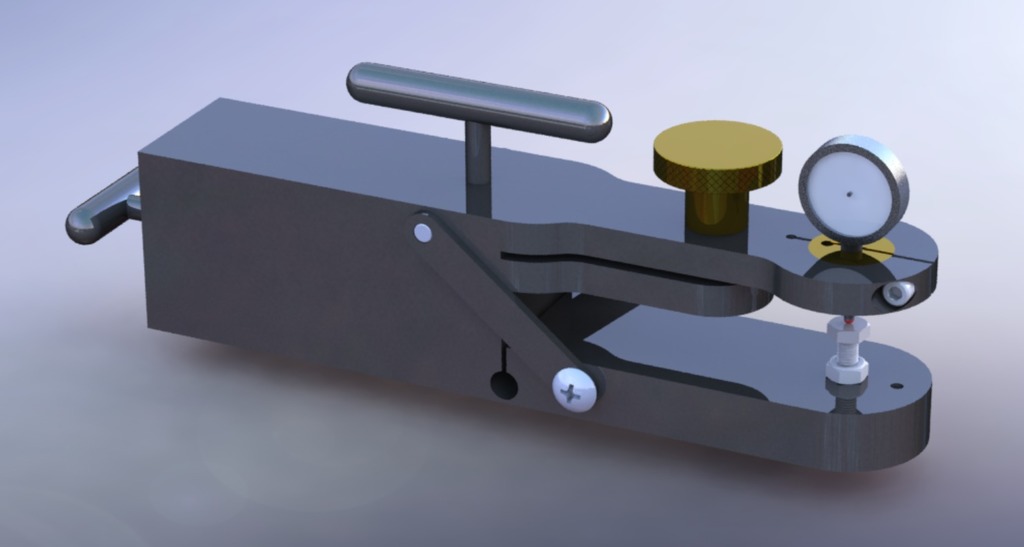
Years ago, the Repeat-O-Meter seemed like a simple device that could be easily built. Why did they retail for over $1,500, given its simplicity? Based on photographs of the actual device and Tom Lipton's improvements, I've created my own version of this device, which anyone with basic shop skills should be able to build. I do not recommend 3D-printing this in plastic. Instead, I anticipate a time when we will have affordable laser-sintering in various metal materials. This device requires a basic indicator and a brass-bushing that holds the indicator. The brass-bushing can be modified for any indicator mount size. There is currently a mock-up indicator shown in the model for demonstration purposes. PDF files for all required screws are included. The Repeat-O-Meter is used on a flat surface plate to find local dips or high-spots. Using this device can tell you if your surface plate needs to be reground and recalibrated or not, eliminating guesswork. To use the device, zero out the RoM indicator on one spot, then run it around on the surface plate and see if it records a positive or negative reading anywhere on the plate. For this tool to work effectively, you need to press-fit the balls into the bottom of the device and then surface grind them co-planar before cutting the center-flexure. Ideally, they should be lapped flat as well. You will also need a .0001" indicator. This device is relatively complex, but I had fun designing it. Enjoy using it, and let me know if you find any use for it. There are a couple of critical design aspects in this device. The key is the flexure mechanism in the bottom center, which I've spaced .050" from the bottom to allow that part to bend slightly with the surface plate. However, .050" may be too much to get significant range of motion out of that flexure. In that case, you have a couple of options. You could simply surface grind the bottom of the part, taking off maybe .005" at a time until you get good motion. You would need to knock the hardened feet out to do this and remove them from above without problem. If you're worried about the hole becoming too big, you can take a ball-peen hammer and lightly Brinel the metal all around each hole after removing the balls. This will cause the metal to displace into the hole, making it slightly smaller, giving you enough metal to press back in later. Another option is to re-bore the flexure hole slightly larger, but this requires more tools and experience than just surface grinding the part. Another option would be to add weight to that part of the foot, as the weight of the foot causes the flexure to operate correctly. Adding another piece of steel on top or even lead would add significant weight to the tongue and cause it to flex more. The angled support arms seem to constrict the tongue from moving, but this is not the case. The screw is not tight on this part; there's a small amount of clearance above and around it using a bushing. This clearance allows the flexure to flex quite a bit, .025" in either direction, before the support-arm bottoms out and provides support. This feature only exists to keep the device from being destroyed by overextending the flexure accidentally. With the support arms, the device is robust in a way that it could not be without them. I've also thought about ways to create a part like this with other kinds of flexures. It might be possible to simplify the device quite a bit via other flexure designs. I will have to think about it. A video of the device in action by the original designer is available at https://www.youtube.com/watch?v=ZkCIVsP7-KY
With this file you will be able to print Repeat-O-Meter for Surface Plate Calibration with your 3D printer. Click on the button and save the file on your computer to work, edit or customize your design. You can also find more 3D designs for printers on Repeat-O-Meter for Surface Plate Calibration.