Replacement Handle for Swiffer Wet Jet
thingiverse
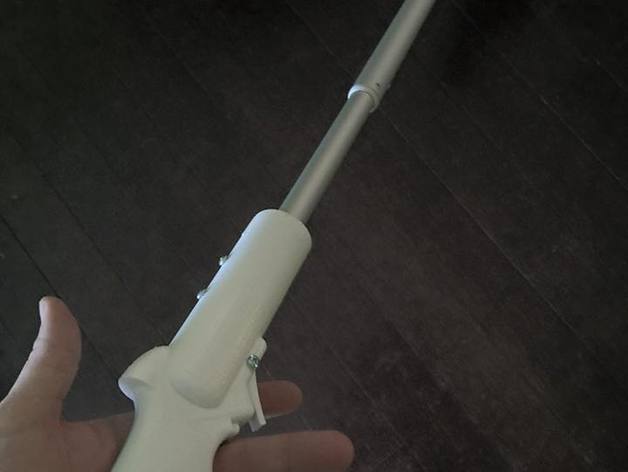
We've got two rambunctious dogs and two messy kids at our house, making us use the Swiffer Wet Jet an awful lot. I think it's a great, convenient tool, but its design leaves room for improvement. The handle is made of thin plastic, and when you apply some pressure to clean those stubborn spots on your floor, it snaps in half within weeks. Now, I know what you're thinking - just donate another $20 to Swiffer and deal with the hassle of a broken handle again. But that's not my approach. I decided to print my own sturdy handle, which turns out to be really strong and can withstand significant pressure without snapping or bending. All you need is three parts: Handle 1, Handle 2, and the Trigger. You'll glue these parts together with Gorilla Glue Gel. To attach it to the Swiffer shaft, you'll need three bolts (and nuts). I used 3x #6 pan head machine screws of varying lengths. The tricky part is assembling it without breaking anything - particularly the wire or the existing switch. My design uses that switch and wire, so be careful not to damage them. Here's a step-by-step guide: 1. Remove the old handle: There are two screws holding it in place, one on the bottom and another hidden under the button. The one under the button is tricky to get to; you'll need to pry off the button with a flat head screwdriver or break it apart. 2. Print the three parts you'll need. You'll also need Handle 1, Handle 2, and the Trigger. 3. Prep the parts: Tolerances on this design are tight, so make sure the handle fits snugly. If your printer is calibrated wrong, you might have to sand the inner opening for the shaft before gluing anything together. 4. Place one half of the handle assembly on the shaft and route the wiring for the switch. Remember, we're going to glue the parts together before putting the switch in place. 5. Test fit the two halves together and make sure there are no gaps between them. Sand or drill as necessary until everything fits perfectly. Repeat steps 3 and 4 each time until you're satisfied with the assembly. 6. Glue the two halves together. Once they're securely attached, you won't be able to go back - this part is pretty straightforward. 7. Insert the trigger into the trigger opening, making sure the flat side faces the switch, and secure it with a bolt. I used a 1" bolt. That's it! Your Swiffer now has a sturdy handle that can withstand pressure without breaking or bending. Possible improvements include designing a version of the trigger with a spring to keep it pressed against the switch. Another idea is recessing the bolts for a cleaner look. There could also be a hanging loop on the back for easier storage. **Printer Settings** * Printer: Monoprice Dual Extrusion * Rafts: No * Supports: Yes * Resolution: .20 * Infill: 30% * Notes: Be prepared for tight tolerances, possible light sanding, and potentially non-uniform Swiffer shafts.
With this file you will be able to print Replacement Handle for Swiffer Wet Jet with your 3D printer. Click on the button and save the file on your computer to work, edit or customize your design. You can also find more 3D designs for printers on Replacement Handle for Swiffer Wet Jet.