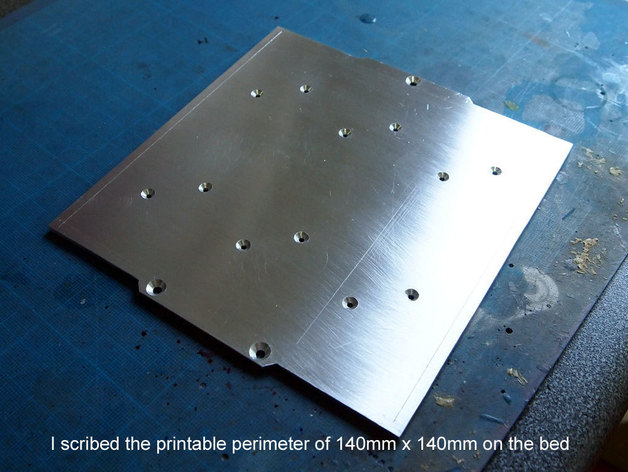
Replacement heated bed for Emaker Huxley
thingiverse
It's no secret to owners of Emaker Huxleys that the heated bed has a design flaw. Many owners, including myself, have experience multiple failures of the heated bed.http://www.emakershop.com/forum?vasthtmlaction=viewtopic&t=276 IMHO, it's not if but when the bed will fail. I decided to design my own replacement bed for the Emaker Huxleys despite already ordering the ReprapPro Huxley's PCB bed. Reason being that the PCB bed is not a drop-in replacement for the Emaker Huxleys. Changes to the Y-axis is required and the thermistor tables are different too. This bed is designed to be a drop-in replacement and has a larger build area that will allow actual printing of the promised 140mm x 140mm area. One of the problem when coming up with the design is determining the resistor to use. Indeed there seems to be no guide to this. For my case, I used my rusty electronics knowledge and some guesswork. First, determine the power wattage for the bed. 90-100W seems like a safe bet, and since the Emaker Huxley's power adapter is only rated to 120W (19V). It's best to give some allowance. Obviously, if your bed is huge or uses a thicker aluminum, you have to compensate for that. So current, I = 90W / 19V = 4.74A Resistance, R = 19V / 4.74A = 4ohms I decided to use 6 x 15W resistors to spread the heat more evenly, but I believe 4 x 25W will work too. So roughly 4ohms / 6 = 0.66ohms each.http://singapore.rs-online.com/web/p/products/107-3560/ I also got some high-temp hook up wires.http://singapore.rs-online.com/web/p/products/177-0952/ You can use back the original thermistors that came with the kit but just for reference, it's this one.http://singapore.rs-online.com/web/p/products/528-8592/ Instructions I hand cut the bed from 3mm aluminum using the PDF template. Since it's basically just a square with the corners cut out, it's not hard at all. I used a coping saw but a hack saw will work too. Make rough cuts and file to shape. Alternatively, cut the bed from 3mm aluminum using the DXF for laser or waterjet cut. Drill out the holes and countersink them according to the screws that you'll use. You will need 12 M2x8mm screws plus nuts and 3 M3x35mm screws. All countersunk heads. For the M3 screws, use the nyloc nuts supplied with the kit. Remember to mount the resistors with a small amount of thermal paste. Assemble the mounting screws as per the original. Initial testing shows that the bed can go from room temperature to 120C in about 15mins. Profit.
With this file you will be able to print Replacement heated bed for Emaker Huxley with your 3D printer. Click on the button and save the file on your computer to work, edit or customize your design. You can also find more 3D designs for printers on Replacement heated bed for Emaker Huxley.
