Replicator 1 PID Enclosure Heater Installation
thingiverse
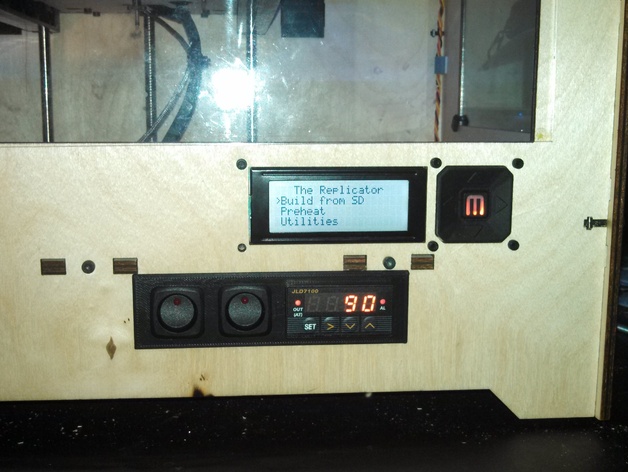
This PID-controlled heater installation enhances the Replicator 1 3D printer's enclosure heating for optimal ABS printing. The replicator's enclosure temperature should ideally be within 110 F to ensure good print results, and a cooling fan helps reduce distortion and aid in spanning gaps. The heater installation utilizes various components like JLD7100 Digital Display PID Temperature Controller, K type Thermocouple, Integra DIN6 DIN Rail Kit, and a 12V DC Universal Regulated Switching Power Supply. The assembly involves mounting these components under the printer floor or as needed underneath. The wiring includes parallel connection of 120 VAC to the relay and rightmost switch on the front display, PID controller, and 12V power supply. A 24V relay is connected to the MightyBoard's extra output for controlling the heater system with G-code commands. The thermocouple is placed under insulation added to the printer floor. The power switch turns on the heater and heating fans, while a second switch controls the extruder cooling fan. The 24VDC relay engages at the start and end of print to turn on/off the heating system, indicated by the red light on the power switch. The Reflectix hat speeds up preheating and allows for higher temperatures without the heater running.
With this file you will be able to print Replicator 1 PID Enclosure Heater Installation with your 3D printer. Click on the button and save the file on your computer to work, edit or customize your design. You can also find more 3D designs for printers on Replicator 1 PID Enclosure Heater Installation.