Replicator 2/2X DuetWifi Upgrade
thingiverse
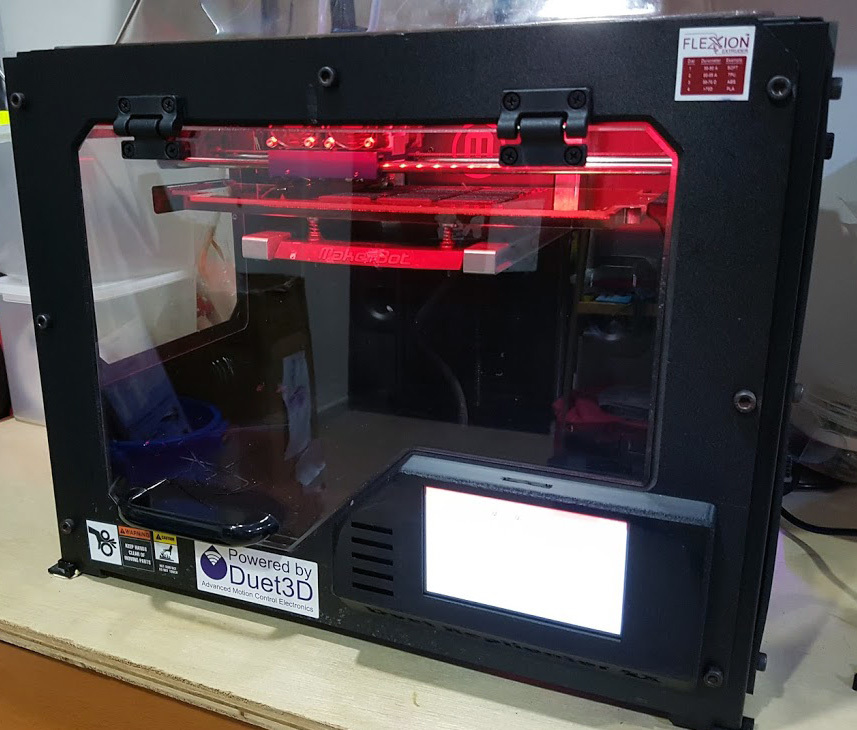
This is part 1 of the Replicator 2/2X DuetWifi Upgrade series. Part 2, 3 and 4 can be found here: - Part 1: DuetWifi Installation and PanelDue Mount (https://www.thingiverse.com/thing:2428995) - Part 2: Mini Differential IR Probe mount for Replicator 2X (https://www.thingiverse.com/thing:2475179) - Part 3: DuetWifi Configuration files for Replicator 2X (https://www.thingiverse.com/thing:2475257) - Part 4: Simplify3D Slicer Configuration for the Replicator 2X (https://www.thingiverse.com/thing:2476695) - Part 5: Endstop adapter for inductive z probe instead of the IR probe (https://www.thingiverse.com/thing:2954398) My Makerbot Replicators 2x has served me well for many years, but finally something broke down and it started to reset itself mid-print. After trying all cables in the machine without fixing the problem, I suspected a mainboard or PSU issue. The long story is that it was time for an upgrade. The new Replicator 2X now runs a Duetwifi board with reprap firmware, utilizes an IR sensor to measure bed height and provide mesh bed leveling, and displays all data on a 5'' color touch screen mounted at the same place as the old Makerbot display. What you need for conversion: * 1x Duetwifi Mainboard - http://www.reprap.me/duetwifi-electronics-board.html * 1x PanelDue 5'' Display - http://www.reprap.me/paneldue-with-5-screen-for-duetwifi.html * 2x M3 Thermistor - http://www.reprap.me/m3-modular-screw-on-stud-thermistor-hot-end-screw-type-thermistors-for-3d-printer.html * 1x 24V PSU - http://www.reprap.me/power-supply-24v-15a.html * Connectors or cables in case you want to keep your Replicator 2/2x stock cable set for the future. Connection: * Extruder heaters, fans, extruder thermistor, heated bed and bed thermistor connection is straightforward. * Steppers connection is straightforward as well. Simply connect wires to the board in the same order as you see them on stepper motor - minus the gap between pins. * Endstop connection is done by combining center 2 pins (these are ground pins) from Makerbot endstops to gnd pin on Duetwifi 3pin connector, signal and VCC according to markings on endstop and duetwifi mainboard. * Now you can drive Zaxis homing either with stock endstop or use a probe sensor such as IR probe for duetwifi by DC42 (http://www.reprap.me/ir-probe-for-duetwifi.html) I mounted the board with standoff to bottom of printer in-between stock makerbot standoffs. 4 holes are required in bottom of printer for that (M3). I also mounted PSU beside it at bottom to get a nice compact installation. There is enough space between PSU and bottom of printer to allow cooling fan to ventilate PSU. You can even hook LED up to spare fan connector on board (plus minus leads only) for it to shine red while in operation. Last remove old Display and mount PanelDue. The attached STL is a modification of enclosure made by DC42. It has few slots to allow you to store SD cards (if you want to use the SD Card slot in paneldue, you need to purchase 10pin ribbon cable to hook it up to mainboard). Install panel and mount enclosure to front using M3 screws (Countersink recommended). Finally configure your printer with reprap configurator. Please visit Part 2 for IR Sensor mount and Part 3 for Duetwifi configuration files (dual extruder). Enjoy your new, wifi connected, Replicator printer!
With this file you will be able to print Replicator 2/2X DuetWifi Upgrade with your 3D printer. Click on the button and save the file on your computer to work, edit or customize your design. You can also find more 3D designs for printers on Replicator 2/2X DuetWifi Upgrade.