Replicator 2X Extruder Drive Block Upgrade
thingiverse
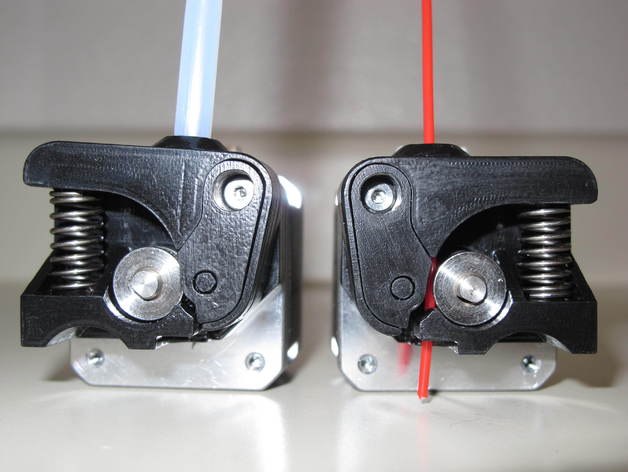
Upgrade Your Makerbot Replicator 2X Extruder Drive Block for Improved Strength and Functionality Makerbot Replicator 2X users, rejoice! A new version of the extruder drive block upgrade has been released, offering enhanced strength, better functionality, and smoother printing experience. The upgraded V2 files have been uploaded with a few minor changes that create stronger parts requiring less post-finishing. In addition, a remix based on user comments is available, which uses an M4 flat head screw to mount the bearing for your convenience. This upgrade is designed to be the last one you'll ever need for your Replicator 2X, and it's inspired by the function of the official Replicator 2 upgrade and the aesthetics of the whpthomas upgrade. It offers several advantages over other drive block upgrades, including a fully surrounded lower filament guide hole between the drive gear and the entry to the hot end, which is crucial for printing with flexible filaments. The upgraded design also features a deeper filament guide tube hole than many others, preventing the guide tube from slipping out during printing. Moreover, it requires no extra hardware for mounting the bearing, as the mounting pin is included in the design. To install the upgrade, follow the detailed instructions provided. The required hardware includes the bearing and shoulder bolt from the stock extruder, an M3 flat head cap screw (8mm length), and a 0.375" X 1" or similar compression spring. For successful printing and assembly, additional hardware may be needed, such as ABS with 3 shells for base pieces, ABS with 4 shells for arm pieces, and ABS with 2 shells for cover pieces. Some post-print detailing may also be required to achieve the desired tolerances and fit of components. With this upgrade, you'll experience failure-free printing and enjoy a smoother, more efficient 3D printing process.
With this file you will be able to print Replicator 2X Extruder Drive Block Upgrade with your 3D printer. Click on the button and save the file on your computer to work, edit or customize your design. You can also find more 3D designs for printers on Replicator 2X Extruder Drive Block Upgrade.