Replicator/FF Y-Shaft Pillow Block, with drill guide
thingiverse
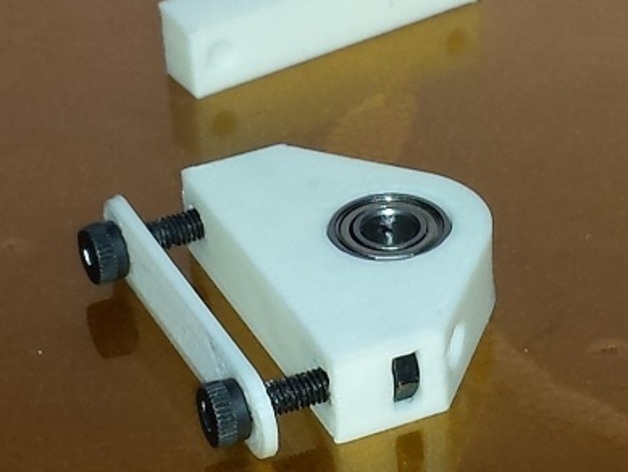
Modify your Replicator or FlashForge Creator by adding pillow block bearings on the Y-axis shafts' 5mm support for enhanced performance. To ensure correct standoff distance, use the provided OpenSCAD code that allows you to adjust this parameter as per your application. The design also features nut holders to simplify assembly and a washer plate for exterior bolt heads. Recently, a drill guide has been added to help users confidently place all pillow blocks accurately without worrying about binding shafts. To use the new drill guide, first ensure that your Replicator's or FF frame is correctly cut from the CAD files and check the shaft locations. Place the guide on the side of the machine in a corner, ensuring it's flat against sides and top edges. Slide it forward until the 'arm' touches the front's inside face. If the shaft isn't centered, adjust the 'shaftfromtop' parameter in OpenSCAD code or shim pillow block height. Mark holes using a transfer punch as per guide markings, which are 45mm from sides and clear y-rod holders. The standoff distance is adjustable, but customizing is discouraged to avoid spam. To fit nuts, use needle-nose pliers and follow the design's direction. Assemble like the two previous designs, and print at 0.2mm with 20% fill.
With this file you will be able to print Replicator/FF Y-Shaft Pillow Block, with drill guide with your 3D printer. Click on the button and save the file on your computer to work, edit or customize your design. You can also find more 3D designs for printers on Replicator/FF Y-Shaft Pillow Block, with drill guide.