Replicator MightyBoard Airflow Rework
thingiverse
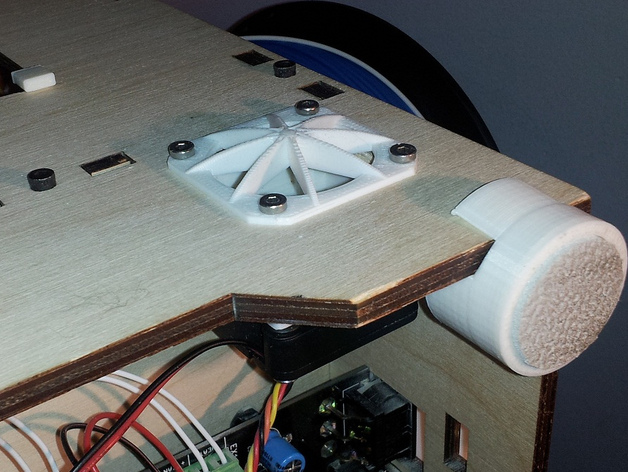
The original fan is positioned to cool the MightyBoard yet may require improved cooling to prevent voltage regulator failure. The author suggests replicating and combining several things to enhance the MightyBoard's cooling system, beginning with blocking the heat build chamber from the base using DDStarkey's suggested covers (items 29858 and 29862). Afterward, print Dave Randolph's thing 24066 fan plate to add a second fan mounting location or cut and drill the existing plate. To improve airflow, saw a hole in the side panel near where the new fan will be mounted and secure the new fan with rubber grommets for vibration damping. Attach Dave's duct to the side panel using (2) M3x25mm screws on the fan side and (4) M3x10mm screws on the outside. For better airflow, consider replacing all of the Replicator fans with Orion fans ordered from Allied Electronics or Digi-Key for improved performance and longevity. Additionally, insulating the bottom chamber with foil insulated bubble wrap can help maintain temperature.
With this file you will be able to print Replicator MightyBoard Airflow Rework with your 3D printer. Click on the button and save the file on your computer to work, edit or customize your design. You can also find more 3D designs for printers on Replicator MightyBoard Airflow Rework.