RepRap Air
thingiverse
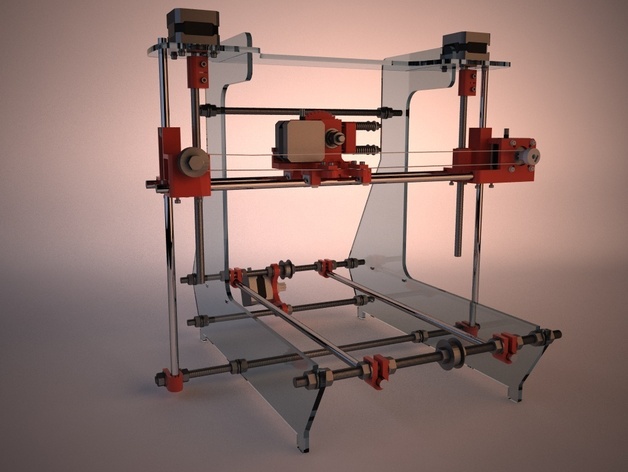
ALREADY PUBLISHED THE NEW VERSION AIR 2 AT http://www.thingiverse.com/thing:14204 Since I discovered the RepRap project I was surprised how much knowledge could be stored in an Internet community. I was impressed as a practical invention was able to born and grow in the network through the collaboration of specialists in various fields such as mechanics, electronics, computers ... all around the world. In the mechanical field, It was a revolution when Josef Prusa got dramatically simplify the construction of a RepRap Mendel, current resulting Prusa, that has become a standard in building a RepRap. This also achieved make it much easier a person to be able to build a 3D printer. The Prusa Air drinks from this spirit and tries to give a twist to the construction of a 3D printer. Its design is based on three basic principles: 1) To simplify the manufacturing and assembly (KISS principle). 2) Designing parts the cheapest way to be able to meet the requirements. 3) A little beauty. With these guidelines, the use of RP parts is reduced for "commercial" pieces but always bearing in mind that they were readily available worldwide. The changes are basically: A) Most of the frame rods and RP pieces has been replaced by three pieces of acrylic embedded between them. They have followed all the design dimensions of Prusa, so for size, trips, electronics, firmwares... it works as a Prusa. B) One of the sides of the typical Mendel triangle has been removed, resulting in a work area more accessible. C) The holes for the rods have been changed so that the rods can be removed without having to completely unscrew the nuts. D) The X and Z axis haven’t changed, they are exactly the same of a Mendel Prusa, the Y axis, as the guides are placed in the same way, you can choose to place a traditional Y-axis or mount a Y-axis with integrated heated platform like this: http://www.thingiverse.com/thing:11657. All the infographics was made by Pikelo with Cinema 4D + Vray. There is a wiki page writen in Spanish: http://reprap.org/wiki/Prusa_Aire Instructions BILL OF MATERIALS Here are all the parts needed to build the printer, not including carriage parts for the X axis, or for the Y-axis platform because they are considered independent subsets and each person can choose which place. PRINTED PARTS 6 U-clamp 3 Endstop Holder 1 X End Idler 1 X End Motor 1 Y Motor Bracket 2 Z couplings Can be replaced by: http://www.thingiverse.com/thing:9622 2 Pulley Along with this will be a M3x8 grub screw and nut M3 4 PLA bushings RODS AND SCREWS THREATED RODS The threaded rods shall be steel, zinc plated and M8, the cuts required are: 4 x 285 mm 2 x 210 mm 1 x 430 mm If you cut they from 1 meter rods you will need two rods, the best way to cut is: Rod 1: 285 - 285 - 430 ========> Total 1000 mm Rod 2: 285 - 285 - 210 - 210 ===> Total 990 mm SMOOTH RODS Smooth rods should be 8 mm diameter stainless steel, the ideal is to get calibrated rounds that have a very tight dimensional tolerances (7.97 - 8 mm). The cuts required are: 4 x 410 mm 2 x 345 mm In total would be about 2.35 m. The dimensions may be the same as those of Prusa but some have been slightly changed to minimize the number of different pieces. SCREWS Again I stress that this includes the hardware necessary for the printer without including extruder / X carriage or Y axis platform. 43 M8 nuts DIN934 for rods 40 M8 washers DIN125 for rods 1 M8x35 screw DIN933 for Axis belt X carriage 8 M3x10 screws with nut DIN912 To fix X-Axis guides 16 M3x10 with washer DIN912 To fix the 4 motors 7 M3x20 screws with nut and doble washer DIN912 for Z couplings and Endstop Holders Screws DIN 912 are for allen wrench and installation much easier. Finally would be to add the 3 608ZZ bearings, belts T5 840 and 900 mm long and 5 mm wide, and last, the 6 M8 fender washers with a diameter of 30 mm, these are very difficult to get, at least in Spain, and they can be replaced by washer-brimmed (DIN9021) of M10.
With this file you will be able to print RepRap Air with your 3D printer. Click on the button and save the file on your computer to work, edit or customize your design. You can also find more 3D designs for printers on RepRap Air.