reprap prusa rigidity wall hack
thingiverse
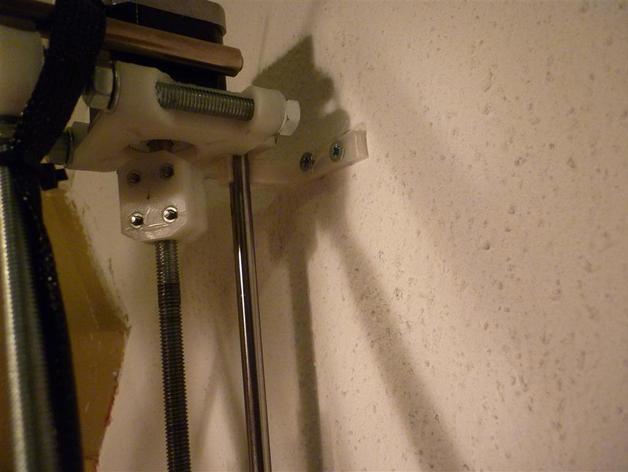
reprap prusa rigidity wall hack. it takes minutes and not hours to print and mount. This has been attached for over a month but it took me until now to take a picture. While searching to eliminate some of my problems this did the trick in eliminating the main source of wobble: Bolt it to a wall! It seems kind of hacky since, and it is. I had a psu mount bracket laying around, bolted it to the wall at the correct height. My z axis smoothrod snaps on to it making it really easy to remove my reprap from the wall whenever needed. Oh and because it is so hacky you even have to drill the extra hole ;) Good luck reinforcing your frame with the aid of a wall. Instructions making: print, drill hole in wall mount, drill and bolt to wall. vitamins: 2 screws and whatever plugs you need. using: Snap your reprap to the wall.
With this file you will be able to print reprap prusa rigidity wall hack with your 3D printer. Click on the button and save the file on your computer to work, edit or customize your design. You can also find more 3D designs for printers on reprap prusa rigidity wall hack.