RepRapPro Huxley Case (32PTU screen)
thingiverse
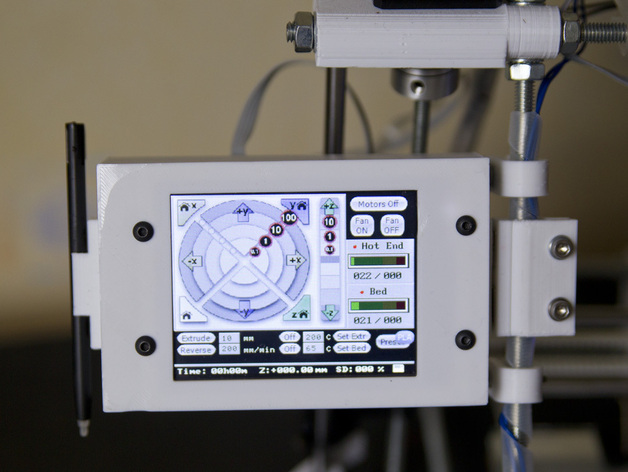
I wanted to fix the LCD screen to my Huxley in such a way that I could remove and replace it easily. I also needed to power it from the +12V supply from the Sanguinololu board as using the +5V supply was (in my view) causing the 7805 regulator on the Sanguinololu to get too hot - remember that the RRP Huxley is powered from a 19V supply meaning that the 7805 regulator has to dissipate the heat arising from dropping 14V. My solution to the supply problem was to use a Pololu Step-Down Voltage Regulator - D15V35F5S3. This is a switching regulator and is highly efficient. My solution to the take off - replace requirement was to use some 10mm x 5mm x 2mm magnets which I had purchased for another project. The case design uses the following printed parts: LCD Case Clip.2 These are supports for the case once held in place by the magnets. These supports clip around the plastic cable tidy on the Huxley's M6 rod. LCD Case This is the main case body which has two pockets in the side to accommodate two magnets. LCDCaseBottom Fits snugly to the back of the case M6 Magnet Carrier This takes two magnets and attaches to the Huxley frame over the polythene spiral cable tidy between the two supports using M3 screws and nuts to hold it in place Pololu Voltage Reg Carrier This fits inside the case and connects to the +12V and GND pins on the Sanguinololu and to the +5V and GND pins of the LCD board. Stylus Clip This fits to the side of the case and takes a Nintendo DS type stylus - I bought a few of these on EBay. As the LCD display is of the resistive type and heavily populated with buttons and controls, I found that a stylus is more accurate than a finger! Instructions Take a look at the photographs to see how the parts are assembled - it isn't that complicated. I have added an STL called LCD Case 3.9 which carries several of the parts listed in the description. Take care when pushing the magnets into their respective pockets as they are a tight fit and not easy to remove. Pay particular attention to the polarity of the magnets - you need to make sure that both of the magnets on the frame of the Huxley in the M6 magnet carrier attract the ones on the side of the LCD case - easy to get this wrong which leads to all sorts of bad words. (I know - I got it wrong :-) ) One thing to note is how I have secured the Pololu voltage regulator which has four holes in it - one at each corner. To keep things simple, the board is held in place by heating up and squashing the four pins on the carrier - not very elegant but it does the job. Make sure all is working before heating up and squashing the plastic pins down though! Code for the RepRapPro Huxley LCD display can be found on Marco's Github as well as my own : https://github.com/Alzibiff/RepRapLcd4D The code you need is in the Single Extruder directory/folder and will be work in progress - who knows what little extras might be useful in the future? The button on the bottom right of the display is used as a quick way to populate the Extruder and Heated bed temperatures and toggles between PLA and ABS. The relevant temperatures are held in the CONSTANT.INC file - change these (and other similar constants) to match your needs. I am using this display to make the Huxley totally stand alone - no PC, laptop or USB cable required.
With this file you will be able to print RepRapPro Huxley Case (32PTU screen) with your 3D printer. Click on the button and save the file on your computer to work, edit or customize your design. You can also find more 3D designs for printers on RepRapPro Huxley Case (32PTU screen).