Retro 7 Segment Clock (Complete)
thingiverse
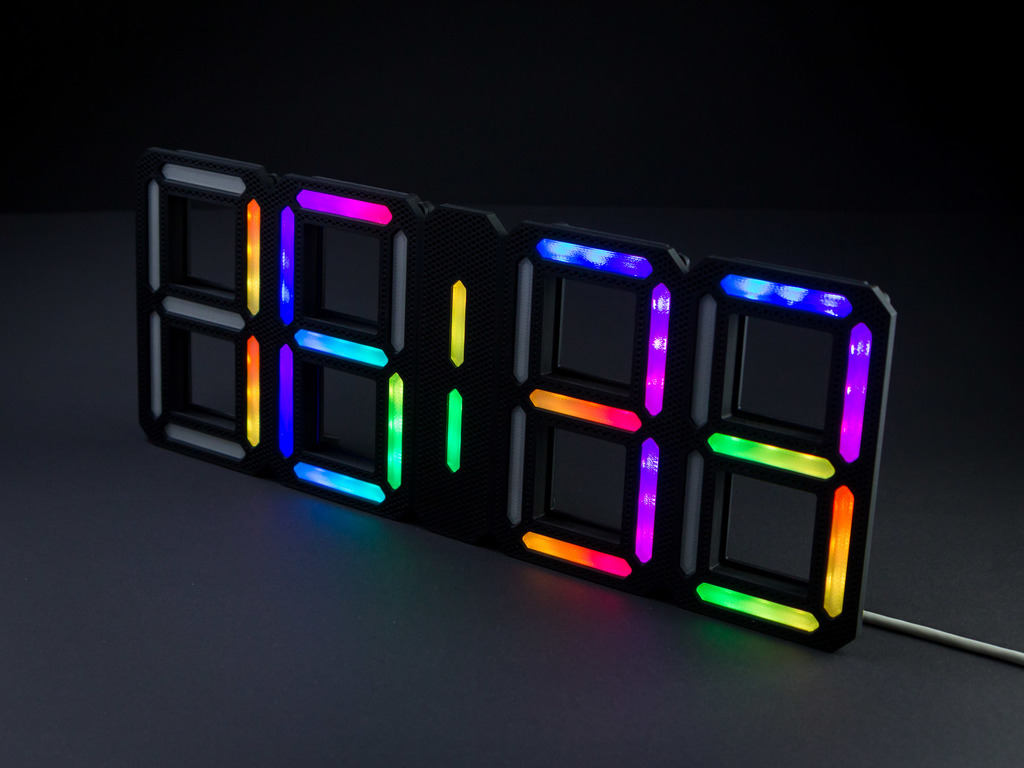
Here's a rework of something I did a while back. This time it's not only the display modules, it's the complete clock as shown in the pictures. <b>Updated software sketch v5</b> Massive cleanups, improved color handling and ldr support, check the sketches section for details. <b>XL</b> Even bigger with 4 leds per segment: https://www.thingiverse.com/thing:3136688 <b>SE (Small Edition)</b> https://www.thingiverse.com/thing:3095715 The SE also features a complete build video. This version uses continuous led strips as much as possible - when building this, there are less than 20 wires to solder! <b>Updated software version - v4</b> Besides more comments v4 adds automatic brightness correction by using a photoresistor. <b>Updated software version!</b> I've uploaded sketch v3 which adds some features. Also I've added a details section about the sketch where I'll put the changelog/usage instructions. <b>Update for smaller build volumes!</b> I've uploaded two parts (base_frame-noborders and center_frame-noborders) which don't have the upper and lower borders. This reduces the biggest part to print from 178,31mm x 152,85mm to 178,31mm x 147,27mm. So it should be printable on many printers which are limited to 150mm along the y-axis (various makerbot clones for example). Use the NoBorders-files only if you're limited by build volume. <b>Update for a 3rd module displaying seconds</b> If you have this thing up and running you might want to add another module to display seconds: https://www.thingiverse.com/thing:3016537 -- Width: 400mm (15.8") Height: 153mm (6.0") Depth: 30mm (1.2") (not including optional feet) It may look confusing at times but I think it's hard to build a clock like this easier and faster. I've used M3x10mm screws (didn't have any other length at home) but anything between 6mm and 10mm should work just fine. <b>Usage instructions can be found at the bottom</b> <b>Notes:</b> - Walls are multiples of 0.6mm, so I suggest printing these using a extrusion width/wall width of 0.6mm/1.2mm. 0.5mm/1.0mm or smaller will increase print times and give you weaker parts. - Before printing all the diffusers I suggest printing the single one and test if it fits nicely. Don't squish the first layer too much on the frame or diffuser files! - After wiring the led strips I strongly suggest running the test-INO before completing everything (rtc, arduino, case, power wiring and so on). - Of course you can use other led strips as long as they aren't much thicker, 10mm wide and you know how to program them - The case will fit an Arduino Pro Mini _OR_ Arduino Nano. No usb breakout as I'm only using pro minis for stuff like this... <b>Requirements:</b> 1 Arduino (Nano or Pro Mini) 1 RTC module (DS3231) 99 WS2812 LEDs, 60 leds/meter, 2x 47pcs, 1x 5pcs 2 button switches, 6mm 1 resistor (300-500ohms) 24 screws (M3, 6-10mm) lots of wires Working Arduino IDE Basic knowledge of what you're doing Willingness to read this and look at the pictures closely Remember: You can open the pictures in a new browser tab to see them full size!
With this file you will be able to print Retro 7 Segment Clock (Complete) with your 3D printer. Click on the button and save the file on your computer to work, edit or customize your design. You can also find more 3D designs for printers on Retro 7 Segment Clock (Complete).