Revisited Hellraiser Torment puzzle box
thingiverse
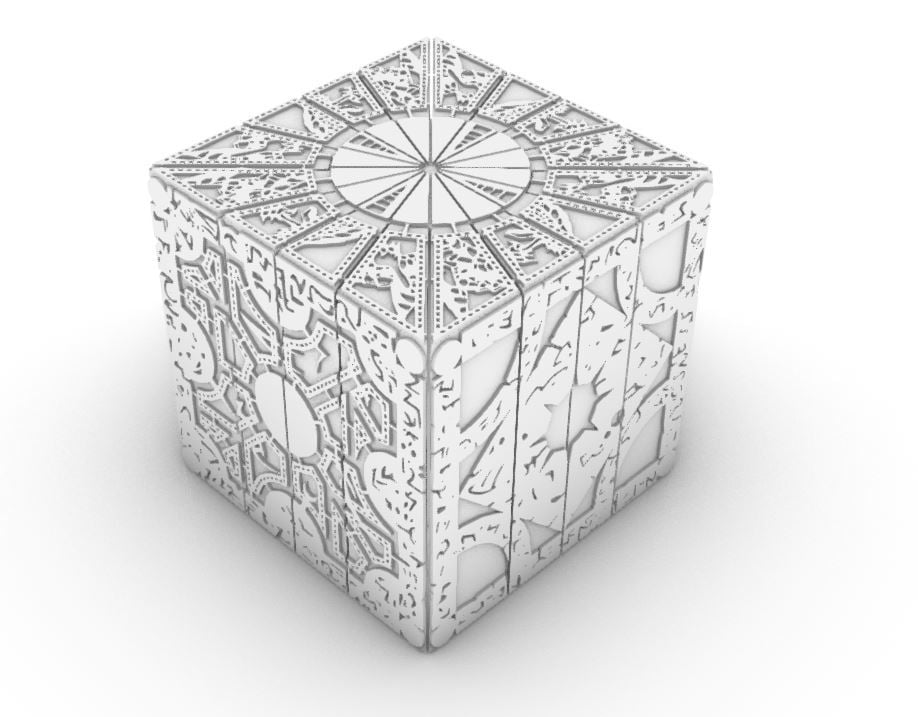
The box is composed of 2 main parts (First Half and Second Half), while the internal mechanism works thanks to a double pipe system with a terminal thread that allows the two main parts to connect and rotate. I separated the second half male thread (that has to be glued to the second half) so that you can print it at 0.1mm resolution. There also is a closing cap, that has to be glued on top of First half. The decorative external patterns are supposed to be printed with a 0.2mm nozzle, but you can print them with a 0.4mm as well. So, a little recap: -Print First and Second Half at 0.2mm resolution or more. -Print the threaded pipe and the male thread at 0.1mm resolution. -Print the other smooth pipe and the closing cap at 0.2mm resolution. -Print the decorative patterns (named by face) preferably with a 0.2mm nozzle. -Glue the male thread to the second half in the square cavity. -Insert the smooth pipe and the threaded pipe into Firts half ( has shown in the explicative image attached -Join the two halfs screwing the male and the female threads. -Glue the decorative patterns to the box faces. Enjoy Cenobites arrival ;-) *EDIT: I uploaded the complete Face A STL, as you made me notice that it lacked of some details.
With this file you will be able to print Revisited Hellraiser Torment puzzle box with your 3D printer. Click on the button and save the file on your computer to work, edit or customize your design. You can also find more 3D designs for printers on Revisited Hellraiser Torment puzzle box.