RGB Wave Lamp Yeah! Remix
prusaprinters
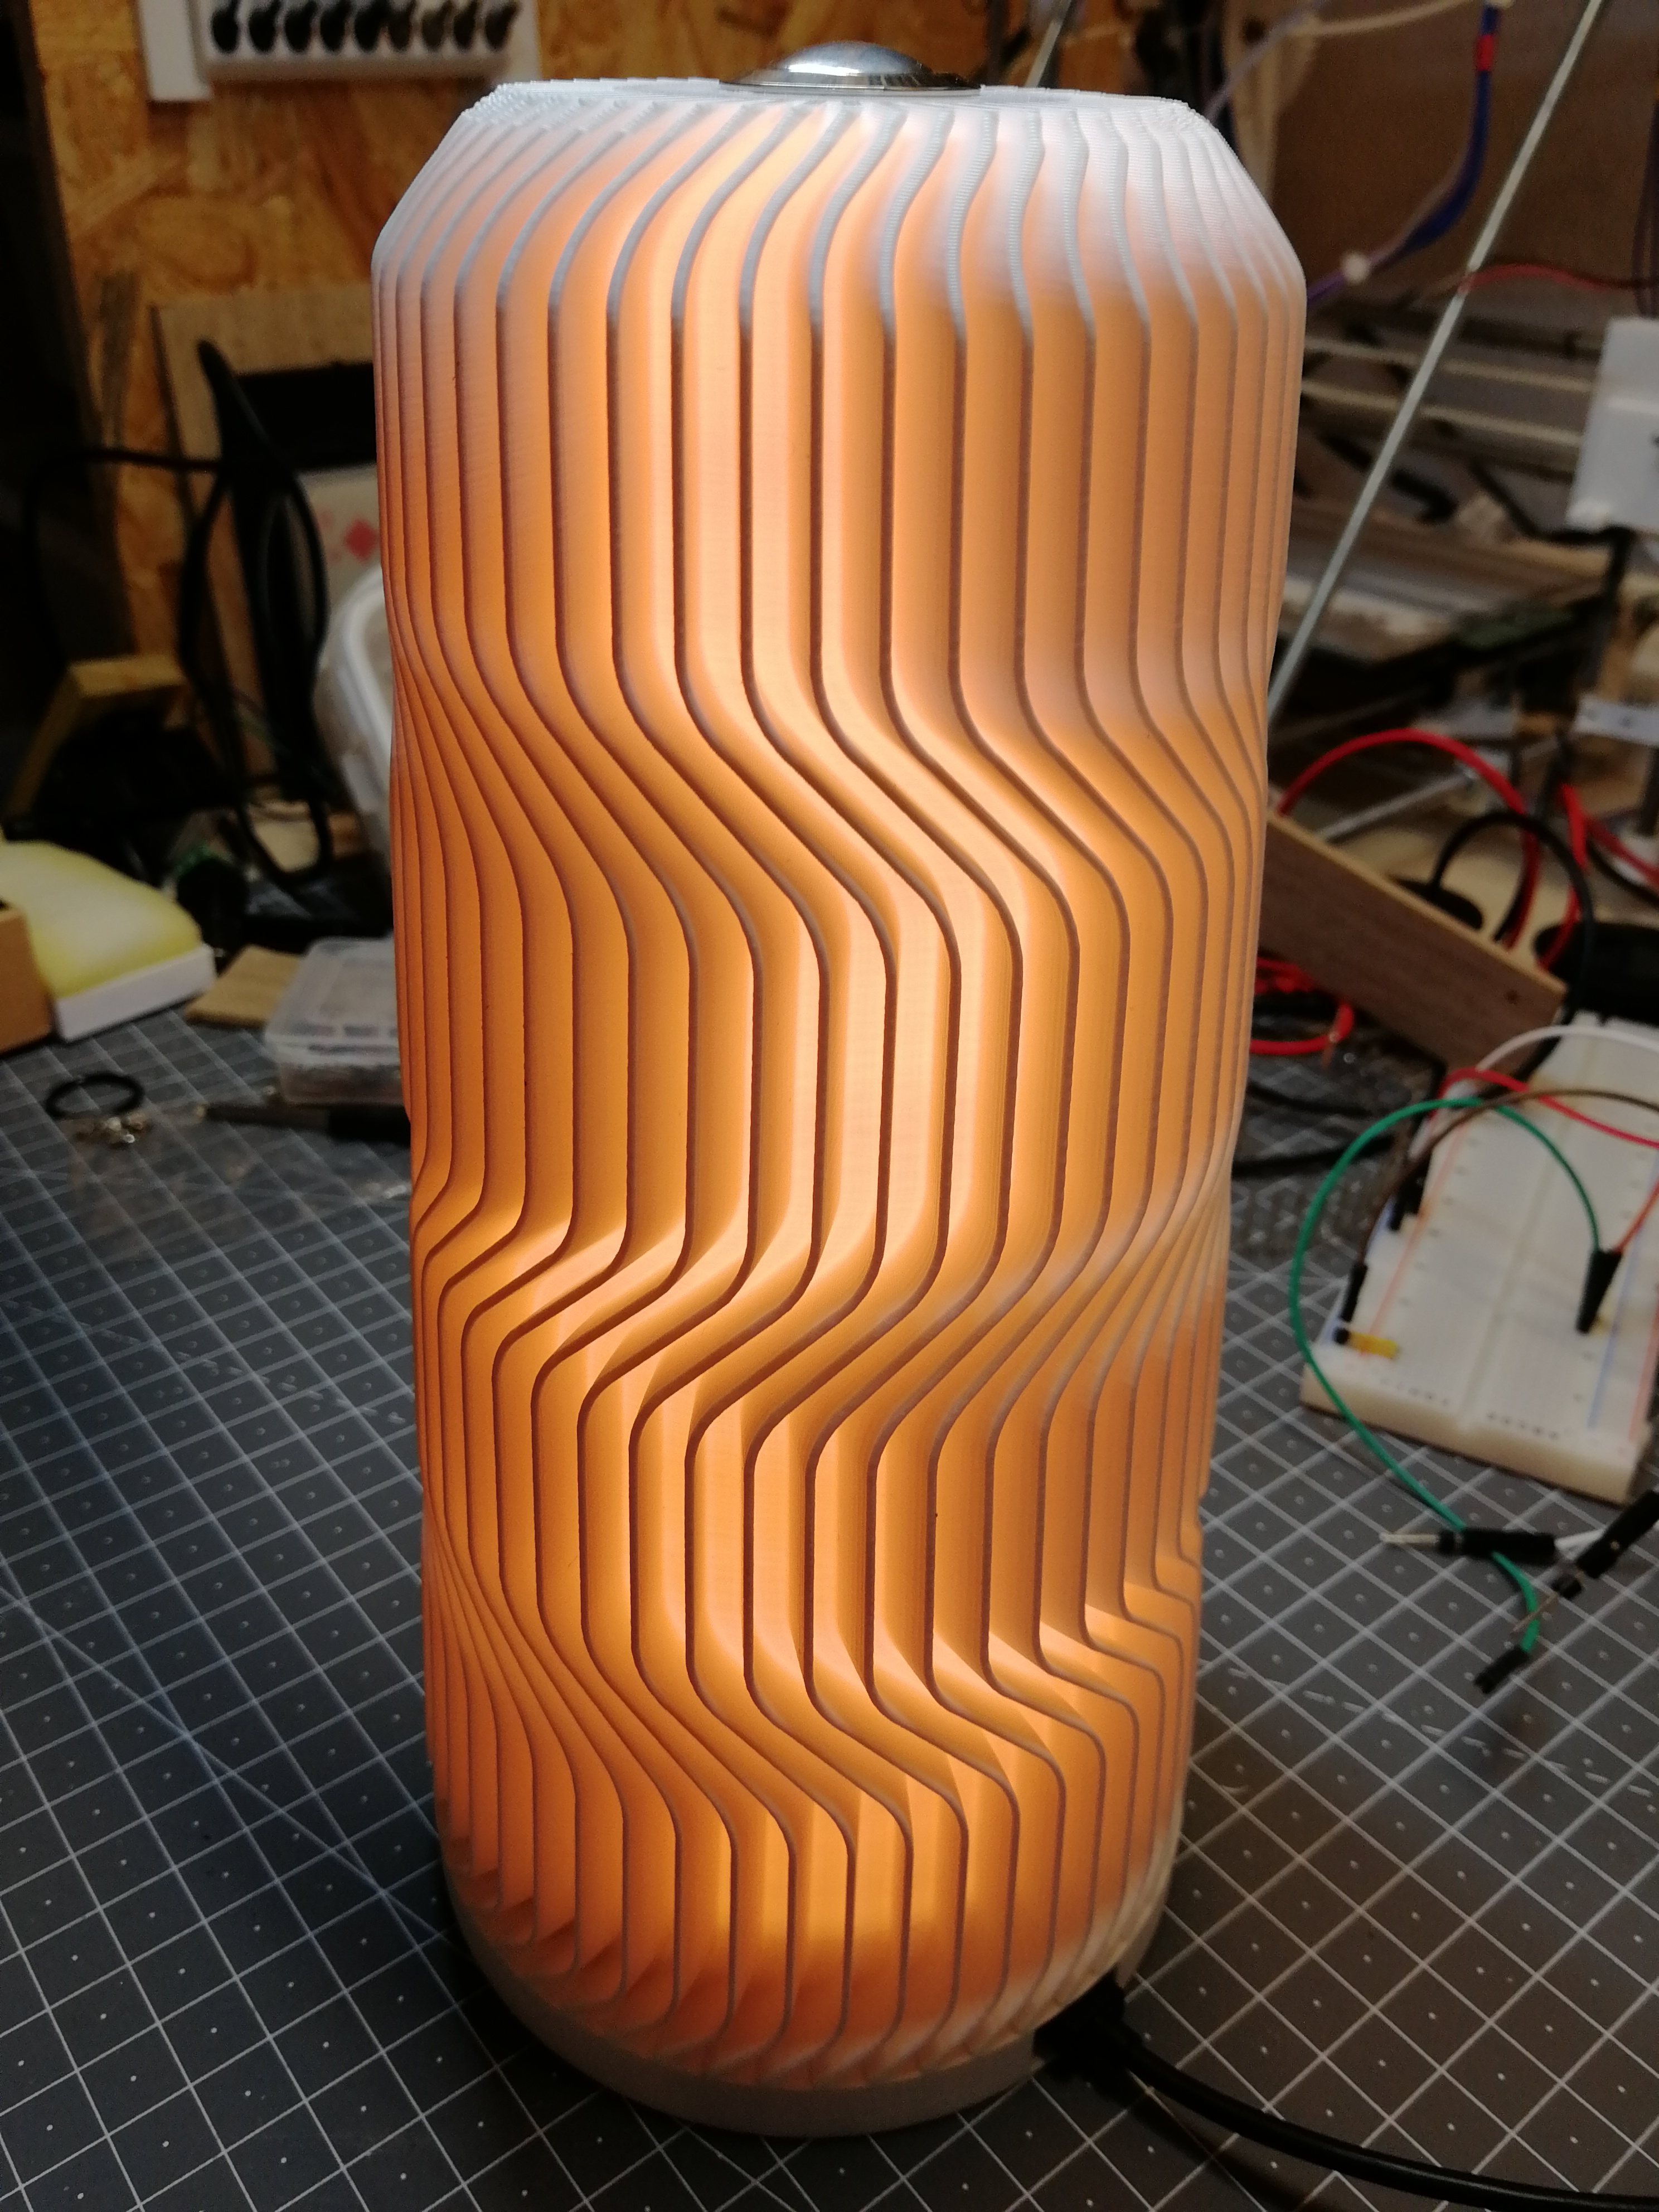
<p>This is a beautiful mood light based on a RGB LED strip and a ESP8266 as controller.</p> <p><a href="https://www.youtube.com/watch?v=rVWFDmi_Bek">https://www.youtube.com/watch?v=rVWFDmi\_Bek</a></p> <h3>Lamp Shade</h3> <p>The shade is a remix of <a href="https://www.thingiverse.com/thing:2109502">Wave Lamp Yeah!</a> by brico3d. It has been scaled to 140% and oriented upside down for printing. The shade is <strong>196mm high</strong> - be sure it fits your printer's build volume.</p> <p>Print it in white or even translucent PLA.</p> <p>The model has been adjusted in Meshmixer to be solid. You need to print this in <strong>Spiral Vase Mode</strong>! This will print the outside parameter only. I printed it in <strong>0.2mm resolution</strong>.</p> <p>I highly recommend to adjust the bottom layer thickness to <strong>8 bottom perimeters</strong>. The bottom layer will end up being the top where we want to install the button.</p> <p>File:</p> <ul> <li>shade_solid.stl</li> <li>shade_solidfixed.stl Try this file if the other doesn't work in your slicer</li> </ul> <h3>Button (optional)</h3> <p>The WLED software (see below) supports a single push button. I opted for a simple silver one with a 19mm base (<a href="http://s.click.aliexpress.com/e/2gLIf1O">AliExpress</a>). Since we can't create holes while printing in vase mode, the hole for the button needs to be drilled after printing.</p> <p>Start with a tiny drill and increase drill sizes bit by bit until you reach the wanted size. Drill slowly to avoid melting the PLA.</p> <p>The button is screwed in using a 22mm nut from inside the lamp shade. It's extremely difficult to reach into there (unless you have tiny hands). For that reason I included a simple tool for screwing the nut on. Print the two parts and stick them together (may need some slight sanding and force).</p> <p>Because the button cables tended to not slide into the LED holder but crumpled up at the top, I printed a small "stick" and used some shrink wrap to make the cables a bit more rigid at the top.</p> <p>Files:</p> <ul> <li>tool_handle.stl</li> <li>tool_head.stl</li> <li>stick.stl</li> </ul> <h3>LED Holder</h3> <p>This is a remix of the design by <a href="https://www.thingiverse.com/thing:3424808">thomasDOTwtf</a> which is a remix of <a href="https://www.thingiverse.com/thing:90465">jc_x_c </a>' design. I changed it so it does not need any supports.</p> <p>I printed it with <strong>0.32mm</strong> layer height. Since it will be hidden it does not need to be super detailed.</p> <p>With a 60LED/m WS2812B strip (<a href="http://s.click.aliexpress.com/e/c6sVPvIC">AliExpress</a>) you will be able to fit about 32 LEDs on the holder. A 2A USB charger should be able to power that just fine.</p> <p>Use superglue to give the ends of the strip some extra hold in addition to the tape on the back.</p> <p>The holder should fit well into the base. You can optionally screw it in for more hold but I didn't need that in the end.</p> <p>File:</p> <ul> <li>led_holder.stl</li> </ul> <h3>Base</h3> <p>The base is a complete redesign inspired by <a href="https://www.thingiverse.com/thing:3424808">Base and Strip Holder for Wave lamp Yeah!</a>. A NodeMCU (<a href="http://s.click.aliexpress.com/e/bKmO9eoY">AliExpress</a>) can be screwed into the bottom.</p> <p>The base features 4 cavities that can optionally be filled with 6mm steel balls to give the base some weight. Shake the base while filling. The holder is placed on top and will close the holes.</p> <p>Print it with <strong>0.2mm</strong> layer height and <strong>10% infill</strong>. No supports should be needed.</p> <p>File:</p> <ul> <li>base.stl</li> </ul> <h3>Software</h3> <p>Flash the excellent <a href="https://github.com/Aircoookie/WLED">WLED</a> on the NodeMCU.</p> <p>Connect the LED strip to Vin, Ground and GPIO2 (marked D4 on the NodeMCU). Connect the button to Ground and GPIO0 (marked D3).</p> <p>Set it up following the <a href="https://github.com/Aircoookie/WLED/wiki">guide</a>.</p> <h3>Sources</h3> <p>The sources for all files are available at Tinkercad:</p> <ul> <li><a href="https://www.tinkercad.com/things/jt3kU7BMBqe-shade-solid">Lamp Shade</a></li> <li><a href="https://www.tinkercad.com/things/6M9QOvexix6-led-holder">LED Holder</a></li> <li><a href="https://www.tinkercad.com/things/ggKheXlLhbG-base">Base</a></li> <li><a href="https://www.tinkercad.com/things/dh3RY6bJgve-tool">Assembly Tool</a></li> </ul> <h3>Print instructions</h3><p><strong>Printer Brand:</strong> Prusa<br/> <strong>Printer:</strong> <a href="http://amzn.to/2rqZ6Uo">i3 MK3</a><br/> <strong>Rafts:</strong> No<br/> <strong>Supports:</strong> No<br/> <strong>Resolution:</strong> 0.2mm<br/> <strong>Infill:</strong> 10%<br/> <strong>Filament:</strong> DasFilament PLA white</p> <p>Check above for detailed print instructions. Be sure to use Spiral Vase Mode for the lamp shade.</p>
With this file you will be able to print RGB Wave Lamp Yeah! Remix with your 3D printer. Click on the button and save the file on your computer to work, edit or customize your design. You can also find more 3D designs for printers on RGB Wave Lamp Yeah! Remix.