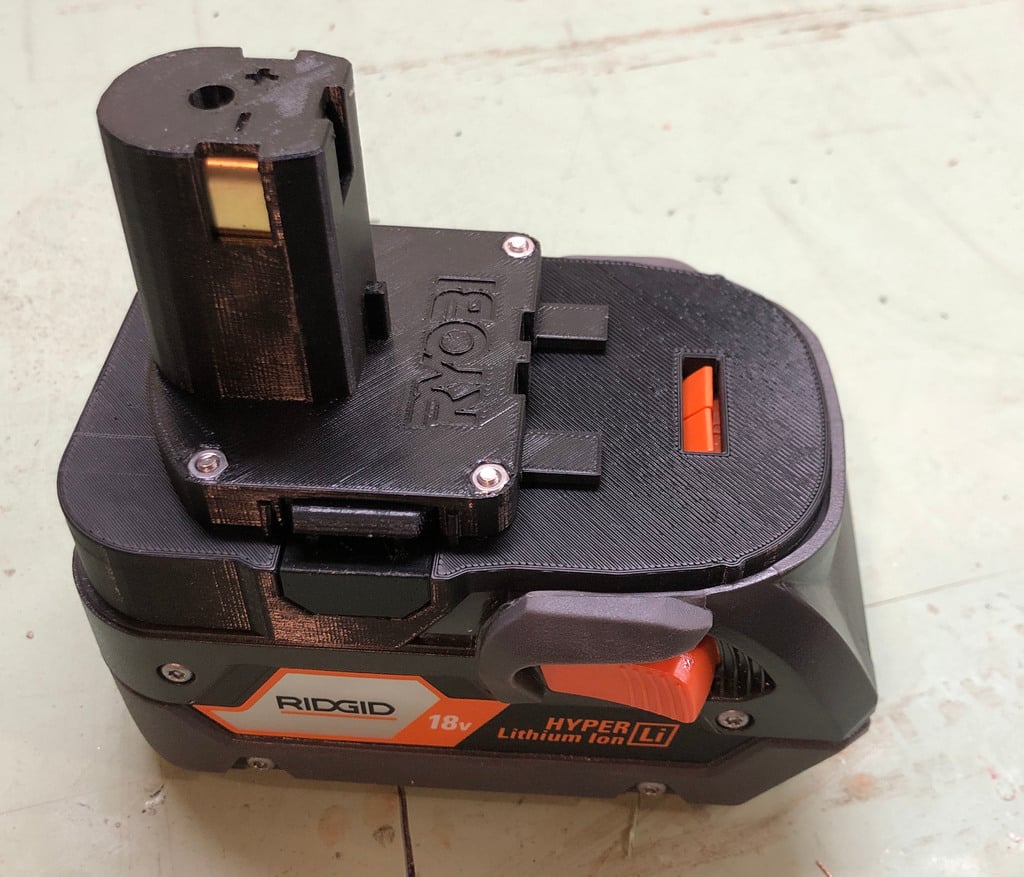
Ridgid Battery to Ryobi Tool Adapter
thingiverse
This is an improvement upon Simhopp's excellent Ridgid battery adapter: https://www.thingiverse.com/thing:1861937 You **cannot** charge a Ridged battery on a Ryobi charger with this adapter. The third wire necessary for charging is deliberately omitted, because I believe the charging between the two systems is incompatible. **Improvements** * The battery meter mounts were removed - this was redundant for Ridgid batteries that already have it built-in. * The Ridgid adapter / switch part that you previously had to purchase separately is no longer needed, it is modeled in. You use more of the same brass strip used for the Ryobi part to create the Ridgid battery contacts. * The clips for the Ryobi side have been improved to work smoothly. Previously, they needed to be sanded or cut down to work smoothly. * Hole sizes and nut traps were adjusted so standard m3 hardware "drops in", rather than having to force it, or cut/drill the printed part * A few areas were thickened to increase strength and rigidity **Hardware required** * 0.6mm thick 1/2" wide metal strip (see photo for what I used) * 5 mm diameter 25mm length spring (note: I used a 40mm spring I had laying around, and it worked fine) * m3 hardware: * 2x m3 16mm button-head screws w/ nuts (assembles Ridgid battery adapter) * 4x m3 12mm button-head screws w/ nuts (secures Ridgid half to Ryobi half) * 1x m3 8-15mm button-head screw (holds the Ryobi battery contacts sled into the Ryobi half) **Printing Instructions** 1. I printed everything with PLA, 4 perimeters, 15% infill. ABS would be more durable... use what you have. :) 2. A couple pieces need supports everywhere. Cleaning this up is a pain. Sorry! *Supports Everywhere* * Ryobi Adapter * Ridgid Adapter *Supports from build plate* * Ryobi Latch (both) *No Supports* * Ridgid Battery Adapter * Ridgid Battery Adapter Lid * Ryobi Contact Holder (make sure to orient this properly on the build plate) **Assembly Instructions** 1. Create the Ridgid battery contacts from your brass strip. See the photo of the step-by-step for the shape to bend, here are instructions how: * Cut a 41 mm strip of your 0.025" x 1/2" brass strip, then cut it in half lengthwise to get two 41 mm strips that are about 1/4", or 6-7mm wide, each. This does not need to be perfect, cutting it by hand with tin snips is fine. Gently straighten them out, the tin snips probably left them slightly curved. * Bend that piece exactly in half at a 90-degree angle (this is the only bend that I would measure - the rest don't need to be as precise) * About 5mm up from the center bend, bend each side in at about a 90 degree angle, until they touch at the tips * Bend 2-3mm of the tips back * Squish the whole thing with pliers so it gets longer and narrower, until it fits into one of the slots of the battery adapter * At this point, test-fit snapping the adapter into your battery with both contacts in-place, and adjust it until it plugs in reliably and snugly, but without having to force it. * Once it fits, mark where each wire should be soldered to the contacts, pull them back out, and solder each wire in place. 2. Once both Ridgid contacts are bent and soldered, fit them in to the battery adapter part, *(this is the hardest part of this entire build!)* pull the wires through the small lid part, then through the Ridgid part, and use 2x 12mm or longer m3 screws and nuts to secure the three plastic parts together. (The screws can be longer, they just protrude into empty space inside the Ryobi part once it's assembled.) Test the fit in a Ridged battery. I had to remove my contacts and slightly adjust them a few times to get them to contact securely, but plug in and eject smoothly. 3. Fit 2x pieces of your brass strip into the top of Ryobi piece, bend them around and down, and trim them about 3mm or 1/8" below the end of the plastic. Then remove them, trim the wires to length so there's not a lot of extra wire to cram inside the Ryobi side, and solder the wires to them that come from the Ridgid battery part. Double-check your polarity! 4. Put the Ryobi contact sled inside the Ryobi adapter part, and screw it in with one m3 screw, 8 - 15 mm in length (I used a 12mm) 5. File down the bridging strings in the large Ridged part where the push-buttons fit in. These ridges make the buttons get stuck - with them filed down, it works smoothly. (You can test-fit the spring and buttons and hold everything together and test to see what I mean.) 6. Add the spring and push buttons to the Ridged part, then screw everything together with the remaining 4x 12mm m3 screws and nuts. If the nuts don't fit in the Ridged part, carefully use your soldering iron to melt them in. 7. I found slotting a small screw driver between the contacts where the Ridgid battery terminals fit several times smoothed out the action considerably.
With this file you will be able to print Ridgid Battery to Ryobi Tool Adapter with your 3D printer. Click on the button and save the file on your computer to work, edit or customize your design. You can also find more 3D designs for printers on Ridgid Battery to Ryobi Tool Adapter.