Rigidbot 2 part cooling fan duct Rev2
thingiverse
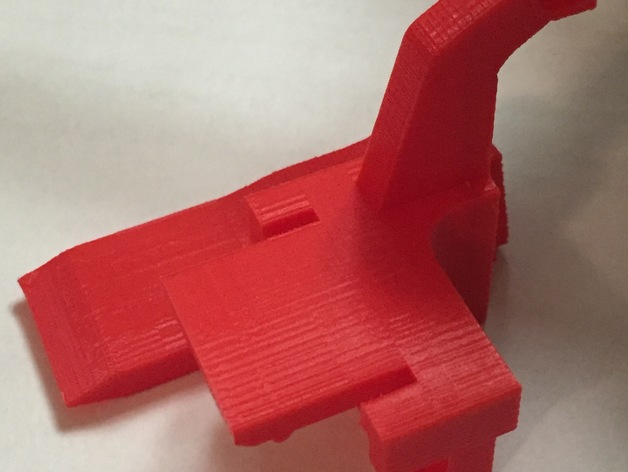
This Rev2 version has a beefier fan mounting arm designed to prevent it from snapping off like the original.\nThis high-efficiency fan duct upgrade is specifically made for the stock part cooling fan on a Rigidbot 2 printer, and attaches using all stock parts so no modifications or extra parts are required to install it on a Rigidbot 2 printer. For best results, carefully read the print settings beforehand.\nThe clip on the fan securely snaps onto the front bearing mount with ease but is easy to remove if needed. Pictures show the orientation and sequence to attach the fan duct and install the stock fan. (Same steps as the original so some of the same pictures are used)\nThe fan duct design directs a concentrated high flow moderate pressure stream of cool air across the tip of the nozzle parallel to the top surface of the part, quickly removing heat from the area. This results in a much more uniform cooling pattern and surface finish even on thin and small parts, greatly reducing warping and curling. Bridging capabilities are enhanced and features on the far side of the nozzle are stabilized. Watching the printer effortlessly create bridge spans of at least 15 mm with no visible sag and horizontal overhangs of up to 5 mm that are flat by the third layer is a truly awesome sight. I use this piece as a test piece. https://www.thingiverse.com/thing:1088310 \nThe air stream passes below the heater block so as not to cause temperature fluctuations across the head. The duct clears all parts of the printer and does not interfere with or touch the guide rods.\nSince this is a precision fit part, it's highly recommended to use calibrated filament. My filament calibration object of choice can be found here as it calibrates for the average diameter of the filament being used and its thermal expansion and cooling properties: https://www.thingiverse.com/thing:1037301\nTo avoid melting the end of the installed duct, it's recommended that the heater be pushed in nearly flush with the front of the heater block.\nThe STL file is Cura scaled and oriented for printing.\nPrint Settings\nPrinter:\n Rigidbot 2\n \n Rafts: \n No\n \n Supports: \n Yes\n \n Resolution: \n 0.1 mm\n \n Infill: \n 24%\n \n Notes: \n Instructions below are for using PLA. Modify as needed for your material of choice.\nThis part will need supports with an overhang angle between 60 and 45 degrees and fairly dense in the range of 25 - 30%. I also recommend a brim of 7 - 10 lines to anchor it to the bed more securely, especially for the fan bolt mount which is the only place the part itself touches the bed.\nFirst layer is printed at 0.2mm and the rest are at 0.1mm. Use a 0.8 shell and 0.8 top and bottom thickness at these resolutions. Start with the bed at 60 C and turn it down to 45 on layer 4 (0.5mm high). The stock cooling fan comes on full at layer 5 and provides adequate cooling for the first print of this part. I used my first test prototype to cool my second and final print. You may want to print a second fan using the first one produced using the stock cooling duct.\nAs mentioned above, use calibrated filament for best fit results.\nPost-Printing\nPost print clean up\n Remove the support material from the back of the duct and any strings inside the duct. You should not have any support material inside the duct itself.
With this file you will be able to print Rigidbot 2 part cooling fan duct Rev2 with your 3D printer. Click on the button and save the file on your computer to work, edit or customize your design. You can also find more 3D designs for printers on Rigidbot 2 part cooling fan duct Rev2.