Rigidbot SE-450-24 BackPack Mount
thingiverse
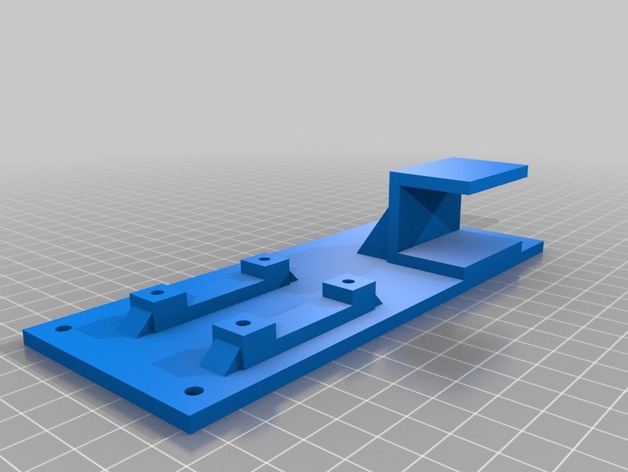
This is a mount to hold your MeanWell SE-450-24 power supply on your RigidBot. When facing the front of the printer, the power supply should be on the back left of the printer. Pictures will be posted once I print and install one, but by all means download and test it out! I recommend printing at 100% infill with support. Instructions How To Build What You Will Need 1x MeanWell SE-450-24 power supply 1x BackPack Mount 2x BackPack Mount Bar Clamp 4x M4x10mm screws 4x M4x8mm screws Instructions Take your MeanWell power supply and place it on its top (back/bottom side up) with the terminal blocks on your left. Take the BackPack mount and orient it so that the two areas that will later house the bar clamps are on the left, and the 4 corner holes line up with those on the power supply. Bolt the BackPack mount into place with the four M4x10mm screws. These screws need to be evenly torqued to provide extra stability. To do this, start by making the screws finger tight. Then going from any given corner to the one diagonally across from it, tighten the screws a quarter turn until they are all torqued equally. Please note that the screws will not bottom out, so if you over-tighten the screws you will risk damaging sensitive electronics inside the power supply, and possible electrocution. Before you place the mount on the RigidBot, you will need to thread the holes for the bar clamp. Use one of the M4x8mm screws to carefully do this for each hole, going until the screw head hits the plastic. This will allow each screw to be tightened as far as possible without damaging the mount. Now you are ready to mount the power supply on the RigidBot. Start by placing the area where the clamps will be on the back-left upright support on the RigidBot. Proceed to slide the whole contraption down until the lower hooks slide over the back horizontal support. Now, while keeping one hand on the power supply to stop it from falling over, take a clamp and an M4X8mm screw and screw the clamp into the top slot. Put in the next screw and torque them down as much as you are comfortable with. Repeat step 6 for the clamp in the bottom slot and... Voila!You have finished mounting your power supply!
With this file you will be able to print Rigidbot SE-450-24 BackPack Mount with your 3D printer. Click on the button and save the file on your computer to work, edit or customize your design. You can also find more 3D designs for printers on Rigidbot SE-450-24 BackPack Mount.