RigidBot Side Mounted Case for RUMBA, Einsy RAMBo, Einsy Retro and Mini RAMBo
thingiverse
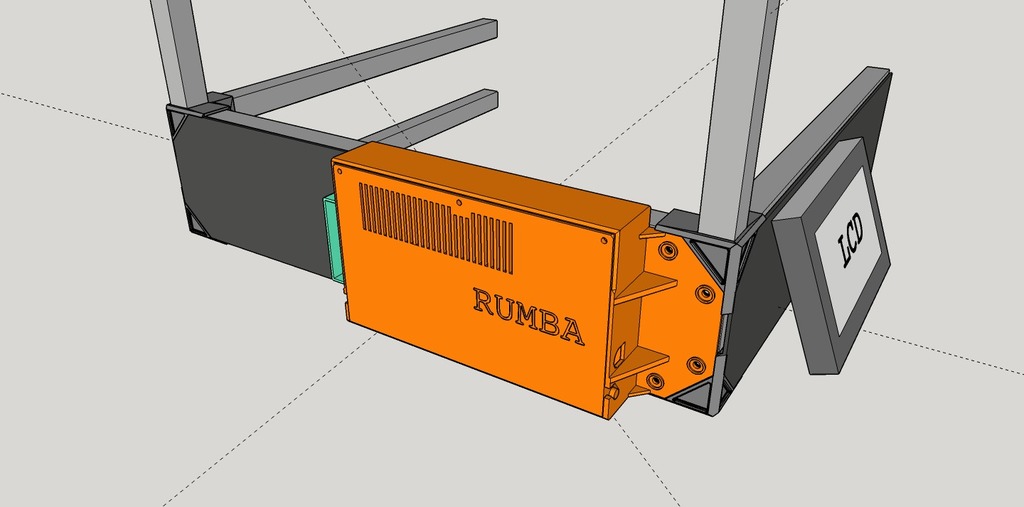
UPDATES 06-24-2018 1) Regular Housing v1.3 - (34mm depth), Moved fan opening & mounting holes, added fan wiring routing hole, USB access hole larger. 2) Deep Housing v1.4 - 39mm depth, cover sets in 2mm (actual depth is 41mm) 3) AirDuct v1.5, More adjustments to make sure it will work for a RB-Regular (Original KickStarter) More shallow top section for clearance of Z-motor bracket and 8mm rod holder, can use a 4015 fan also, just put nuts inside the housing and screw heads on the back of the fan (inside air-duct area). 4) Plate-Cover v1.5 - Moved post-supports a little farther away. Added small supports to the cover pins, so model can be printed without the slicer adding supports. 5) Added Einsy-RAMBo / Mini-RAMBo / Retro-RAMBo Plate-Cover, will work with any RAMBo that has 95mm x 61mm mounting hole spacing, I recommend using the deeper housing 39mm for the RAMBo's. This will eventually be a Universal case for the original Rigidbot's, all that's required is to CAD new Covers / Plates to mount a given controller, the rest stays the same, except for possibly the USB / Reset holes (but this is a WIP, so you get what I have for now, all suggestions are welcome, thanks). After several different set-ups I decided to make a side mounted case for my RUMBA controller. I wanted to have easy access, without any goofy angles or tight access. 1) Easily mounts on the front side of the Rigidbot lower frame, I CAD'd for left side, but should be able to mirror the parts to use on the right side. Use 4 existing M4 screws + 2x new M4 tapped holes on the horizontal frame members. 2) I used thin M3 square nuts to mount the controller and the housing securing screw(s). Get the thin 1.8mm thick type, same used by Prusa. 3) Includes an air duct for a 4010 fan (40mm x 10mm), this will pull air from the room and not from under the heated bed, which could be hotter to begin with. I used a 12V fan on the FAN1 connector, my Start Gcode turns this on before any print. 4) Fan and Duct can be mounted with M3 screws and nylon lock nuts, I put my screws through the housing and the nuts on the back of the fan & duct, washers are a good idea as well to spread out the force against the plastic parts. 5) (WIP) Will add a filter holder / cover for the duct at a later date. 6) Original RB or RB-Big side plastic cover-plate can be trimmed to cover remaining lower side opening and tuck behind the Housing's two rear screws. 7) Housing: I tapped two additional M4 holes in my frame for the housing section, 7.5" from existing front holes, just mount the housing and mark the new hole locations on blue tape. 8) XT60 DC Power Connectors: I'm a fan of being able to easily disconnect the DC power inputs, so I'm using XT60 high current connectors, see image. FYI for the "Curious" I use two DC feeds from my Power supply, Controller and Heated Bed, both separately fused at the power supply (proper method) and using different wire gauges. I used 2x M4 x 35mm hex head bolts, frame makes it hard to use Phillips or cap screws.
With this file you will be able to print RigidBot Side Mounted Case for RUMBA, Einsy RAMBo, Einsy Retro and Mini RAMBo with your 3D printer. Click on the button and save the file on your computer to work, edit or customize your design. You can also find more 3D designs for printers on RigidBot Side Mounted Case for RUMBA, Einsy RAMBo, Einsy Retro and Mini RAMBo.