RJ45 X-Cable Repair for Replicator 2/2X
thingiverse
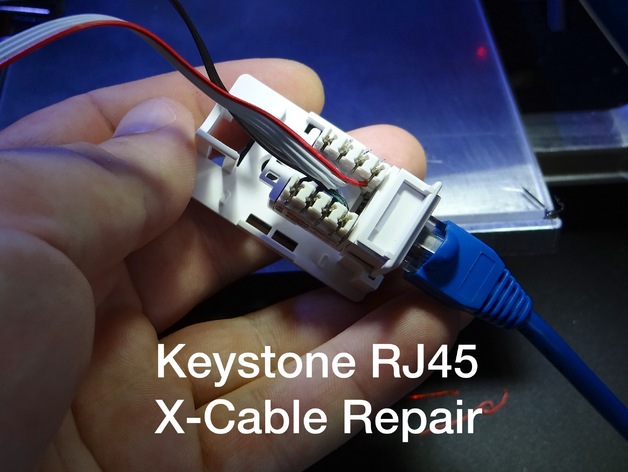
This repairs a common mode failure of the Replicator 2/2X. The X-axis cables on these printers regularly fail due to repeated bending caused by the forward and backward motion of the gantry. So instead of just replacing the stepper motor cable assembly and end stop cable assembly every time this happens, this repair replaces the length of cable that bends with a 0.5m RJ45 Cat-5 ethernet cable. This way if the replacement ethernet cable fails you just unclip it and insert another one - easy peasy - see instructions. Do a search for keystone rj45 on eBay to find these terminals. So far I have done 400 hours of printing with this repair - without incident =) The Alu-Carridge and Alu-X-Ends that you can see in the photos installed on my Repicator 2 are by Carl Raffle, and the Aluminium Z arms and HBP are by Bottleworks. Instructions So first you need to purchase two Keystone Jack RJ45 terminals, along with a cheap krone tool. Before you do anything, remove the right side panel and fish out the x-cable assembly from above the right gantry. You will need to remove a few zip ties and slip the ribbon cables out from the cable retainers all the way down the right front pillar. Now the stepper ribbon cable should have a red pin alignment marker running down one side. However, the end-stop ribbon is completely black. So you need to get a paint marker and mark one side of it so you can align the pins later after you cut it. Next you need to find where your X-cable is broken - assuming it has failed. Either way, I would trim it 5-10mm back from where it sticks out the back of the gantry - which is where the failure point is most likely to be. Trim the other end at the top of the front right pillar. You should end up removing a section about 150-200mm long. Disconnect the terminals from the X end-stop and stepper motor. Now strip each end of the ribbon cables back 10mm and tin the ends with solder. Then use the krone tool to push them one by one into the RJ45 terminals. Be patient, they may take a few attempts to work their way down to the bottom. But each one should be firmly attached and flush with the bottom of the block. Make sure the two blocks are facing each other, and insert the leads in order so they mirror each other (using the pin alignment stripes). If you want to make sure - insert the Cat-5 cable and use a continuity tester on your volt meter to check that the pins all match up. Once pushed down, trim the excess tinned wires sticking out the sides of the terminal blocks, then press on the covers. Push in the end-stop and stepper motor terminals and attach that end's RJ45 block to the front of the gantry using zip ties (see photo). On the other RJ45 terminal, I installed an enclosure. I then used velcro tape to attached it to the inside of the right front pillar about half way up, replacing the ribbon cable inside the cable retainers. Finally, clip the 0.5m Cat-5 ethernet cable and fire up your printer.
With this file you will be able to print RJ45 X-Cable Repair for Replicator 2/2X with your 3D printer. Click on the button and save the file on your computer to work, edit or customize your design. You can also find more 3D designs for printers on RJ45 X-Cable Repair for Replicator 2/2X.