Roadrunner electrical probes
prusaprinters
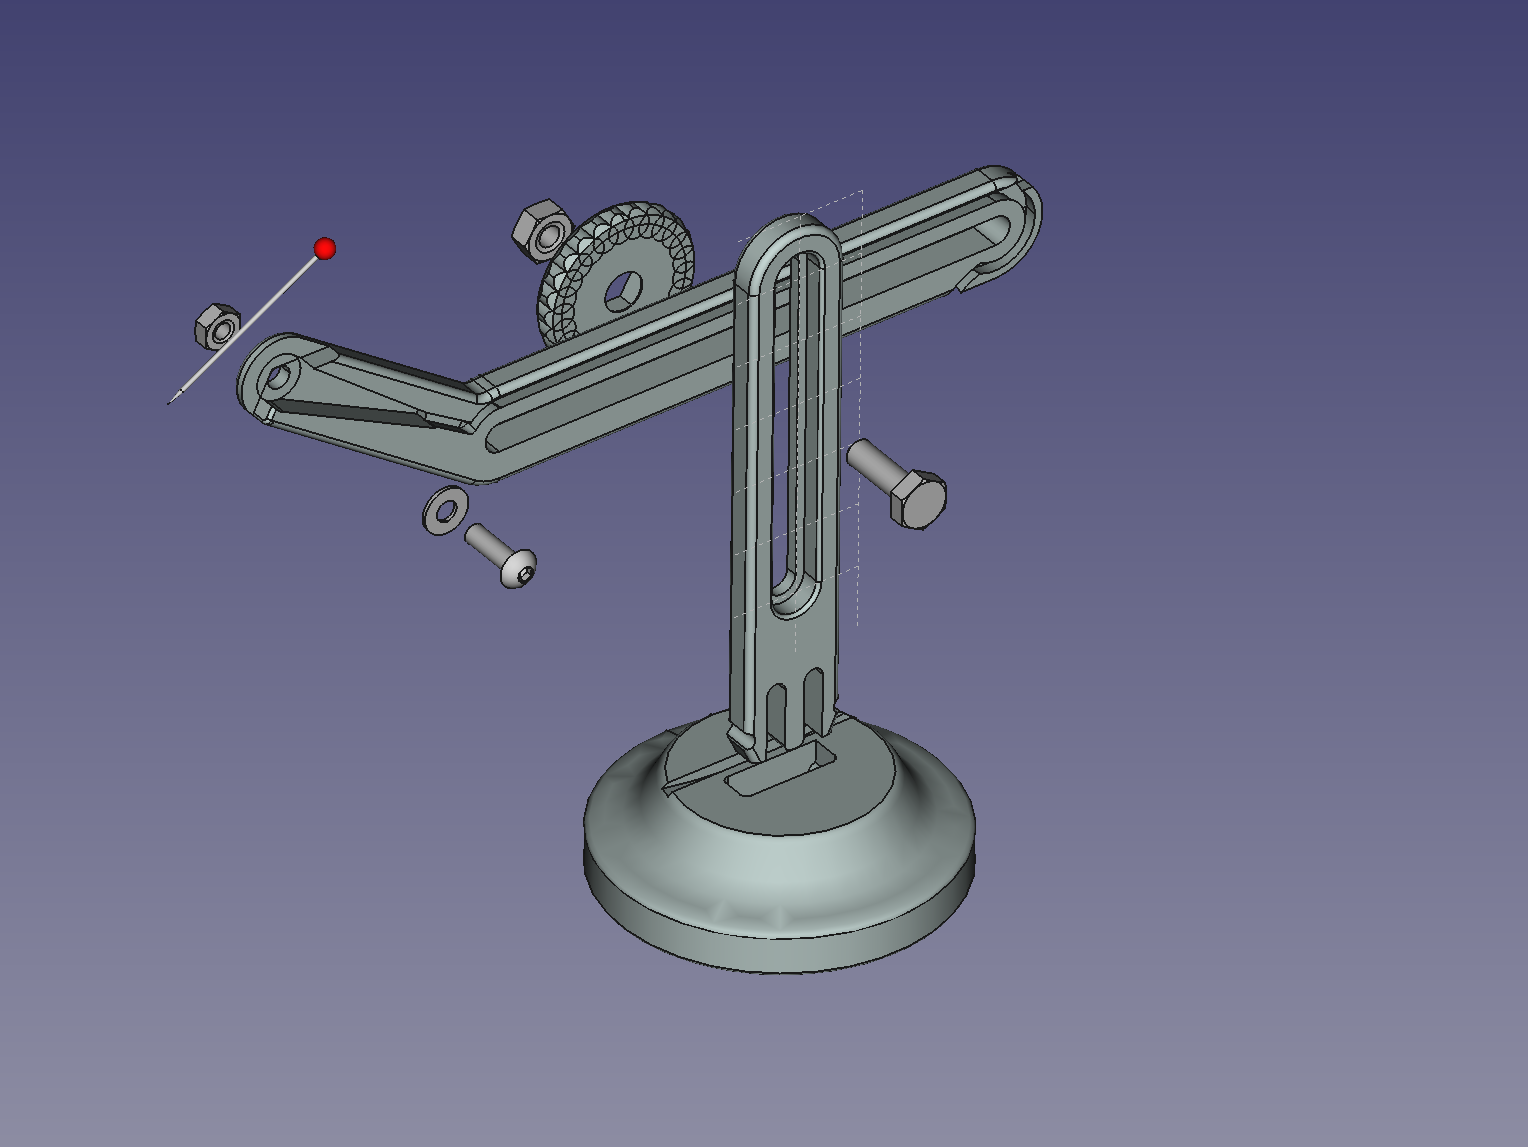
<p>This is better than putting an oscilloscope probe in your helping hands.</p> <h3>Print instructions</h3><h3>Roadrunner Probe Revision A</h3> <p>Released 2020-10-04</p> <p>Copyright (c) 2020 Josh Myer <a href="mailto:josh@joshisanerd.com">josh@joshisanerd.com</a><br/> Released under a Creative Commons CC-BY-SA license</p> <h3>What is this?</h3> <p>These are some basic electronic probe stands. They can be used to<br/> hold a small pogopin or needle onto a pad on a PCB, with a built-in<br/> channel to get a wire out the back. They are designed to accept a<br/> simple Dupont-style male at the head end of the wire, and I use them<br/> with male ends on the other side.</p> <p>This project is heavily inspired by Giuseppe Finizia's excellent PCB<br/> Workstation designs. If you work on a PCB which can be clamped in<br/> place and will be under examination/work for extended periods of time,<br/> his design is almost certainly superior to this one. There are<br/> several of them, my favorite is probably<br/> <a href="https://www.thingiverse.com/thing:3615910">https://www.thingiverse.com/thing:3615910</a>, but check out the rest of<br/> his thingiverse for some alternative designs.</p> <p>But, if you, like me, want to have a little arm of these guys that you<br/> can pull out for quick probes here and there during a reverse<br/> engineering session, these might work for you.</p> <h3>Supplies needed</h3> <p>You will need the following to finish this:</p> <p>To hold the body to the upright:</p> <ul> <li>M4 bolt (hex-head, which is important, 10mm or longer)</li> <li>M4 nut</li> </ul> <p>To hold the probe and wire to the head:</p> <ul> <li>A needle/pogopin/lightweight probe</li> <li>A wire (I use 30cm/1' dupont male-male cables)</li> <li>M3 screw (5mm or so, button head strongly preferred)</li> <li>M3 washer</li> <li>M3 nut</li> </ul> <p>To counterbalance the base:</p> <ul> <li>9 US Nickels (there are 3 counterweight slots in the base: 20mm<br/> diameter, 6mm deep)</li> <li>Tape to hold the counterweights in</li> </ul> <h3>Assembly</h3> <h3>Nut handle</h3> <p>To assemble the nut handle, push an M4 nut into the slot on the nut<br/> handle. It will go in a little bit, but you will need to exert<br/> significant force to actually cram it in there. I use a little C<br/> clamp for this job, but an arbor press would be ideal.</p> <h3>Base assembly</h3> <p>On the base, there is a slot on one side. This is the probe slot,<br/> which gives your sharp probes a safe place to live when not in use.</p> <p>On the upright arm, note that one side is flat: this is the side the<br/> probe arm will mount to.</p> <p>Clip the upright arm into the base, with the flat side facing the<br/> probe slot.</p> <p>Ideally, place 3 stacks of 3 nickels into the cylindrical recesses on<br/> the bottom of the unit, then use adhesive tape to hold the coins in.</p> <h3>Arm assembly</h3> <p>To assemble the arm, we will thread the wire, then attach it down.<br/> Starting from the head of the unit, place your wire such that it will<br/> make good contact with the M3 washer. Then, without leaving slack,<br/> insert the wire into the channel down the side of the arm.</p> <p>Once the wire is in place, use the M3 screw and washer to hold the<br/> wire down, with the M3 nut on the back. You can put a washer between<br/> the nut and the arm as well, if that makes you happy.</p> <p>We will attach the probe in the final step. Attaching it now leads to<br/> lots of poking.</p> <h3>Arm attachment</h3> <p>Once the wire is run down the arm, you can attach it to the upright by<br/> using the M4 bolt through the upright arm, threading that through the<br/> slot of the probe arm, and then using the M4 nut handle to screw it<br/> down. Note that the nut handle has a thin plastic layer between the<br/> nut and one side. This takes the place of a washer, so assemble it<br/> with that side facing the probe arm. If you've installed it the right<br/> way around, the whole nut will be visible after it's screwed down.</p> <h3>Probe attachment</h3> <p>Finally, loosen the M3 screw at the head end just enough to slip your<br/> needle/probe/pogopin up underneath, then gently cinch it back down.<br/> In particular, if you're using pogo pins, be careful not to crush<br/> their delicate tubes. This is part of why I use sewing pins for my<br/> probes.</p> <h3>Complete</h3> <p>And that's it, you now have a probe.</p>
With this file you will be able to print Roadrunner electrical probes with your 3D printer. Click on the button and save the file on your computer to work, edit or customize your design. You can also find more 3D designs for printers on Roadrunner electrical probes.