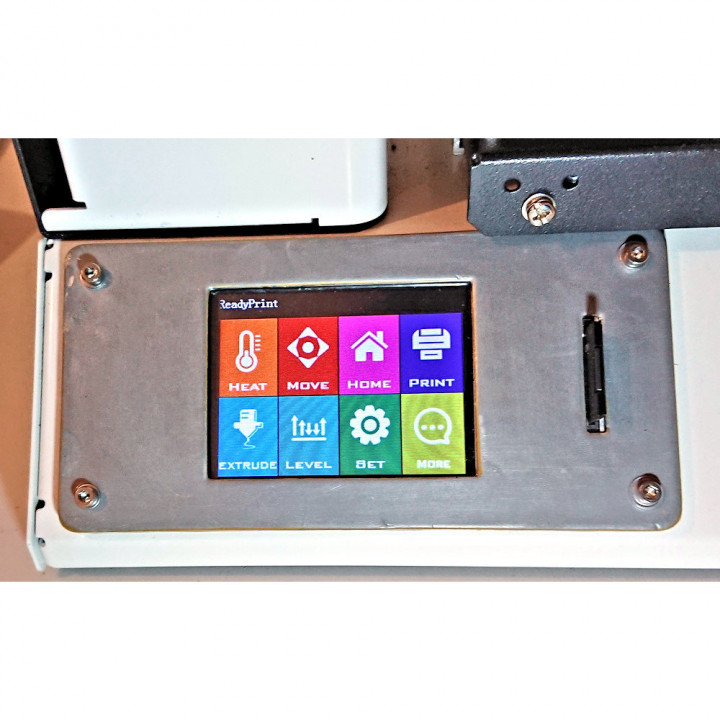
Robin MKS display fascia for MPSM v2 3D printer with SD card socket
myminifactory
Recently I replaced the controller board on my Monoprice Select Mini (MPSM) v2 3D printer after it damaged some motor controllers and the heater MOSFET chip. Online research led me to find the replacement board listed on the supplier's website, but it was out of stock with a hefty price tag plus an additional shipping fee from the Far East to the UK. I decided against waiting for restock and opted instead to save money by replacing it with a Makerbase Robin MKS board featuring their LCD touchscreen. Wiring in the new board was relatively effortless: most cables simply plugged right in, except for a few that needed cutting and stripping to fit into screw terminals. However, the display's size differed from the original one, prompting me to design a fascia to hold the new LCD display. This also provided an opportunity to add a full-size SD card socket, rectifying a design flaw of the stock MPSM v2 where the SD card slot is positioned at the bottom of the side panel and can be tricky to access. The design of the LCD display necessitates bolting the fascia (with M3 bolts) to the 3D printer's front casing and then screwing the display onto it from inside the casing. While this process proved a bit fiddly, I managed it easily with a short screwdriver. The positions of the screw upstands made it relatively simple to use washers to secure the display in place. For the SD card socket, I acquired a short SD extension cable featuring a sort-of-SD-card connector on one end and an SD card socket on the other. To hold the socket in the fascia, I designed a small bracket that can be glued into place for the socket to be screwed onto. One minor issue with this project is that the fascia is too large to be printed on an MPSM v2, so I included a version cut in half with overlaps, allowing the two pieces to be carefully glued together. This was my approach, and as the photos demonstrate, it turned out quite well after some filling at the joints and spray painting. Of course, you may encounter variations in your display or SD socket compared to mine, or perhaps you'd like to create a custom version of the fascia; in either case, the OpenSCAD file is also included here for your convenience.
With this file you will be able to print Robin MKS display fascia for MPSM v2 3D printer with SD card socket with your 3D printer. Click on the button and save the file on your computer to work, edit or customize your design. You can also find more 3D designs for printers on Robin MKS display fascia for MPSM v2 3D printer with SD card socket.
