Robo 3D E3D Titan Modular Mount
prusaprinters
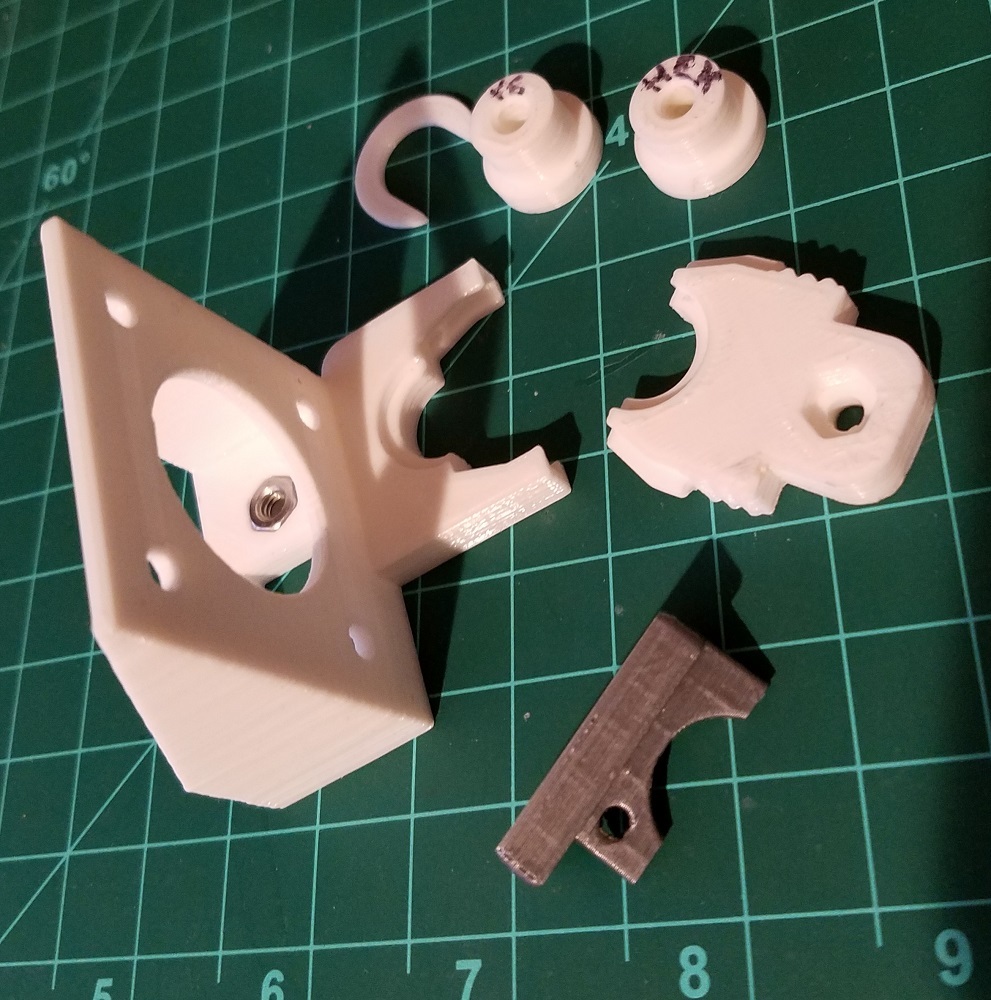
<p>E3D released a great new extruder called the Titan this month. Read more about it here ... <a href="http://e3d-online.com/blog/titan">http://e3d-online.com/blog/titan</a>. It is designed to use with their V6 hotend. It is small, compact 60g extruder with 3:1 gearing. I bought mine from PrintedSolid.com (<a href="https://printedsolid.com/products/e3d-titan-extruder">https://printedsolid.com/products/e3d-titan-extruder</a>).</p> <p>I have been working on a bracket for my Robo3d since they didn't release brackets for all printers yet. I've included the STEP files if you want to modify.</p> <p><strong> This is a work in progress as I haven't finished testing everything, but wanted to publish it for others to use or play with. There are other versions coming for the Robo including a whole new carriage plate from some of the folks in the forum.</strong></p> <p>Design goals:<br/> 1) Be able to use as many stock pieces as possible.<br/> 2) Be able to use either the stock Hex hotend or the V6.<br/> 3) Use stock Nema 17 extruder motor, a small pancake motor, or anything in between.<br/> 4) Choices of what motor orientation on the x carriage to mount it.<br/> 5) It needs to be light and simple to print. No support. Low profile without loosing any build volume.<br/> 6) Keep things solid and secure.</p> <p>What to print?<br/> The two pieces needed to print for sure is the main mount and the slider. If you are using the hex hot end, you just need to print the hex spacer. If you want the V6 then there is a V6 top spacer (1mm bigger) and the bottom spacer. You can see the pics of it assembled. No wobble on either hotend once assembled. If you have your x axis endstop switch on you x carriage you may want to print the alternate mount.</p> <p>Assembly:<br/> ** If you are wanting the Titan to face the front, the only option is to get the 20mm pancake motor. Anything bigger will interfere with the belt. The stock motor will work fine mounted with the Titan facing the back.</p> <p>1) Set the M4 nut (thin) into the back of the main mount bracket<br/> 2) Attach the motor to the main mount bracket and the Titan with the M3 x 8mm domed head socket cap screw.<br/> 3) Finish the rest of the Titan assembly per the E3D documentation up to adding the hotend<br/> 4) Instead of installing the hotend in the designed slots of the Titan, I used a spacer so the hotend can be in a more stock location and I could use either hotend. If using the V6, I installed the bottom spacer into the middle grove.<br/> 5) Slide the PTFE tube into the hotend, slide on the appropriate top spacer, and finally the black filament guide (cut 16mm of the tube above the spacer per instructions).<br/> 6) Insert the hotend up from the bottom of the X carriage hole.<br/> 7) Slide the main mount bracket with the motor and titan onto the carriage and over the hotend. If mounting the Titan to face the front, I found sliding from the left side and then turning clockwise once attached to the hotend works the best.<br/> 8) Slide the mount slider into the main mount.<br/> 9) Finish assembling the Titan.<br/> 10) Add your cooling fan and part fans as you would. Make sure to finish bolting the bracket plate to the x carriage in the process of mounting the fans.<br/> 11) Install the endstop bracket and switch if needed.</p> <p>I'm still working on a wire chain mount to add to the carriage to tidy it all up.</p> <p>Extra things needed:<br/> 1) M4 nut (non locking). Mine was only 3mm high.<br/> 2) M4-12mm pan head bolt if using stock part fan mount. This is for under the motor. You should be able to use the locking M4 nut and M4 pan head bolt for the front of the mount. I got a 14mm length one for my setup.<br/> 3) Optionally a smaller stepper motor. I used https://www.amazon.com/dp/B00PNEQ79Q/ref=cm\_sw\_su\_dp so the motor was in back. This doesn't have a plug on the motor for the wires. It is hard wired and the wires need extending. If you get he 25mm deep Nema 17 from STEPPERONLINE store does come with a plug and you can just plug in the stock wiring.</p> <h3> Print Settings</h3> <p><strong>Printer Brand:</strong></p> <p>Robo 3D</p> <p><strong>Printer:</strong></p> <p>R1 ABS + PLA Model</p> <p><strong>Rafts:</strong></p> <p>No</p> <p><strong>Supports:</strong></p> <p>No</p> <p><strong>Resolution:</strong></p> <p>.2 mm (200 micron)</p> <p><strong>Infill:</strong></p> <p>20%</p> <p><strong>Notes:</strong></p> <p>I recommend using high temp resistant filament for this because of heat off of the stepper motor. I have had reports of warping with just using PLA.</p> <h3> Post-Printing</h3> <p>You might need to take a 4mm drill bit to all of the bolt holes and even the top hotend spacer to make sure the PTFE tube slides through. Depends on your slicer and inner dimensional accuracy.</p> Category: 3D Printer Extruders
With this file you will be able to print Robo 3D E3D Titan Modular Mount with your 3D printer. Click on the button and save the file on your computer to work, edit or customize your design. You can also find more 3D designs for printers on Robo 3D E3D Titan Modular Mount.