Robo 3D Extruder Assembly Clip
thingiverse
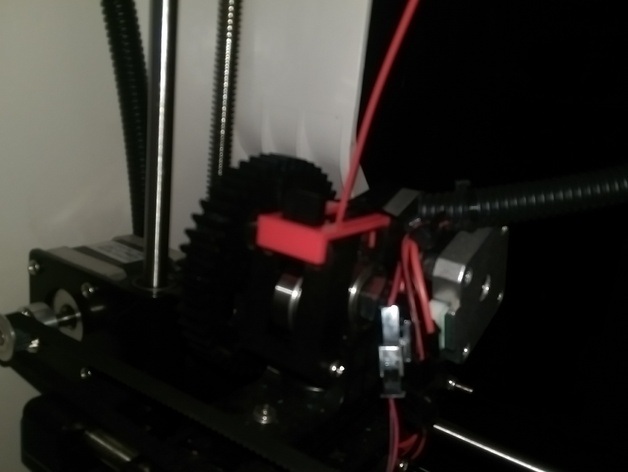
I created an Extruder Assembly Clip that replaces the screws, easy to install, easy to change filament out, and it doesn't require any serious modification to your printer. Simply take the screws off and remove the nuts and put this in its place. I did this on a Robo 3D R1+. You may need to change the distance between the two prongs on the clip depending on your printer. If you want to remix this and make it so you have more control over how tight the assembly gets you can add a screw to the back plate in the center and that should allow you to make it as tight or loose as you want. The best way is remove the nuts is to totally unscrew the screw. Then take the screw and push it into the nut and up while you take the tweezers (that Robo 3D sent with the printer) from the front of the printer. Put one of the prongs into the front of the nut to hook it and then remove the screw and pull the nut out. It should forced to hook onto the prong of the tweezers. Also if anyone can explain to me why Robo 3D went with this design that would be nice. The two screws are the crappiest design ever! Update: 2/18/2017 - This doesn't really work all that well. I ended up going back to the screws. It will work for the first few times and then after that it won't work very well because the material will flex and it won't be able to keep the two pieces together very well. Needs to be remixed. Print Settings Printer Brand: Robo 3D Printer: R1 ABS + PLA Model Rafts: No Supports: No
With this file you will be able to print Robo 3D Extruder Assembly Clip with your 3D printer. Click on the button and save the file on your computer to work, edit or customize your design. You can also find more 3D designs for printers on Robo 3D Extruder Assembly Clip.