Robo 3D Z Axis Stabilizer
thingiverse
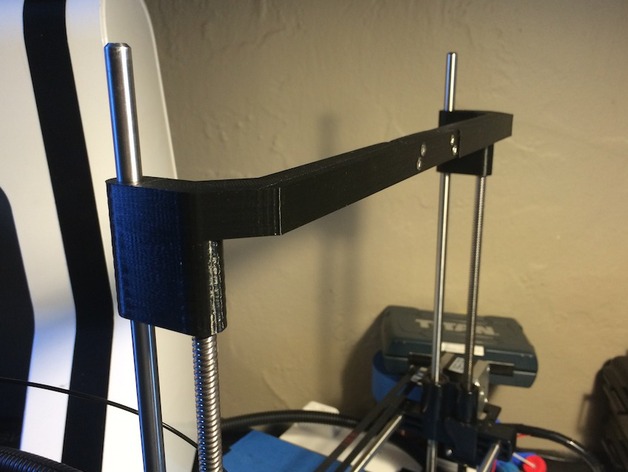
I'm a complete newbie when it comes to 3D printing, but somehow I managed to get this setup working on my Robo 3D R1 Plus without any major issues. I scoured the web for solutions, but this approach seemed like the most straightforward one to me. Keep in mind that you're looking at around 25-30mm of lost build height due to this brace. When drilling holes for the guide rod and lead screw, a 5/16 drill bit might be necessary to achieve the desired fit. I found it best to snug up my guide rod, but not so much with the lead screw. To help things along, I also applied some lube to the lead screw hole. For assembling the left and right sides, I used four M3x10mm stainless socket head cap screws and four M3 non-locking nuts.
With this file you will be able to print Robo 3D Z Axis Stabilizer with your 3D printer. Click on the button and save the file on your computer to work, edit or customize your design. You can also find more 3D designs for printers on Robo 3D Z Axis Stabilizer.