Robo R2 Print Head Plastics
thingiverse
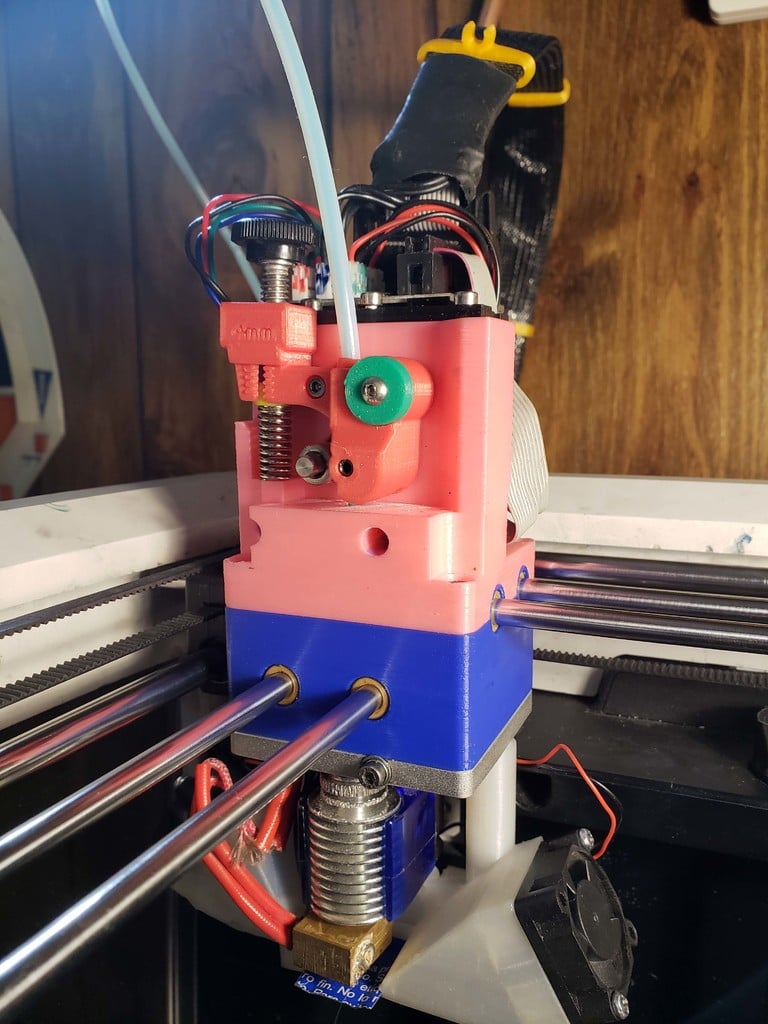
The purpose of these plastics is to improve the print output. To reduce ghosting the top plastic is beefed up to reduce flexing during extrusion starts/stops and changes in direction. The arm has a large plastic bearing which allows the stepper to be secured in the upper right, making the mounting stiffer. The arm has variable spring pressure, I found that soft PLA wants less pressure to prevent heat creep and improve finish. The bushings on either side of the bottom plastic provide a very long bearing that reduces play in the assembly significantly. I have used a pancake stepper to reduce weight and allow the print heat to run at faster speeds, but you can use the existing stepper. I found that blue loctite is best on the stepper mounting screws as they may not be socked down without damaging the stepper. Any screw not socked down will come loose without the loctite. This has overlap with other releases. The individual parts should work with the existing Robo plastic, but are designed to work together. To install the bronze bushings lightly coat a 6mm rod with oil and run it through a bushing so that the epoxy will not stick to the inside of the bushing. Coat the bushing with quick set epoxy and press into the plastic. Do this for both sides of the plastic. Take the 6mm rod which has a coating of oil and slide through the bushings and move it around until it slides freely. Wipe away excess epoxy and do again. Do this for all four pairs and reassemble being careful to use the alignment tools you can download from Robo. I have done four of these and one of them was stiff. The Robo alignment is more critical on this setup because there is no play when finished. If it winds up too tight you can heat the 6mm rods in the center of the carriage ( it does not take much heat) and then move the print head over the heated rods. The PLA will soften and the bushings will perfectly center. Make sure you aligned the carriage first because if you did not that is probably why you are stiff. The bronze bushing should now be oiled. I run a 5 hour print that fills the bed with no filament loaded. This will take out all of the roughness in the bushings and it will move freely. I strongly recommend that if you have not already switched to ground and hardened rods that you do so. It make a big difference in assembly/disassembly. Parts: Any 1" or longer 1/4-40 bolt will work in the arm, I just liked the look of this thumb screw. M3-.5 x 25 socket head screw for mounting arm to stepper x 1 pieces M3-.5 x10 socket head screw for mounting stepper x 2 pieces M3-.5 x 8 flat head socket screw for mounting stepper x 1 piece M3-.5 x (10-20) socket head screws for mounting PCB's to bottom x 2 pieces M3-.5 x (10-20) socket head screws for mounting PCB's plate to top x 3 pieces m4-.7 x 20 socket head or set screw for mounting bearing to arm. m2.5 x 10 for the arm, I have no idea what it does but it is in the original 4mm x12 mm x 4mm sealed bearing for arm to press against filament. Pitsco Education 40227 Tetrix Prime 6 mm Id x 8 mm od Bronze Bushing (Pack of 12) https://www.amazon.com/gp/product/B01N9SBEHT/ref=ppx_yo_dt_b_asin_title_o01_s00?ie=UTF8&psc=1
With this file you will be able to print Robo R2 Print Head Plastics with your 3D printer. Click on the button and save the file on your computer to work, edit or customize your design. You can also find more 3D designs for printers on Robo R2 Print Head Plastics.