Robo3D Enclosure
thingiverse
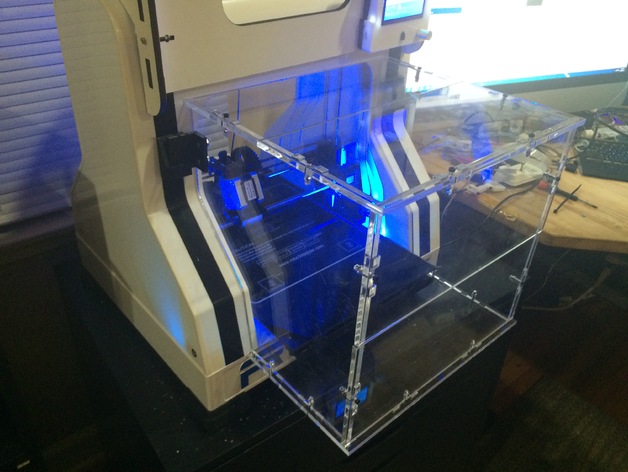
This is a derivative of Mike Kelly's enclosure, available at http://forums.robo3dprinter.com/index.php?threads/mike-kellys-robo3d-enclosure.2712/\nIt was streamlined to work with either .236" or .25" thick material and can be built using just M3 nuts and bolts (20mm or 18mm). This makes it very sturdy, allowing for easy repair if damage occurs.\nThe design was unified so that every part is identical on each side of the enclosure.\nThe slot hinges are still used from the original design; get them here: http://forums.robo3dprinter.com/index.php?threads/mike-kellys-robo3d-enclosure.2712/\nDon't pay attention to the line on top and front of the picture; I was short on extra acrylic for a whole piece.\nThe source files have it as one single part.\n\nInstructions:\nHead over to http://forums.robo3dprinter.com/index.php?threads/mike-kellys-robo3d-enclosure.2712/ and get the 3D printed hinges.\nSecure the hinges to your liking, using eight M4 Pan heads at 14mm each.\nFor assembling the frame, you'll need fourteen M3 - 20mm nuts and bolts.
With this file you will be able to print Robo3D Enclosure with your 3D printer. Click on the button and save the file on your computer to work, edit or customize your design. You can also find more 3D designs for printers on Robo3D Enclosure.