Robot Tank V2
thingiverse
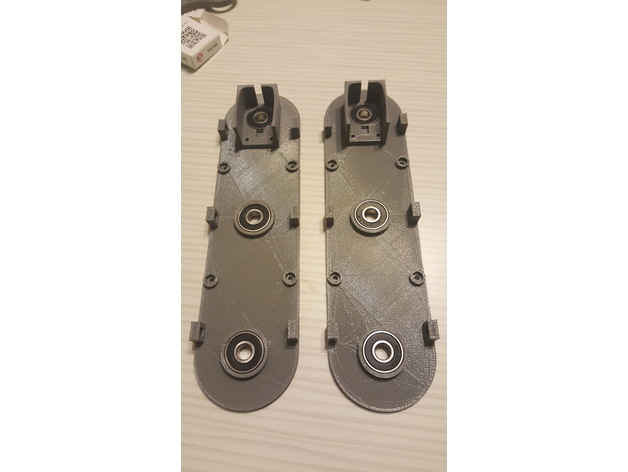
Redisign of the Arduino Robot Tank by velli. Only problem i had with his robot was the plastic grinding against plastic. At high speeds i could get warm and lock up. I made a version that user 608 bearings to make it buttery smooth. Some info on each part: robot_bottom_rpi_motor.stl - Bottom part of the robot with raspberry pi 2 mounting and mounting for motor driver. robot_top_solid.stl - Solid robot top with no mounts for anything. waveshare_camera_mount.stl - Only fits waveshare rpi camera robot_top_batter_and_charger.stl - Works with this chargerhttp://www.ebay.com/itm/ESKY000152-Charger-for-2-3-Cell-Li-Po-Battery-0-8A-For-Esky-Helicopter-/172200531355?hash=item2817f3959b:g:uiEAAOSw3mpXMXfb And made to fit this batteryhttps://hobbyking.com/en_us/turnigy-2200mah-3s-20c-lipo-pack.html wheel_608_bearing.stl - Wheel has a place to embed a 608 bearing. It was made wider then the original robot from velli so it needs wider track links. wider_track_link.stl - New track links for new wheels Wheel_cover_608_bearing.stl - Cover for the outside of the robot. it plugs into the bearings on the wheels. motor_mount_608_bearing.stl - Mount for the motor and has a place to embed 608 bearings. Motor_cover.stl - Original part from velli robot_bottom_rpi_arduino_motor.stl - Same as robot_bottom_rpi_motor.stl just has 2 more arduino nano vertical mounts. Print Settings Printer Brand: Printrbot Printer: Printrbot Simple Metal Rafts: No Supports: No Notes: Only wheel_608_bearing.stl part needs to be printed with supports touching buildplate. Best to print wheel_608_bearing.stl at a 0.1 layer hight and 70-100% infill. All other parts do what you want.
With this file you will be able to print Robot Tank V2 with your 3D printer. Click on the button and save the file on your computer to work, edit or customize your design. You can also find more 3D designs for printers on Robot Tank V2.