robotic arm (arduino)
thingiverse
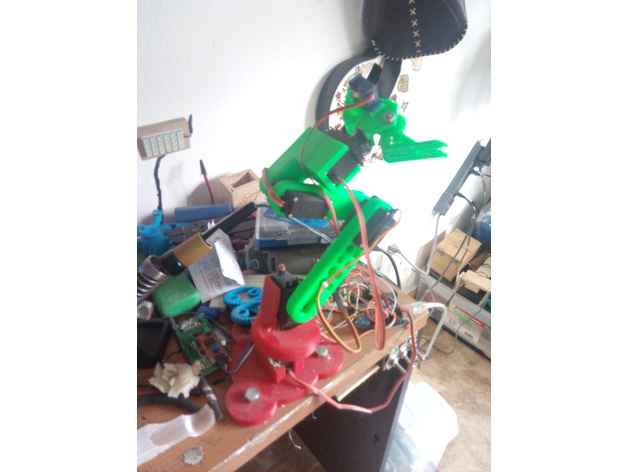
I created my own robotic arm, using an Arduino Uno to power five powerful servomotors weighing 10 kilograms each and a compact mini servo. You can easily print the design and if you're interested, I'd be happy to share my code with you. To bring this project to life, make sure to print all the necessary pieces separately. I'm pleased to report that it works flawlessly, making it an excellent choice for school projects or robotics enthusiasts. For optimal results, print each component with a density of 30% to achieve a lightweight design. Here are the printer settings I used: Printer Brand: Prusa Printer Model: Prusa Steel Rafts: No Supports: No Resolution: 2 Infill: 30% Now, let's take a closer look at the project details. **Overview and Background** This robotic arm is designed to be a hands-on learning experience for students and robotics enthusiasts alike. By building this project, you'll gain valuable skills in programming and mechanical engineering. **Lesson Plan and Activity** In this lesson, we'll guide you through the process of designing and printing your own robotic arm using an Arduino Uno and servomotors. You'll learn how to program the Arduino board and assemble the components to create a functional robotic arm. **Materials Needed** To get started with this project, make sure to gather the following materials: * 5 x Servomotor 10 kg * 1 x Mini servo * 1 x Arduino Uno * Screws
With this file you will be able to print robotic arm (arduino) with your 3D printer. Click on the button and save the file on your computer to work, edit or customize your design. You can also find more 3D designs for printers on robotic arm (arduino).