Rocketeer Jetpack
thingiverse
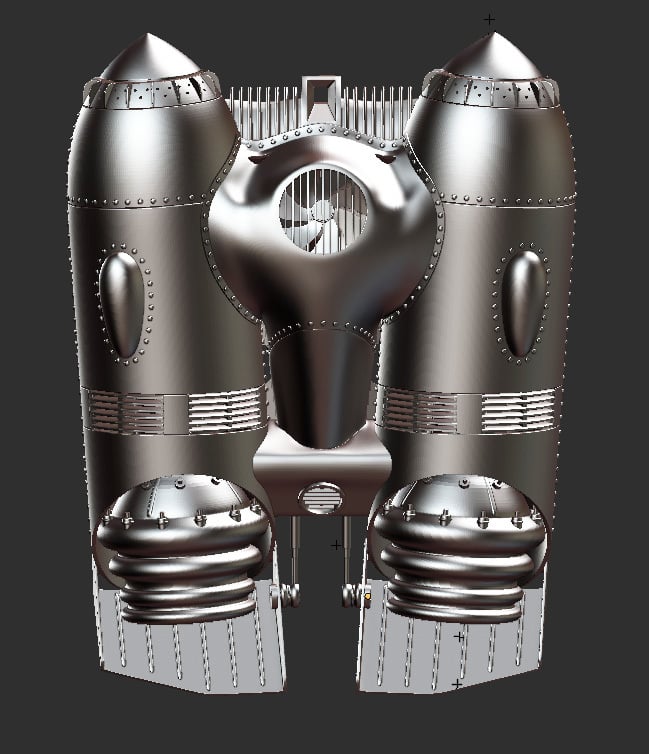
Wearable artist fan art of the jetpack from the Rocketeer. Should fit an average size adult. Back plate may not be necessary depending on how you want to wear it. Back pack frame and/or straps are not included. Hoses and some hardware not included. This is shared as is. I am providing the full components unsliced and sliced for the CR-10s only. Hope you like it. I would love to see pics of finished builds. Do not sell copies of these files. I will keep this listed as a work in progress until someone has completely printed and built one. I will try to put together a comprehensive list of exact hardware needed to put this together in the near future. In the meantime, you will need braided hoses, some 3mm and 4mm bolts of varying sizes, and corresponding nuts and washers. Fair warning, the "ports" for the braided hoses were modeled by eye and weren't designed to fit any specific hose fitting. Some adjustment may be needed. Left side of rocket and it's parts not included. Just mirror the right side parts in your slicer or other 3D modelling/editing program. UPDATE: The Main Rocket Housing and the Outer Vent show up as having non-manifold edges in Blender but at quick glance seem to slice ok in S3D so I have uploaded them for now. UPDATE 12/19/18: Split Rocket Housing into 3 parts. All 3 parts slice fine in S3D. UPDATE 12/29/18: Split Center Cowling into top and bottom along curved panel line in the middel. Slices fine in S3D. I might still split this up even further into top front, top back, bottom front, bottom back. What do you all think? UPDATE 2/15/19: Split Thruster into 3 parts for easier printing without supports. I also made the upper flange a little less wide so it was easier to get into the rocket tube housing. I also,also made a the hole in the center of the flange much larger as requested for those of you who want to add lights and/or other effects inside. I've split the center cowling into 4 pieces for easier printing. All parts slice fine in S3D. I did not add peg holes to any of these newly split parts. They all have features which will help to align them fairly easily and I've found that there are plenty of adhesives that will hold the parts together without the need for pegs. I personally have been using Hobby Lobby's Extreme Power Medium CA glue with the spray accelerator. Great stuff for gluing PLA. I am in the middle of finally printing one of these out myself. Once it is complete, I will post pics and change this to no longer be a work in progress. So far, I've printed the nose cones, center circular vent, fan, and right flap. They've all printed great except the fan. It printed alright and is usable but had some artifacts/scarring. I printed it blades facing up and might try reprinting in a different orientation or with different settings. There have been a lot of downloads. I would love to see some of your finished packs! UPDATE 2/27/19: Modified the Nose Cone file so that it has a little more clearance to easily fit on top of the rocket. UPDATE 4/23/19: Ran inner and outer rocket vents through netfabb to repair non-manifold edges and uploaded the fixed files here. The tolerances on these vents are very tight so you may want to reduce the size to something like 95% in your slicer before printing or you may need to sand/file the edges after printing to fit into the rocket housing.
With this file you will be able to print Rocketeer Jetpack with your 3D printer. Click on the button and save the file on your computer to work, edit or customize your design. You can also find more 3D designs for printers on Rocketeer Jetpack.