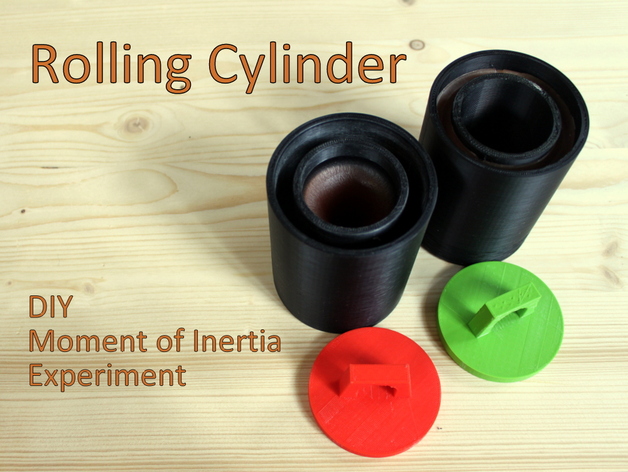
Rolling Cylinder - DIY Moment of Inertia Experiment
thingiverse
The problem is asking us to find the moment of inertia of a disk and then use that result to calculate the moment of inertia of a cylinder. To solve this, we first need to find the moment of inertia of the disk. We are given that the mass distribution of the disk is homogeneous, meaning that the density of the disk is constant throughout its volume. The area of one mass element in the disk can be calculated by integrating over the radius: \[ A(r) = \pi r^2 \] Since the mass distribution is homogeneous, the area density is equal to the mass per unit area: \[ \sigma = \frac{M}{A} = \frac{M}{\pi r^2} \] The mass element is then: \[ dM = \sigma A dr = \frac{M}{\pi r^2} \pi r^2 dr = M dr \] Now we can integrate over the radius to find the moment of inertia: \[ I = \int_0^{rd} (r^2 + rd^2) M dr \] Since the mass distribution is homogeneous, we can assume that the density is constant and equal to \( ρ \). Therefore, we have: \[ M = ρV = ρ\pi r^2h \] where \( h \) is the height of the disk. Substituting this into the integral, we get: \[ I = \int_0^{rd} (r^2 + rd^2) ρ\pi r^2h dr \] Evaluating the integral, we find that: \[ I = \frac{1}{4}ρπhr^4 \] Since the density is constant and equal to \( ρ \), we can rewrite this as: \[ I = \frac{1}{4}Mhr^2 \] This is the moment of inertia of the disk. Now, let's use this result to calculate the moment of inertia of a cylinder. We are given that the mass of the cylinder is \( mc \) and its radius is \( rc \). We can assume that the density of the cylinder is constant and equal to \( ρc \). The volume of the cylinder is: \[ V = πrc^2h \] Therefore, the mass of the cylinder is: \[ M = ρcV = ρcπrc^2h \] Using this result, we can calculate the moment of inertia of the cylinder by integrating over the radius.
With this file you will be able to print Rolling Cylinder - DIY Moment of Inertia Experiment with your 3D printer. Click on the button and save the file on your computer to work, edit or customize your design. You can also find more 3D designs for printers on Rolling Cylinder - DIY Moment of Inertia Experiment.